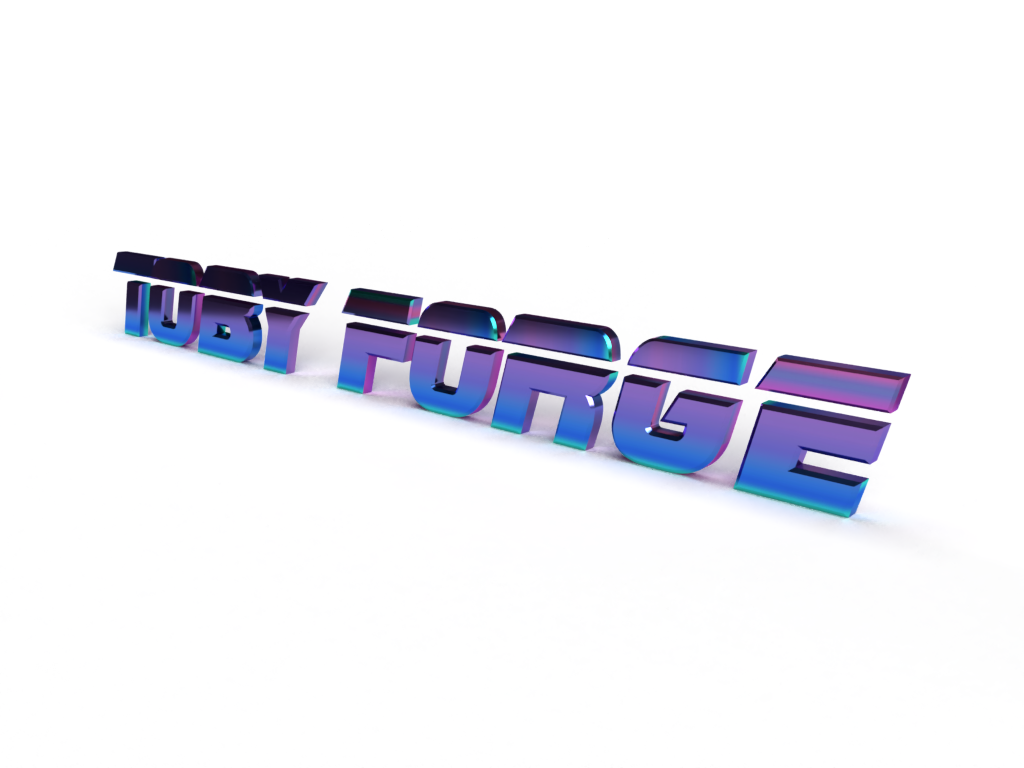
The start of my exploration into the realm of 3D modelling and finding the ideas and concepts I want to proceed with
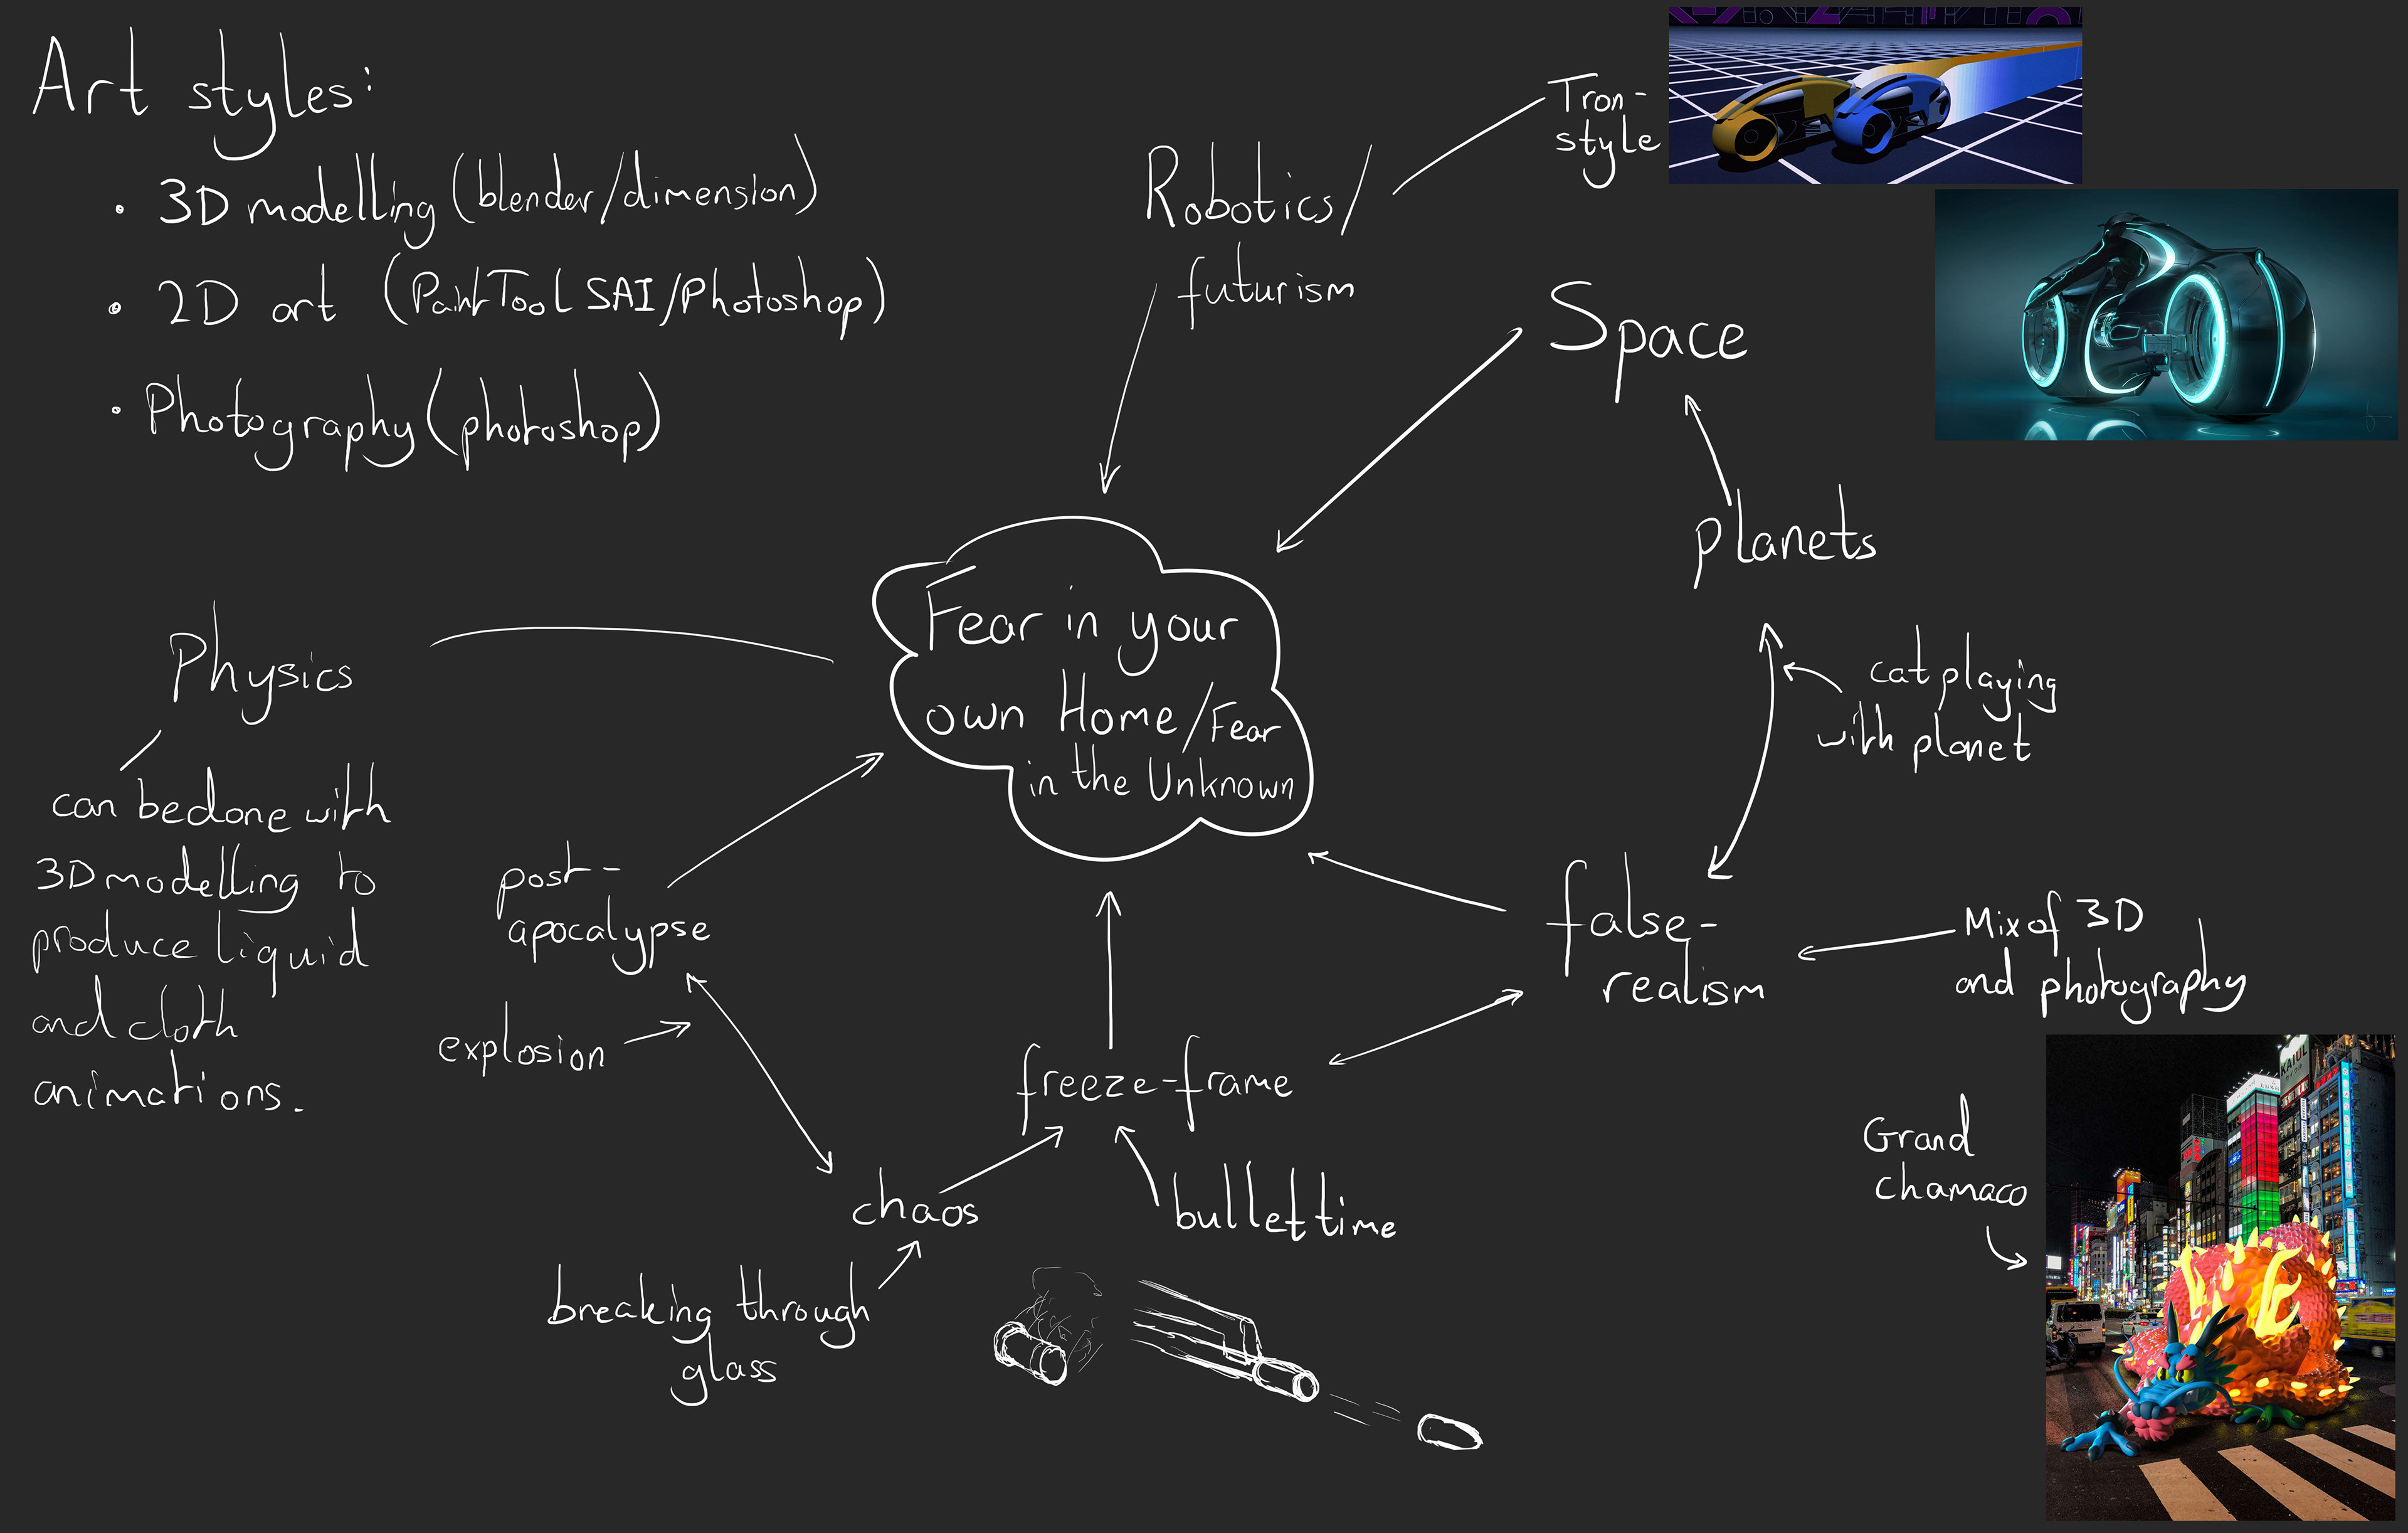
Initial Ideas Mind Map
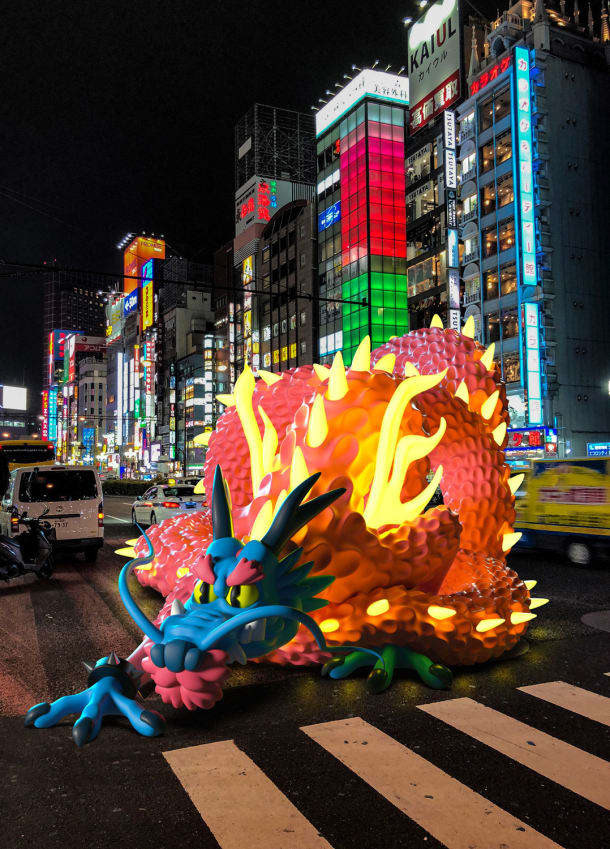
Grand Chamaco
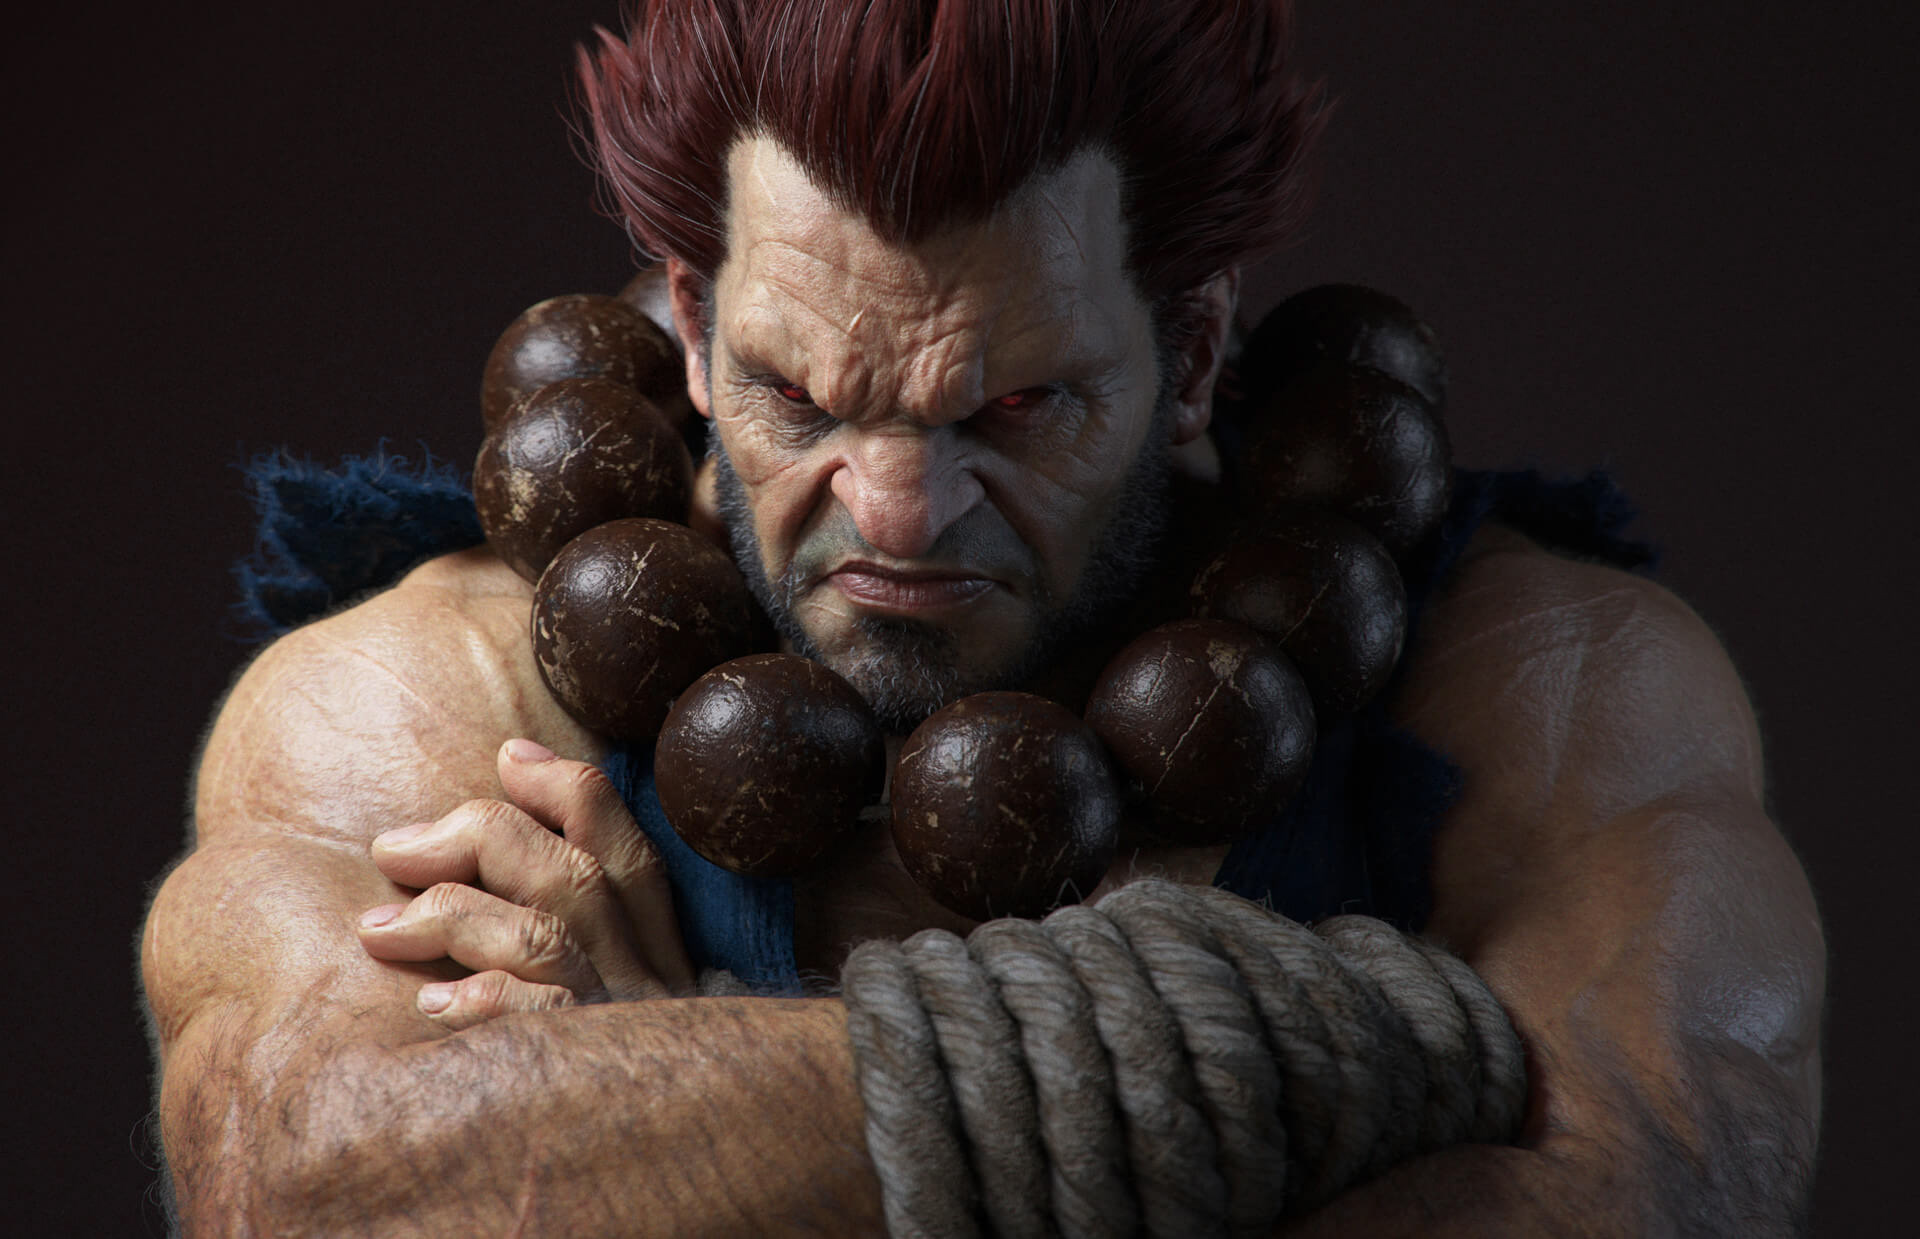
Cornelius Dammrich
Duc Phil Nguyen
After Planning out some ideas for what I want to do, and finding some artists that I liked I started experimenting with blender and following tutorials
Over the break before school started, I decided to begin looking at different software I can use for 3d modelling. To start with I found Adobe Dimension, this in short is a library of models, lights and textures that can all be applied into a 3d plane and ordered however you want. The limiting factor of this is that it is only a library of models, and it is very difficult to create your own pieces in it.
However from my experience so far, as it is limited it is also incredibly easy to learn and get realistic effects quickly. So in the future I may create the objects in blender (the software I use later on) and then import the 3d model into dimension for the final render. However, it may be harder to learn but there is also much more you can do with blender, which is something I need to explore and find its limits.
experimenting with different base planes and materials
with a different material it can change entirely how the light is reflected
experimenting with lighting and other materials, the cahracters are emitting their own light
With other sources of lighting and a white background, it changes the entire feel of the model
A bunch of default objects from dimension


Dimension can model transparent materials with ease and render the effects it has on the lighting

Dimension is incredibly simplictic and quite easy to understand compared to blender
Final render #1
Final render #2
Final render #3
The basic model preview, allowing you to see colours and small effects of lighting
The solid view of the model, easy to view the shapes, and also very quick to view
Wireframe view, allowing you to view all of the edges with no faces
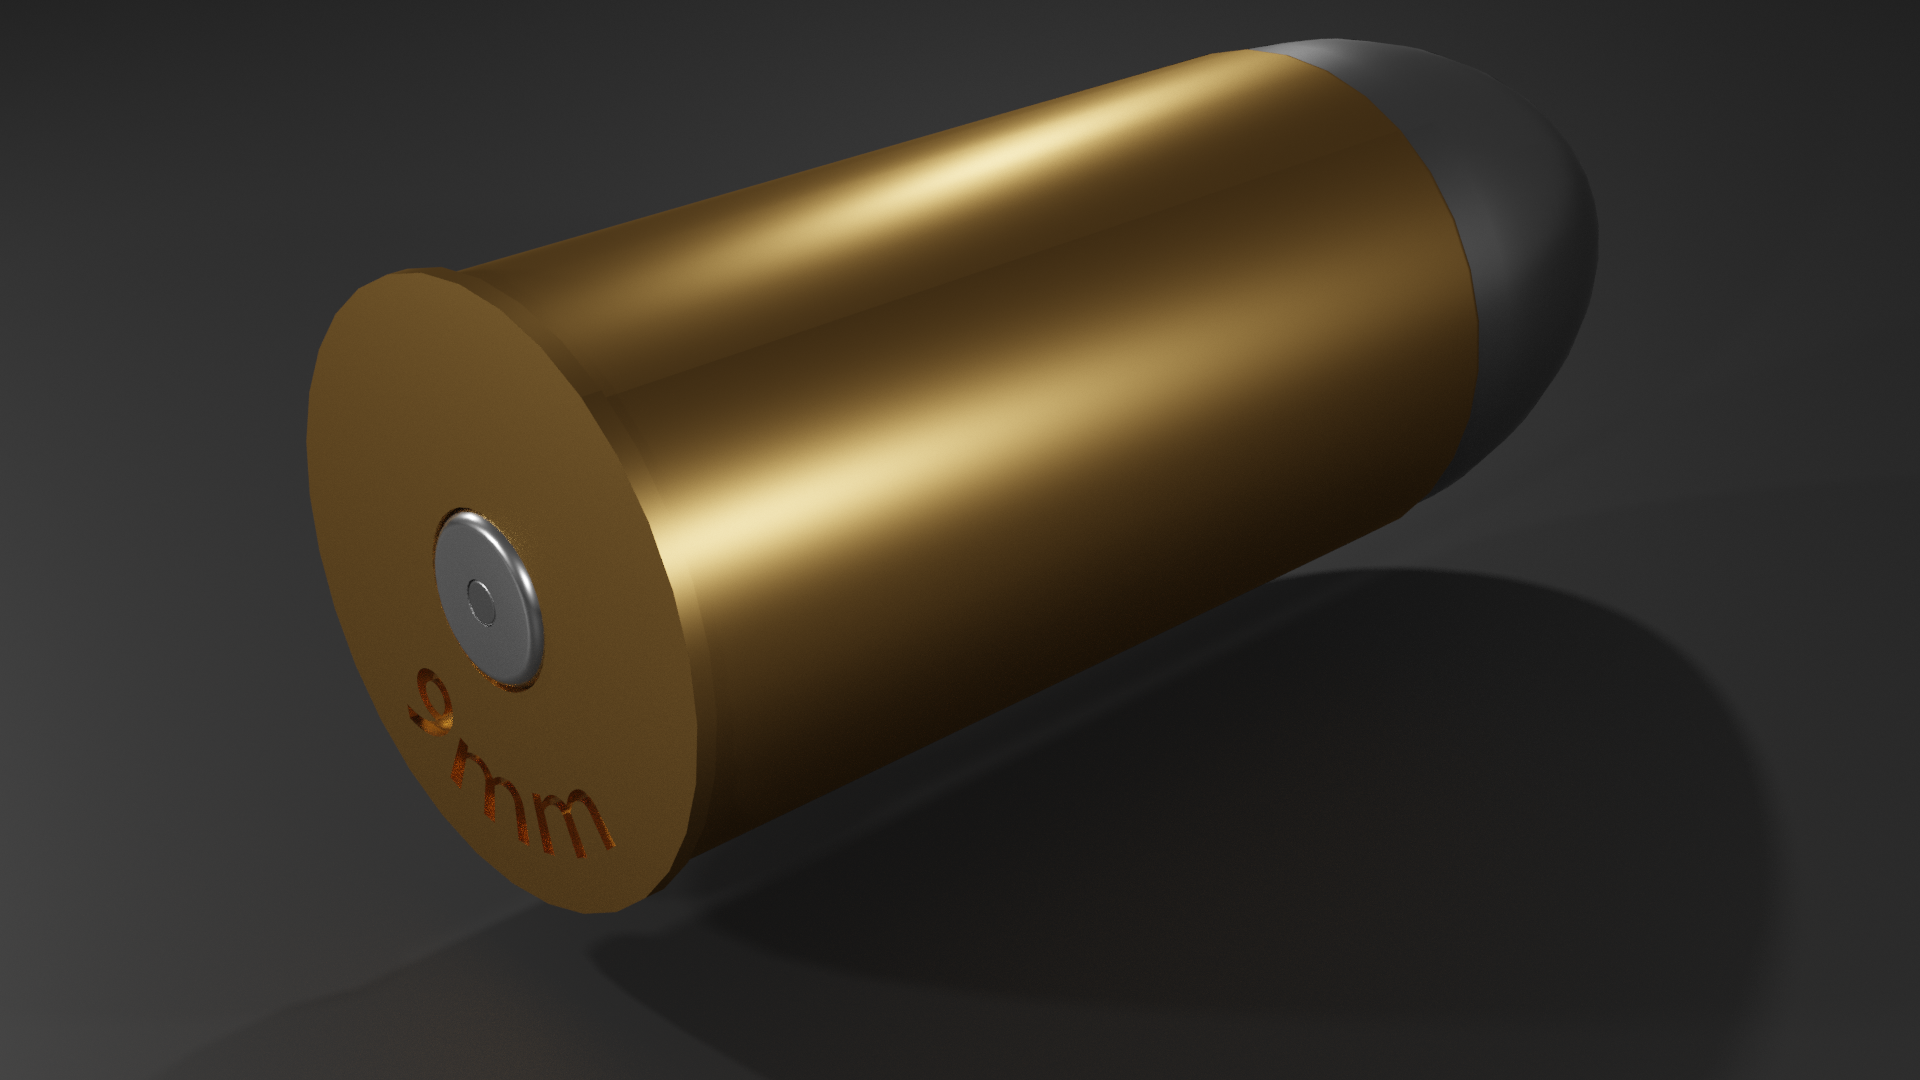
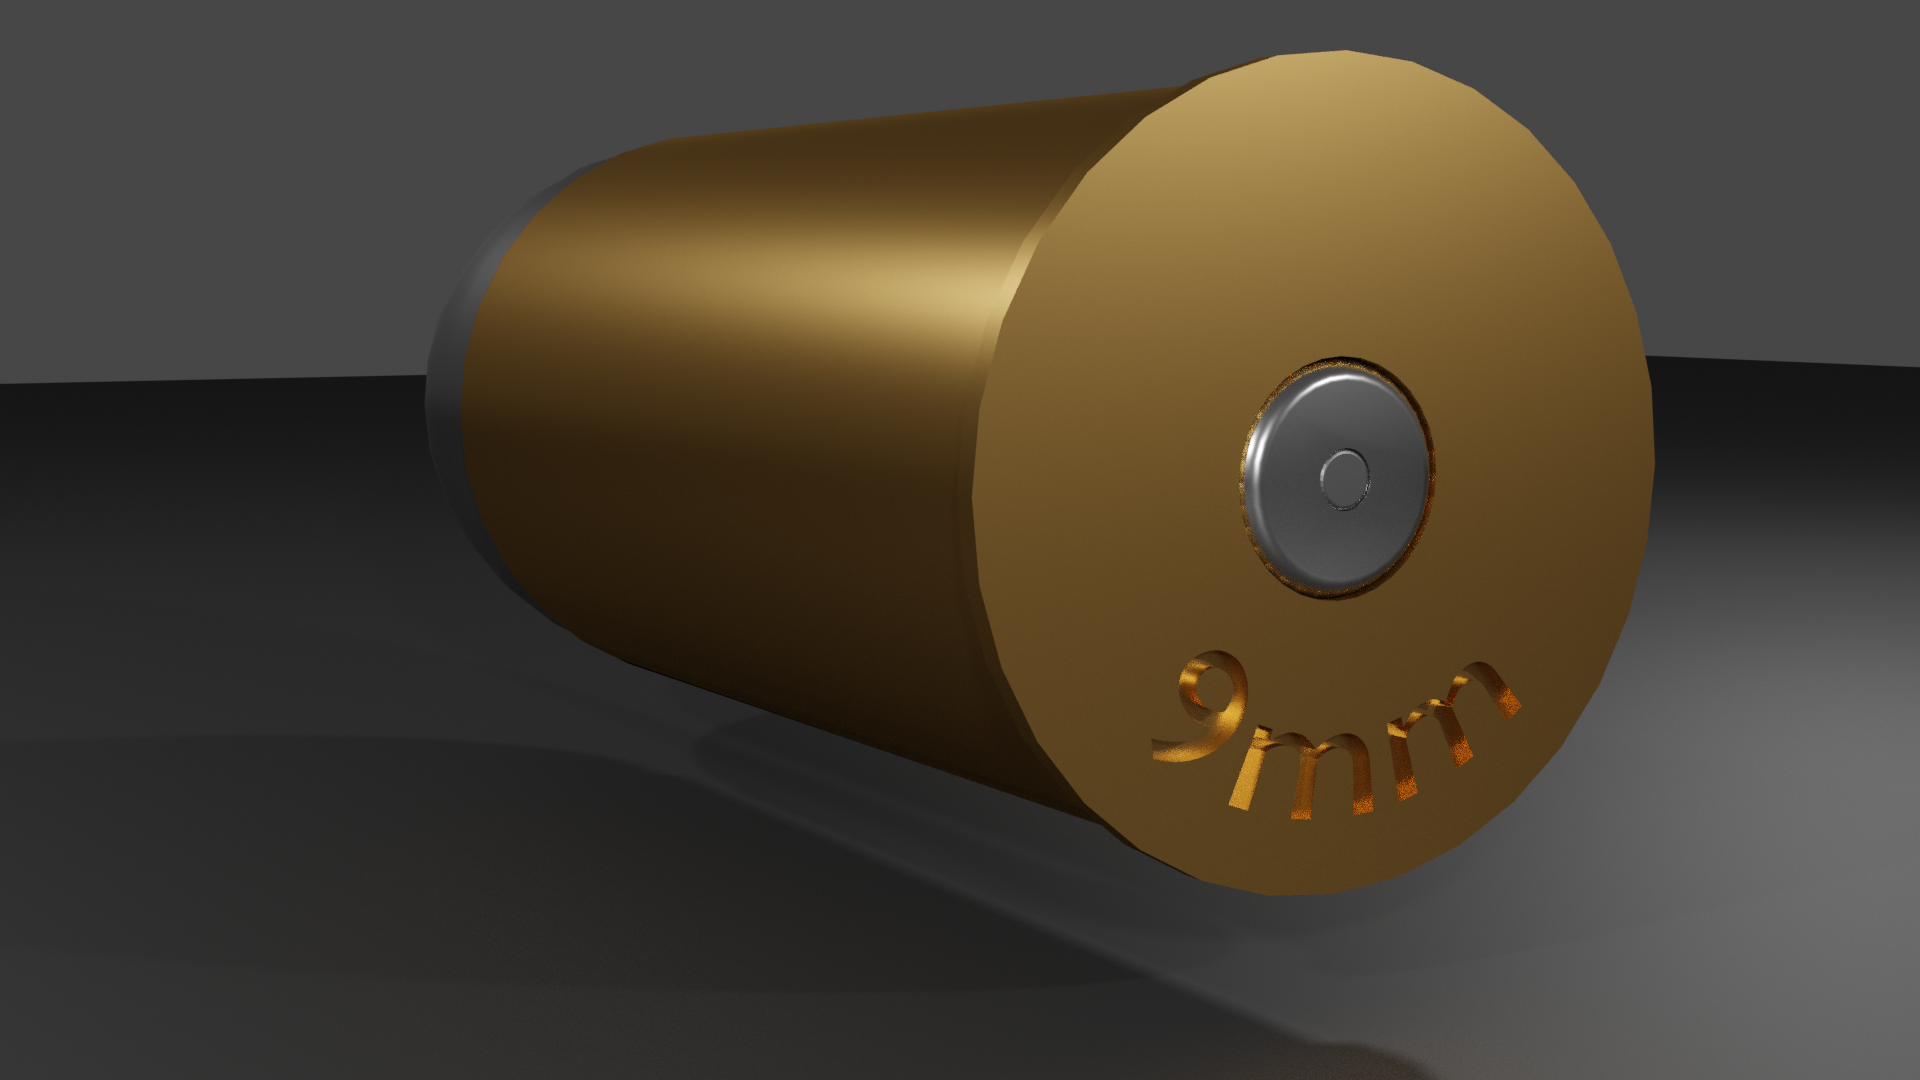
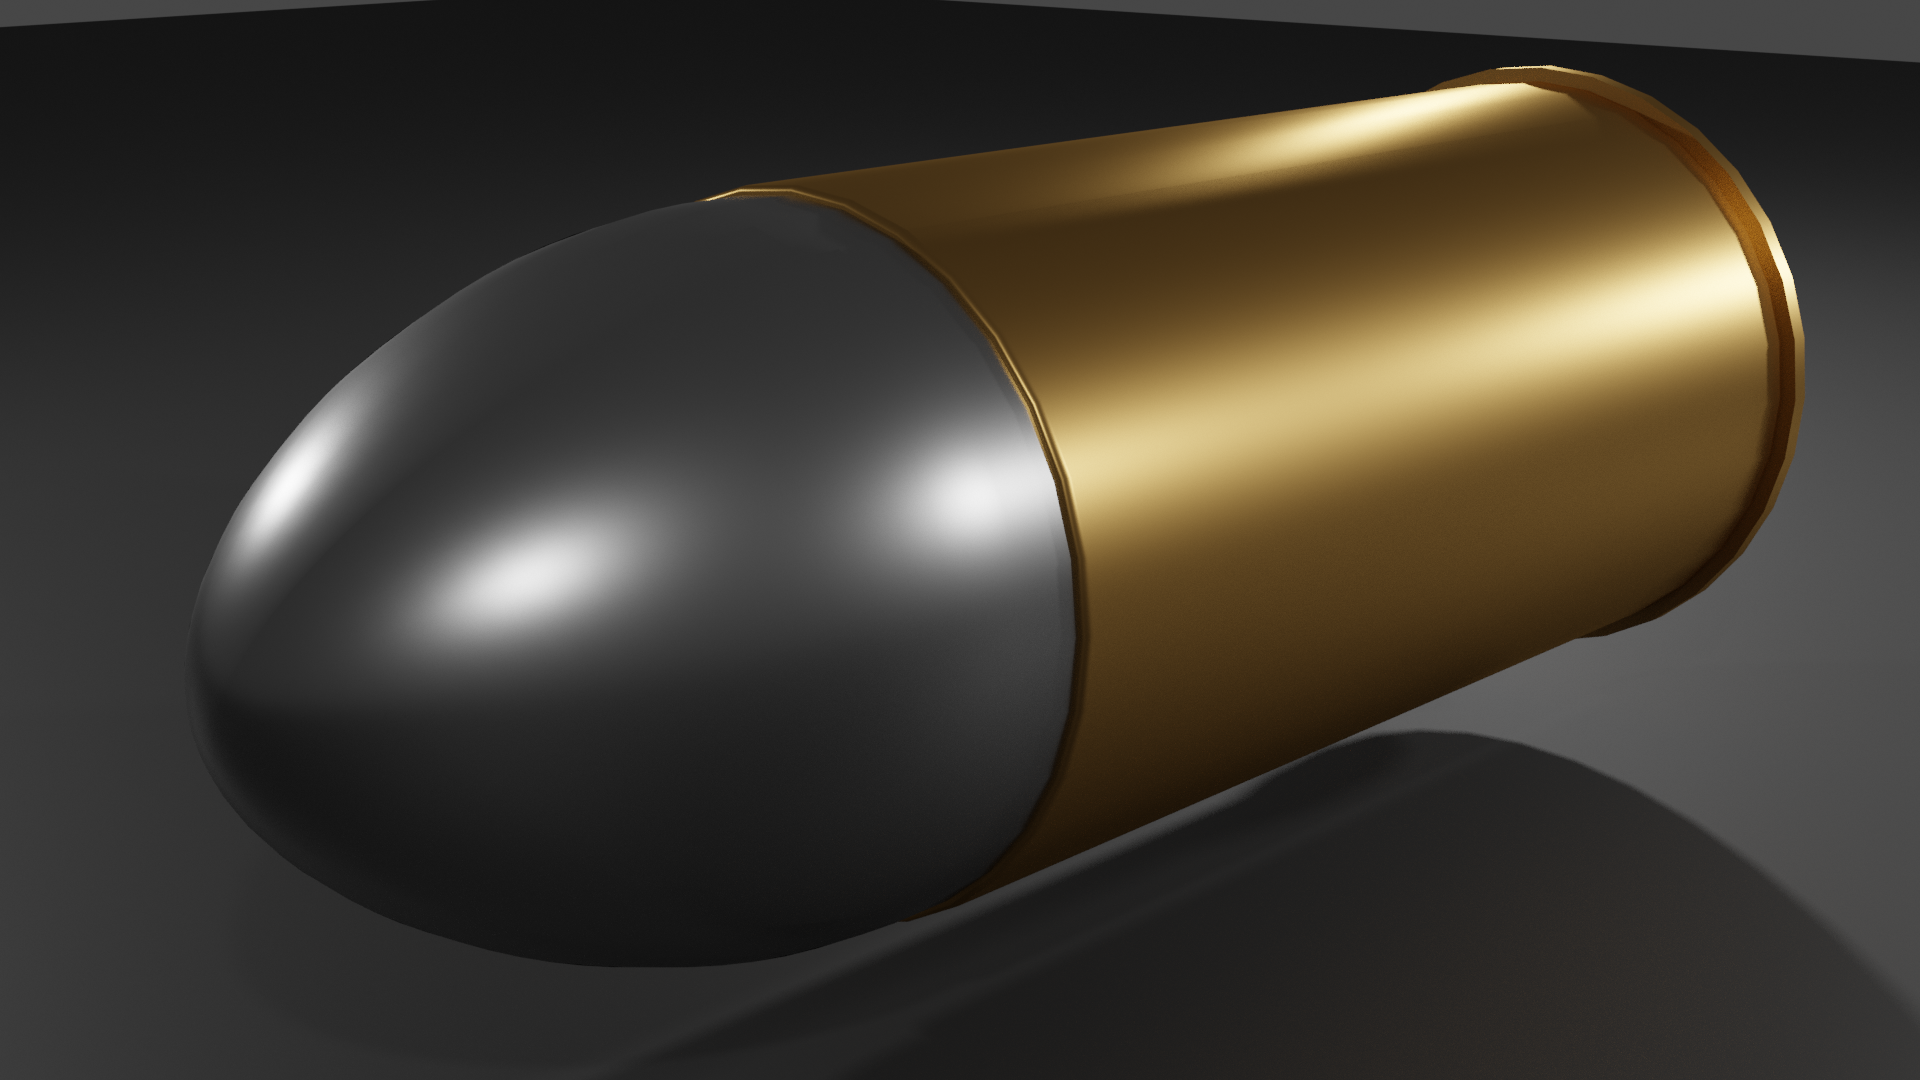
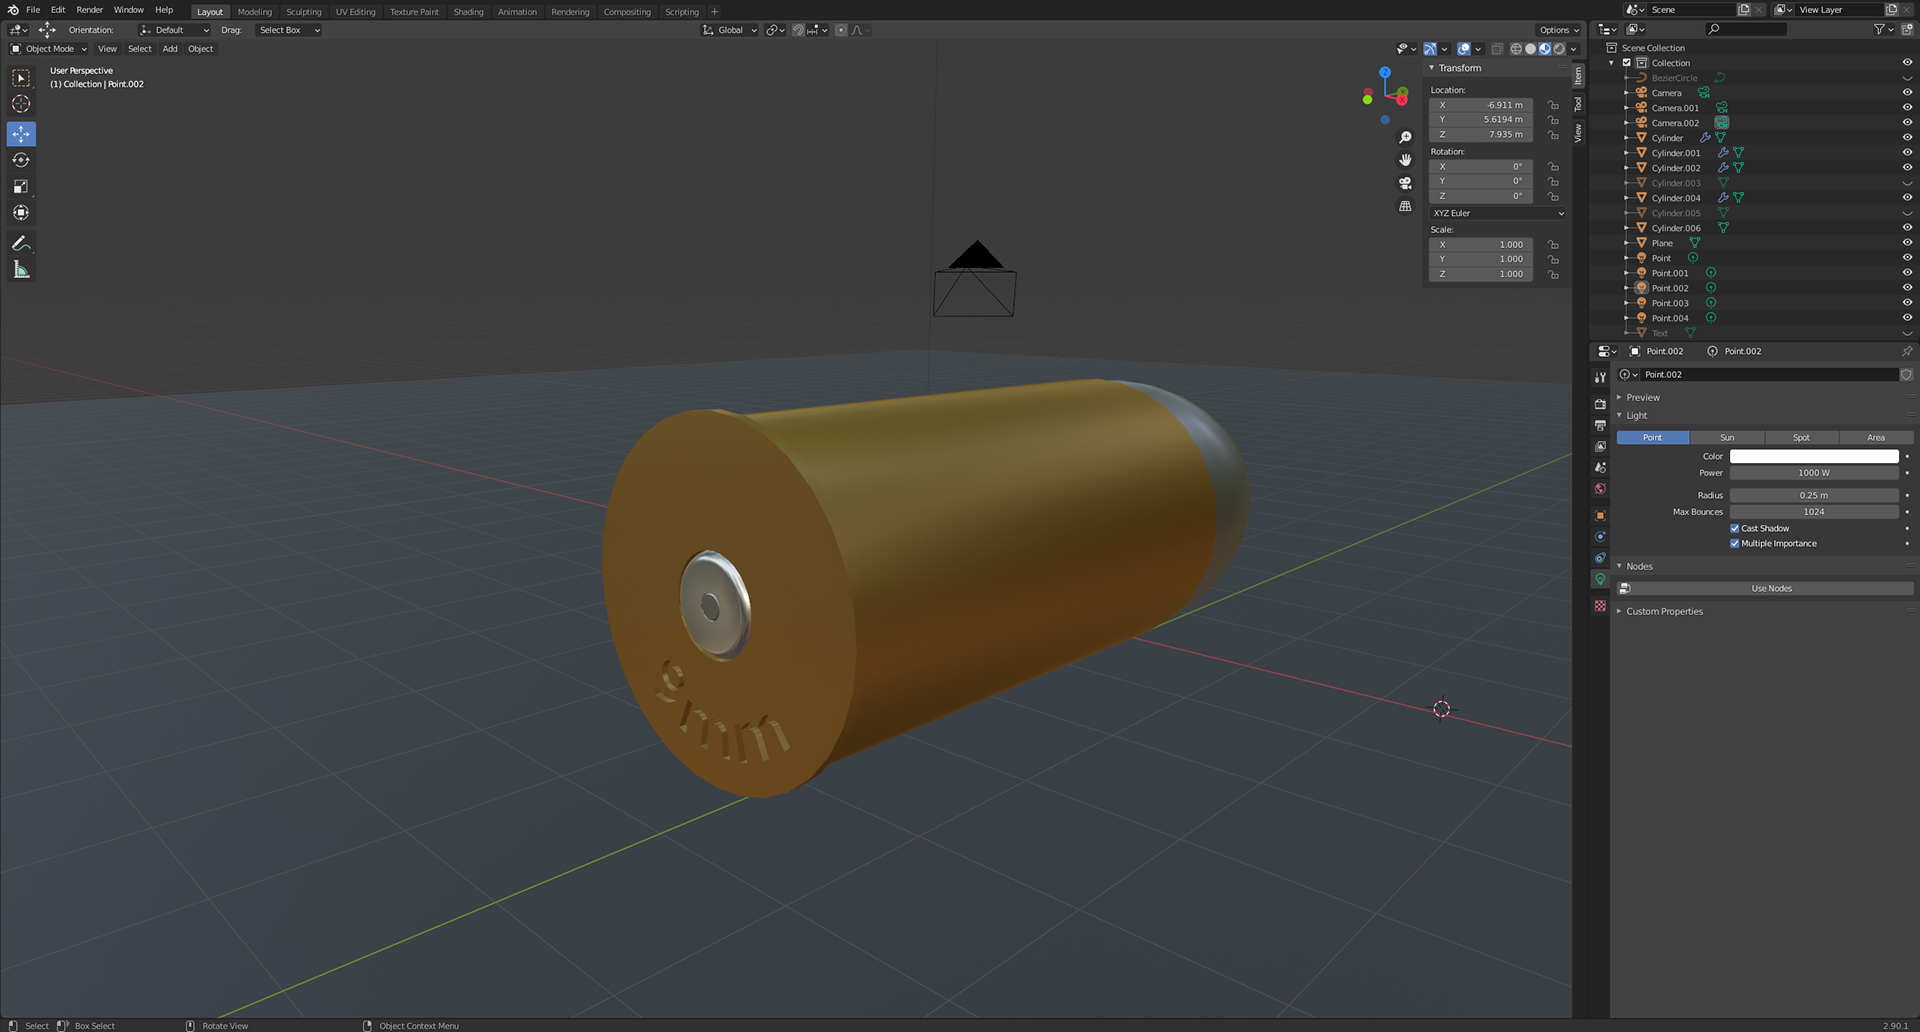
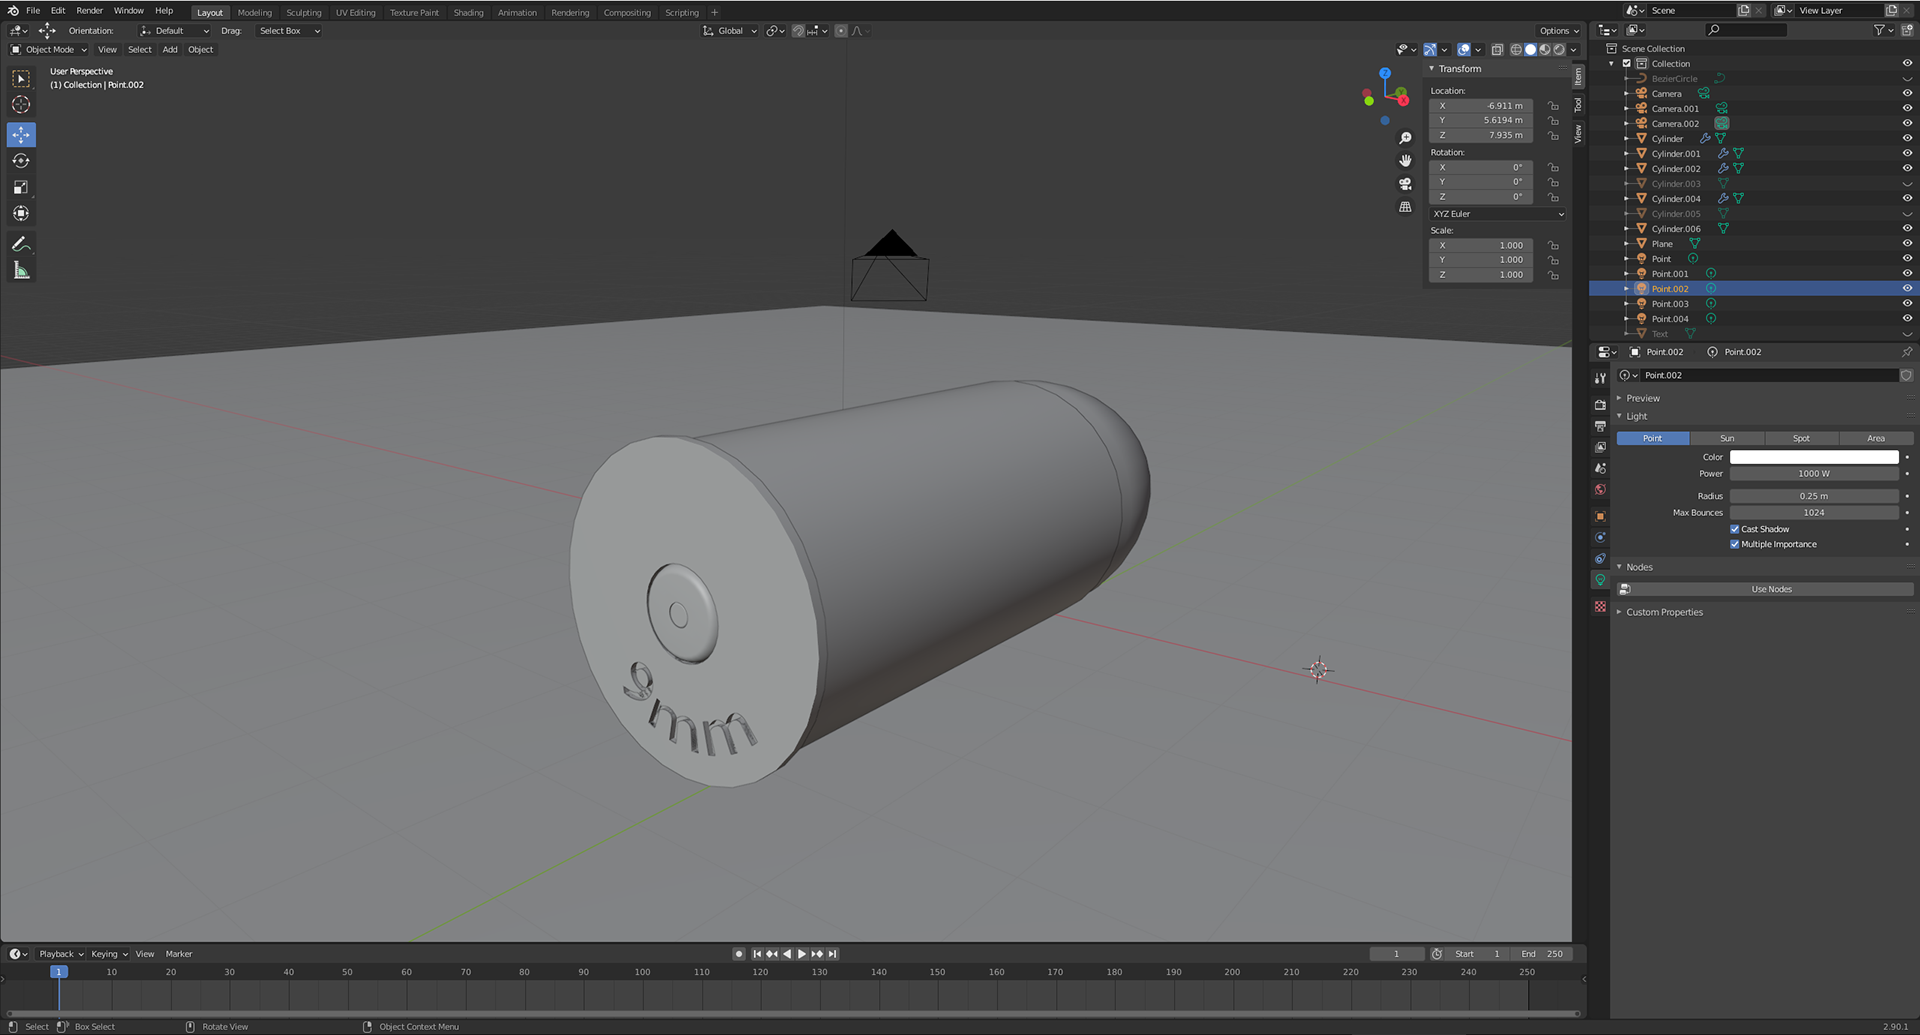
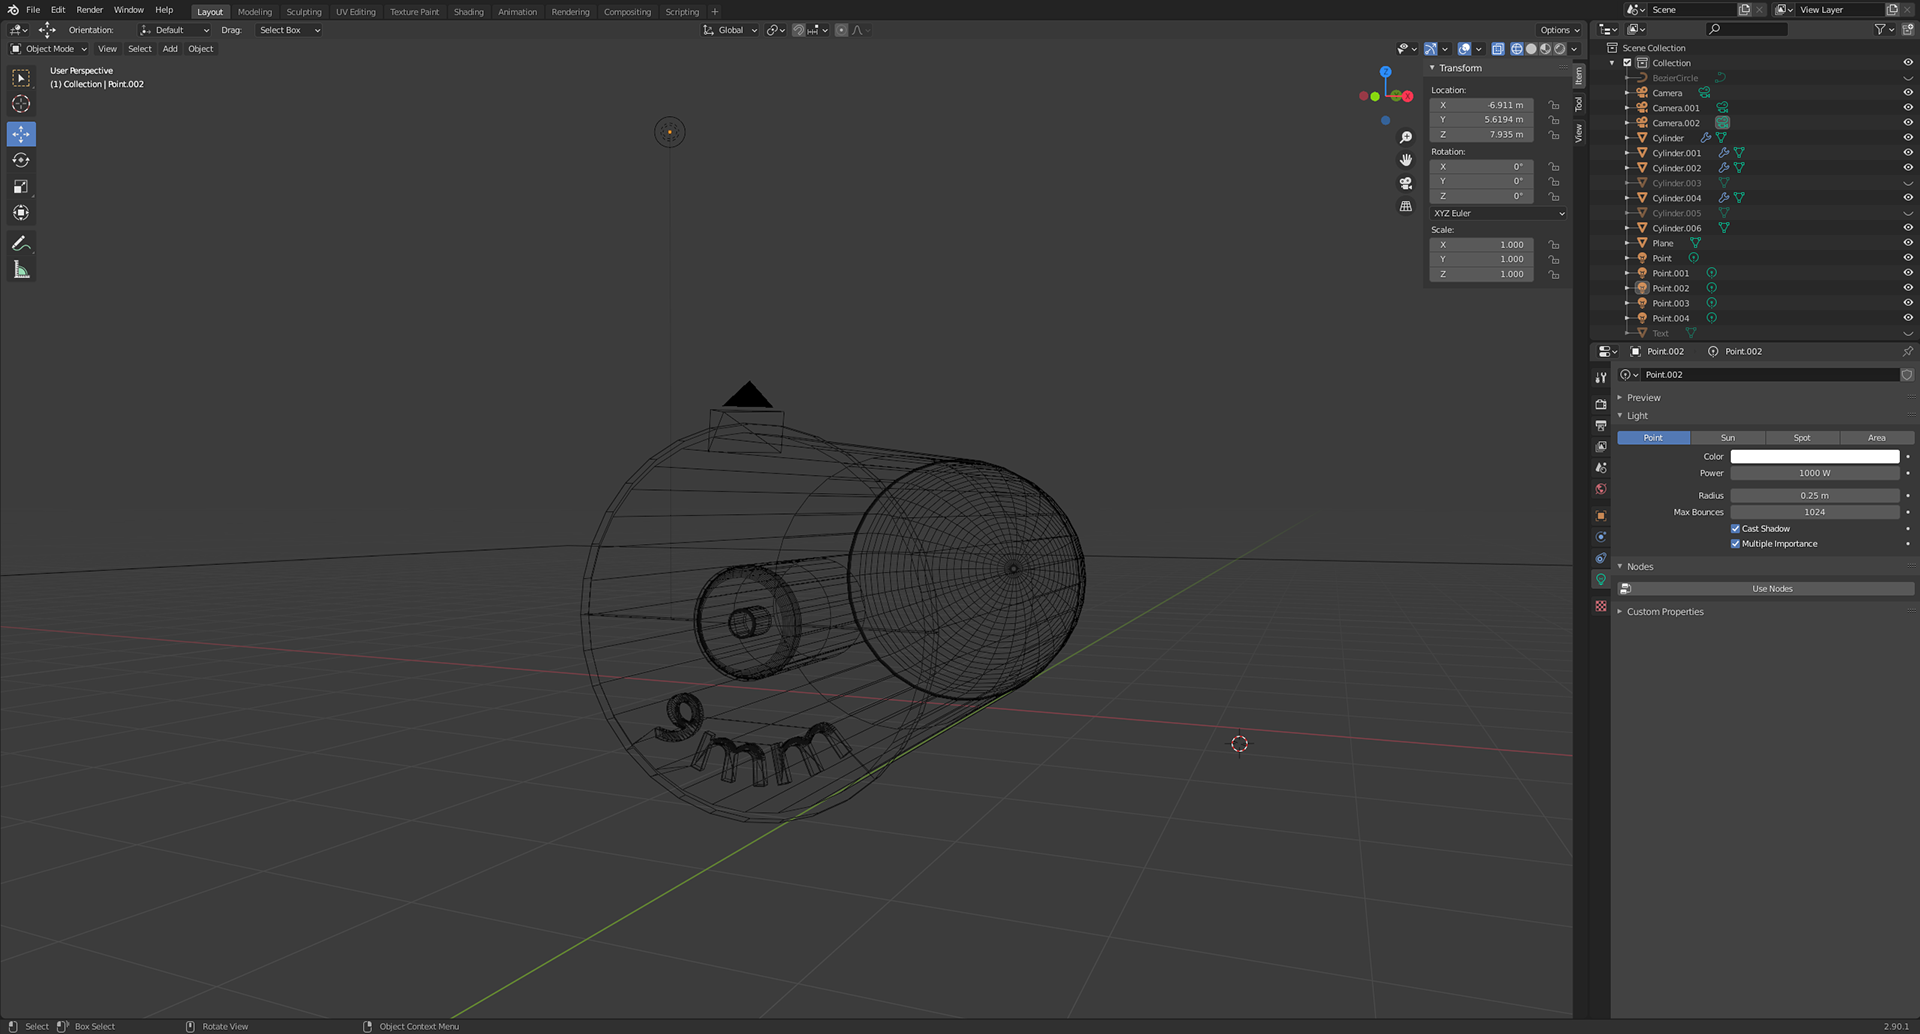
After experimenting with dimensions, I wanted to expand my skills further so I decided to explore Blender, a free open source software that has a huge range of uses in basic modelling, animation and physics properties. Starting off with blender I really struggled to understand everything and get used to the controls and setting. However, once I followed a small tutorial on the basic controls of blender it really helped accelerate my learning. I didn't follow a tutorial to create this bullet, but I decided it is made up of some quite simple shapes, that I could easily make, then using some research I found how to bevel edges and use Boolean modifiers to "etch" the '9mm' text into the casing.
After creating this I did not know how to use materials and other tools like that so I left it for a while, but then came back later after I had completed the Tron bike below to create the metallic texture that is needed for the final render.
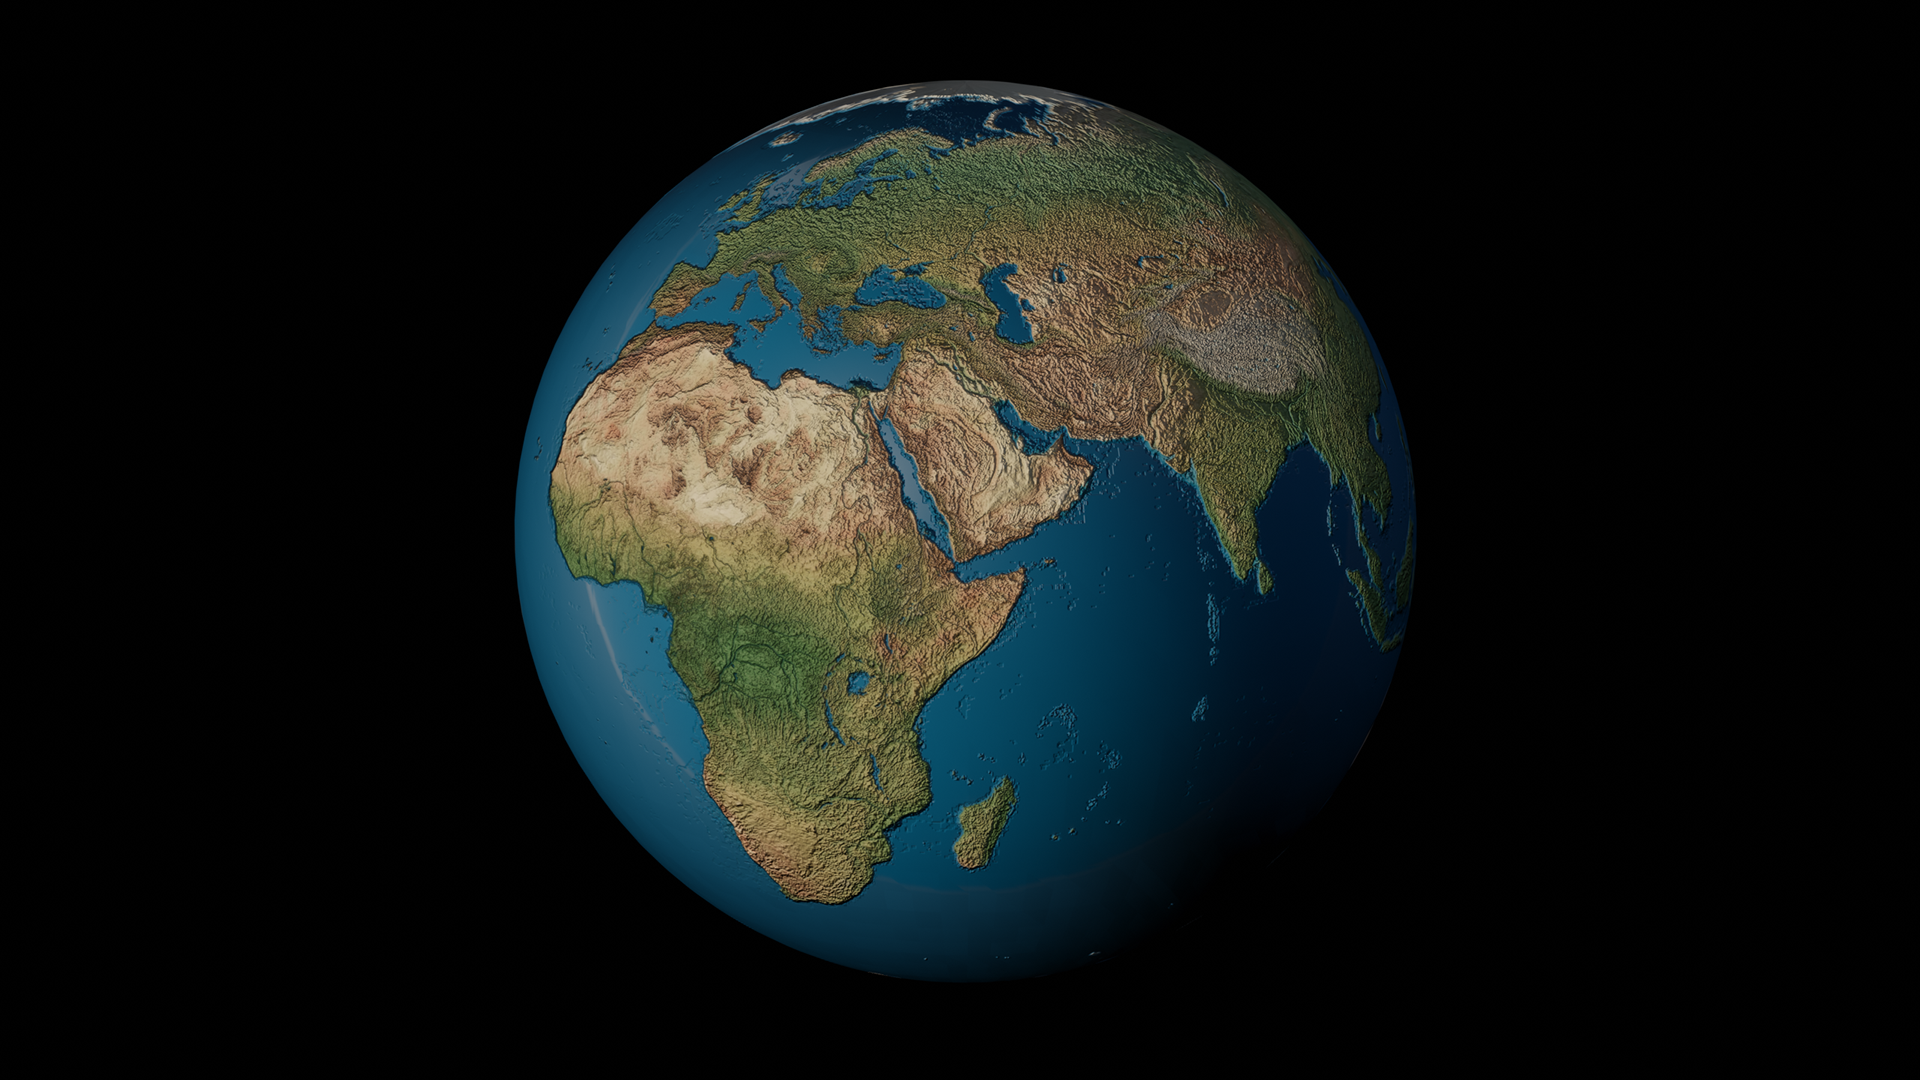
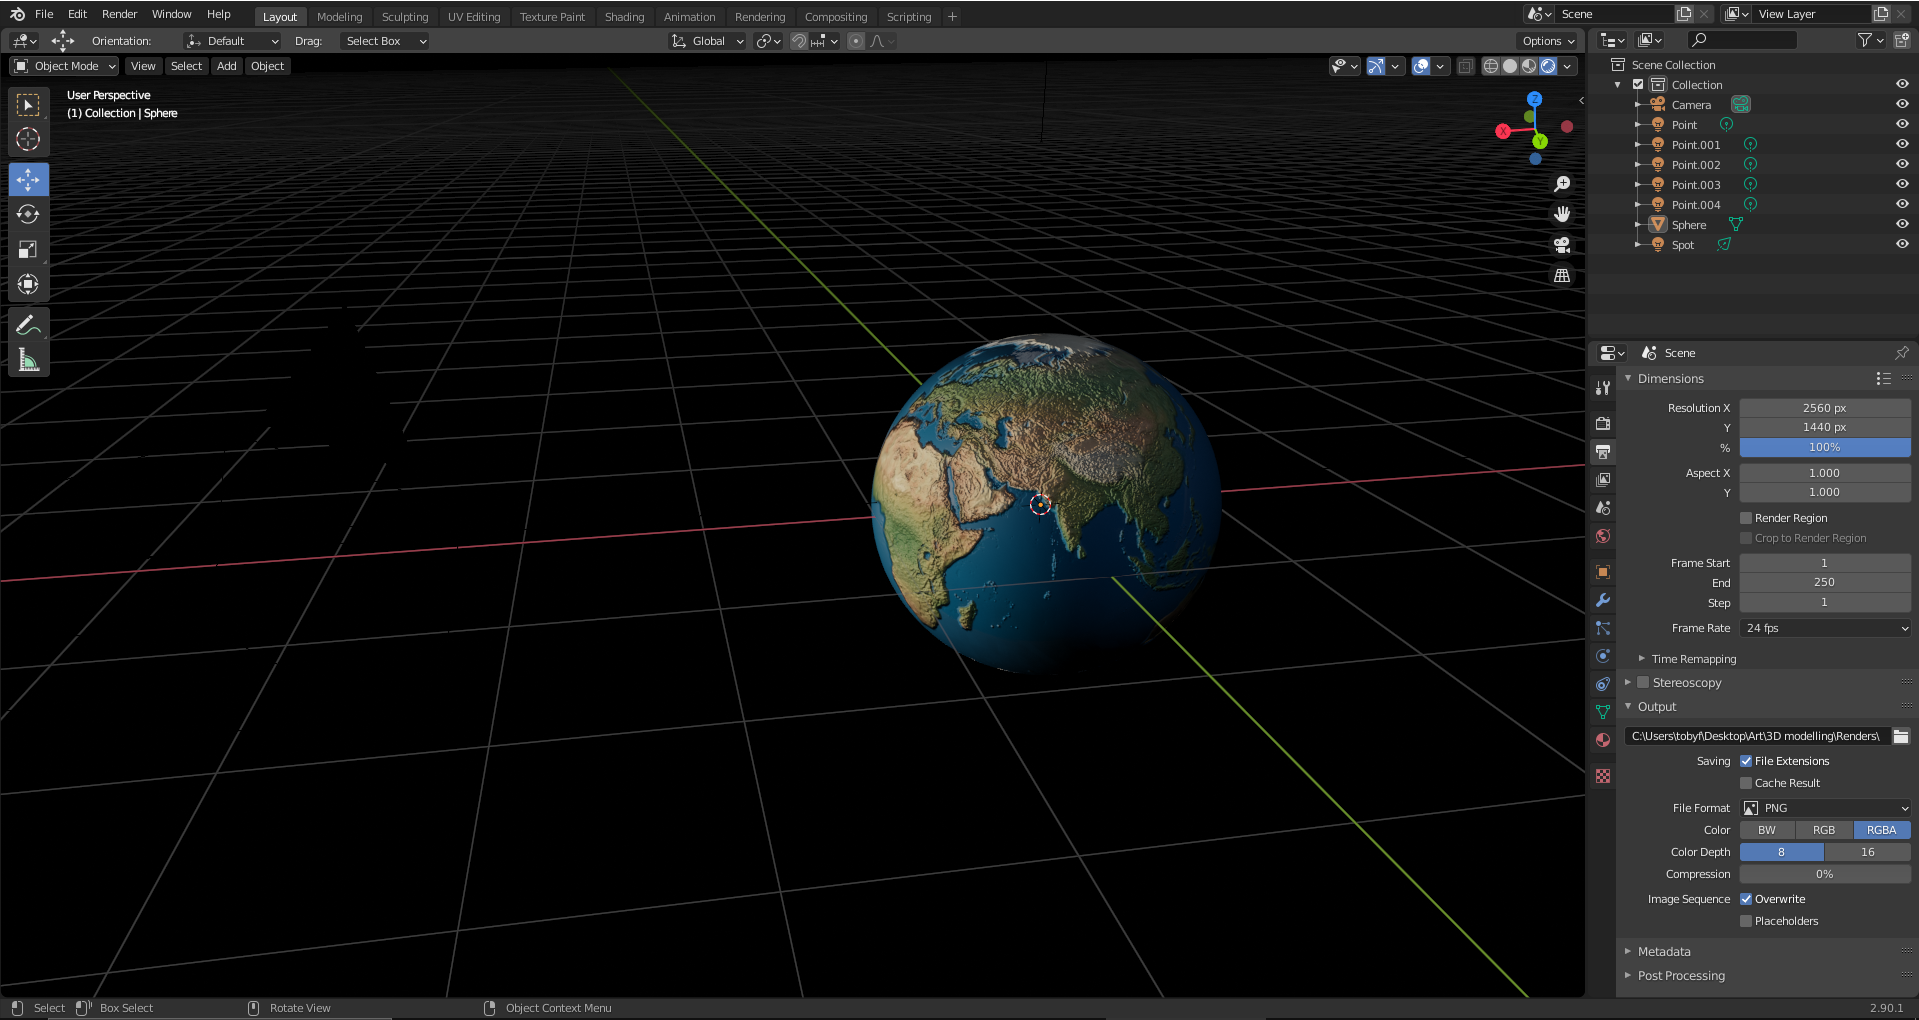
3D modelled sphere with a UV and displacement map to add colour and texture
The basic rendered view with lighting and textures in Blender
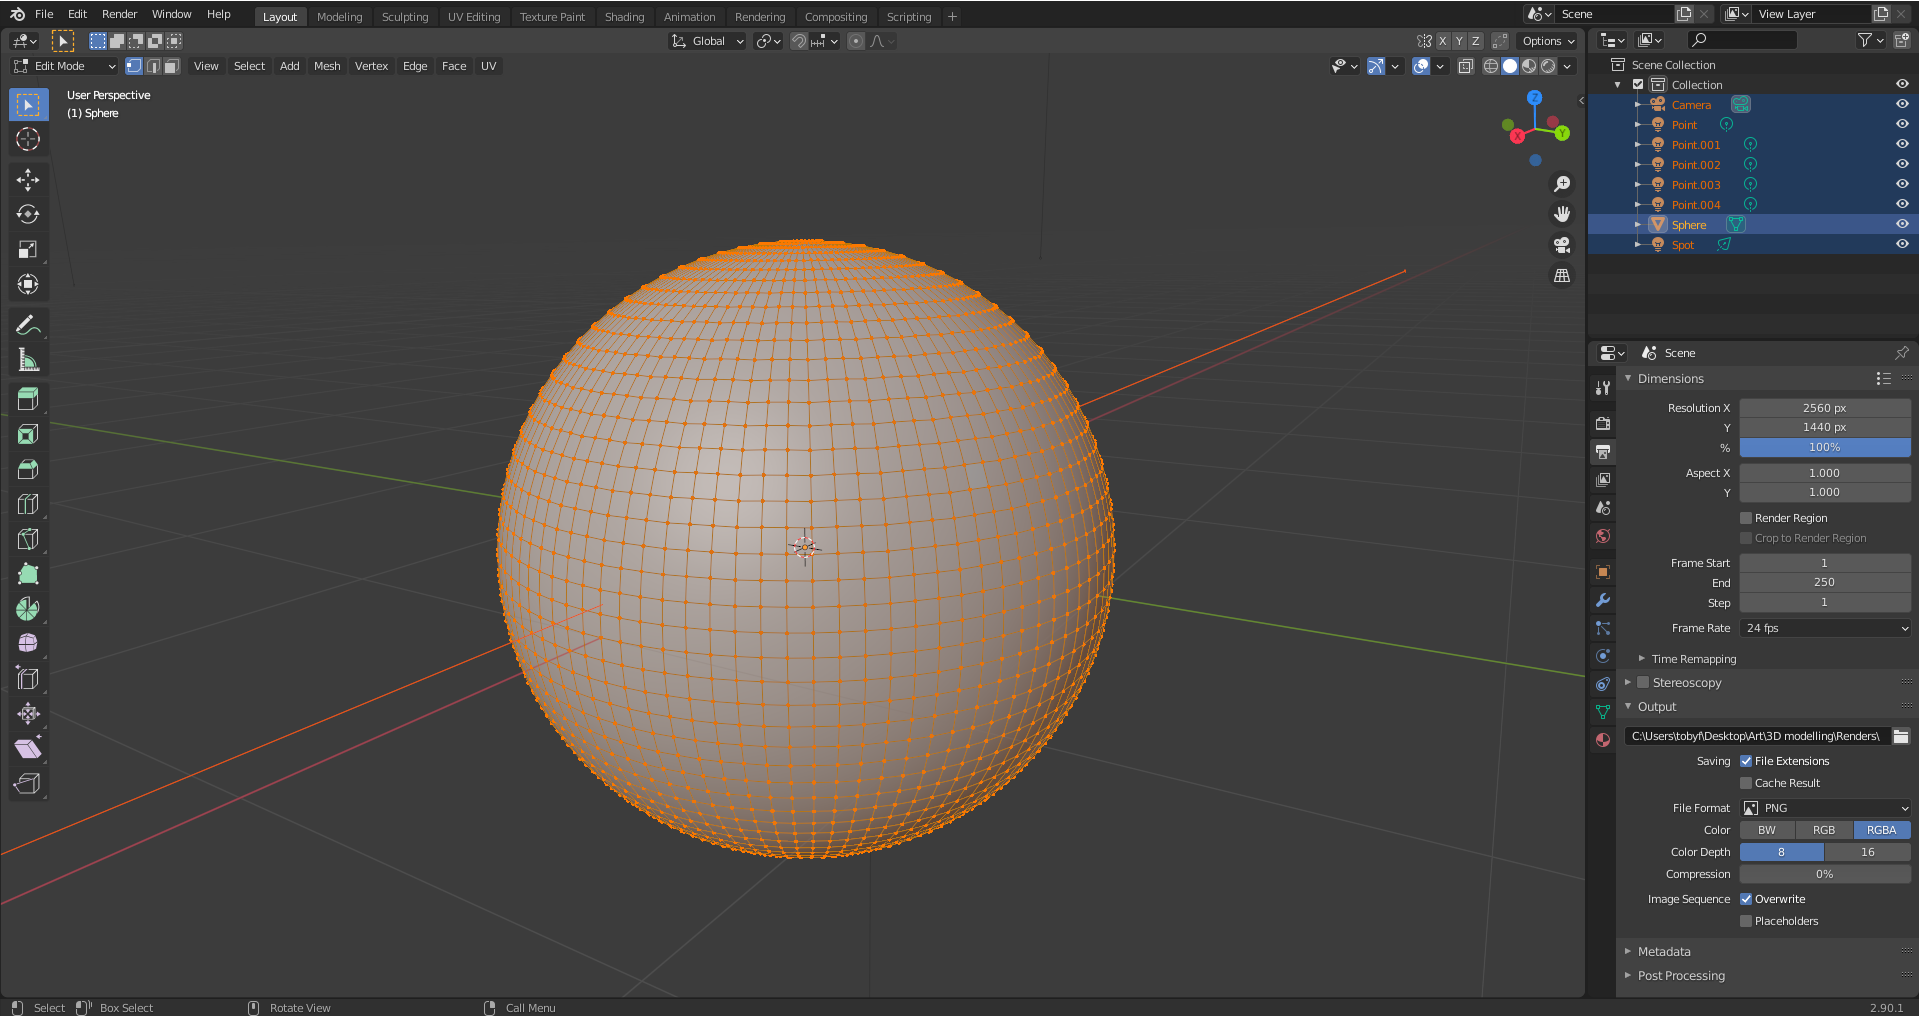
The basic sphere model it is based on with all the different polygons making it up (plus a smoothing filter on top to remove polygon edges)
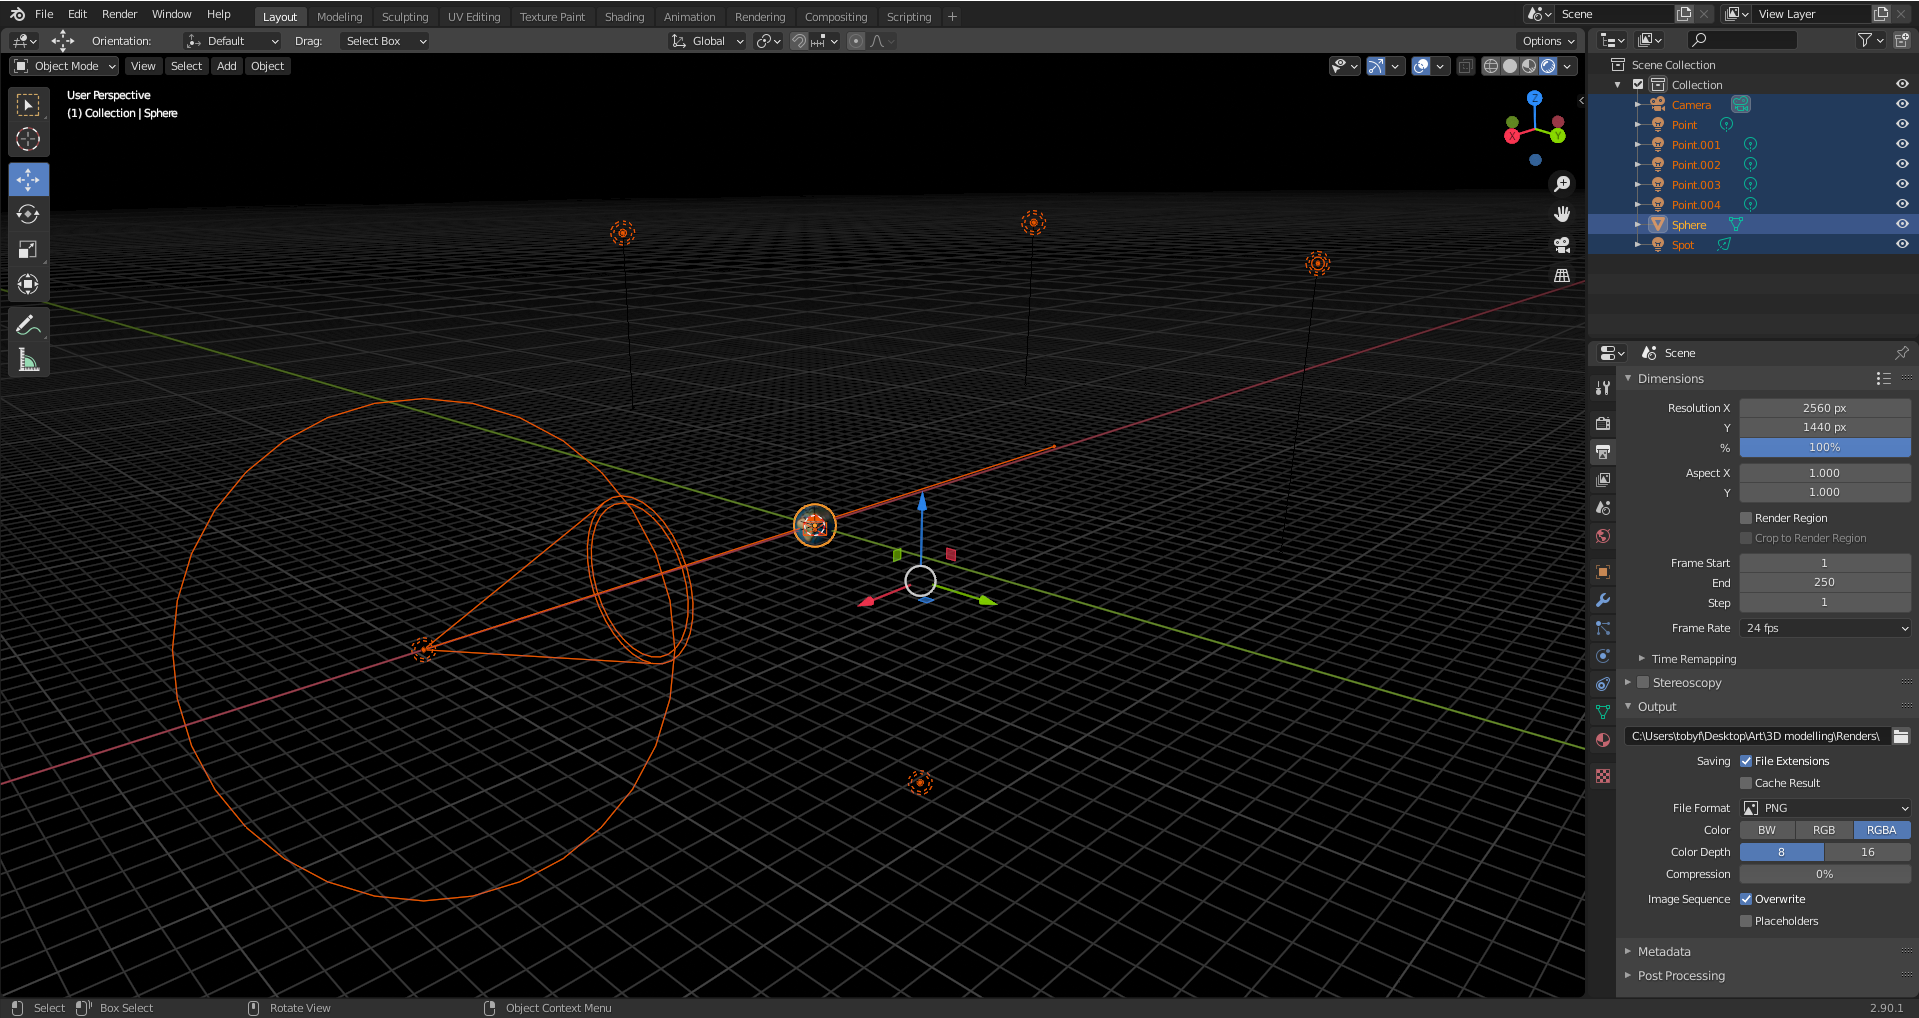
All the light sources, main cone acting as sun with other points to act as small light sources
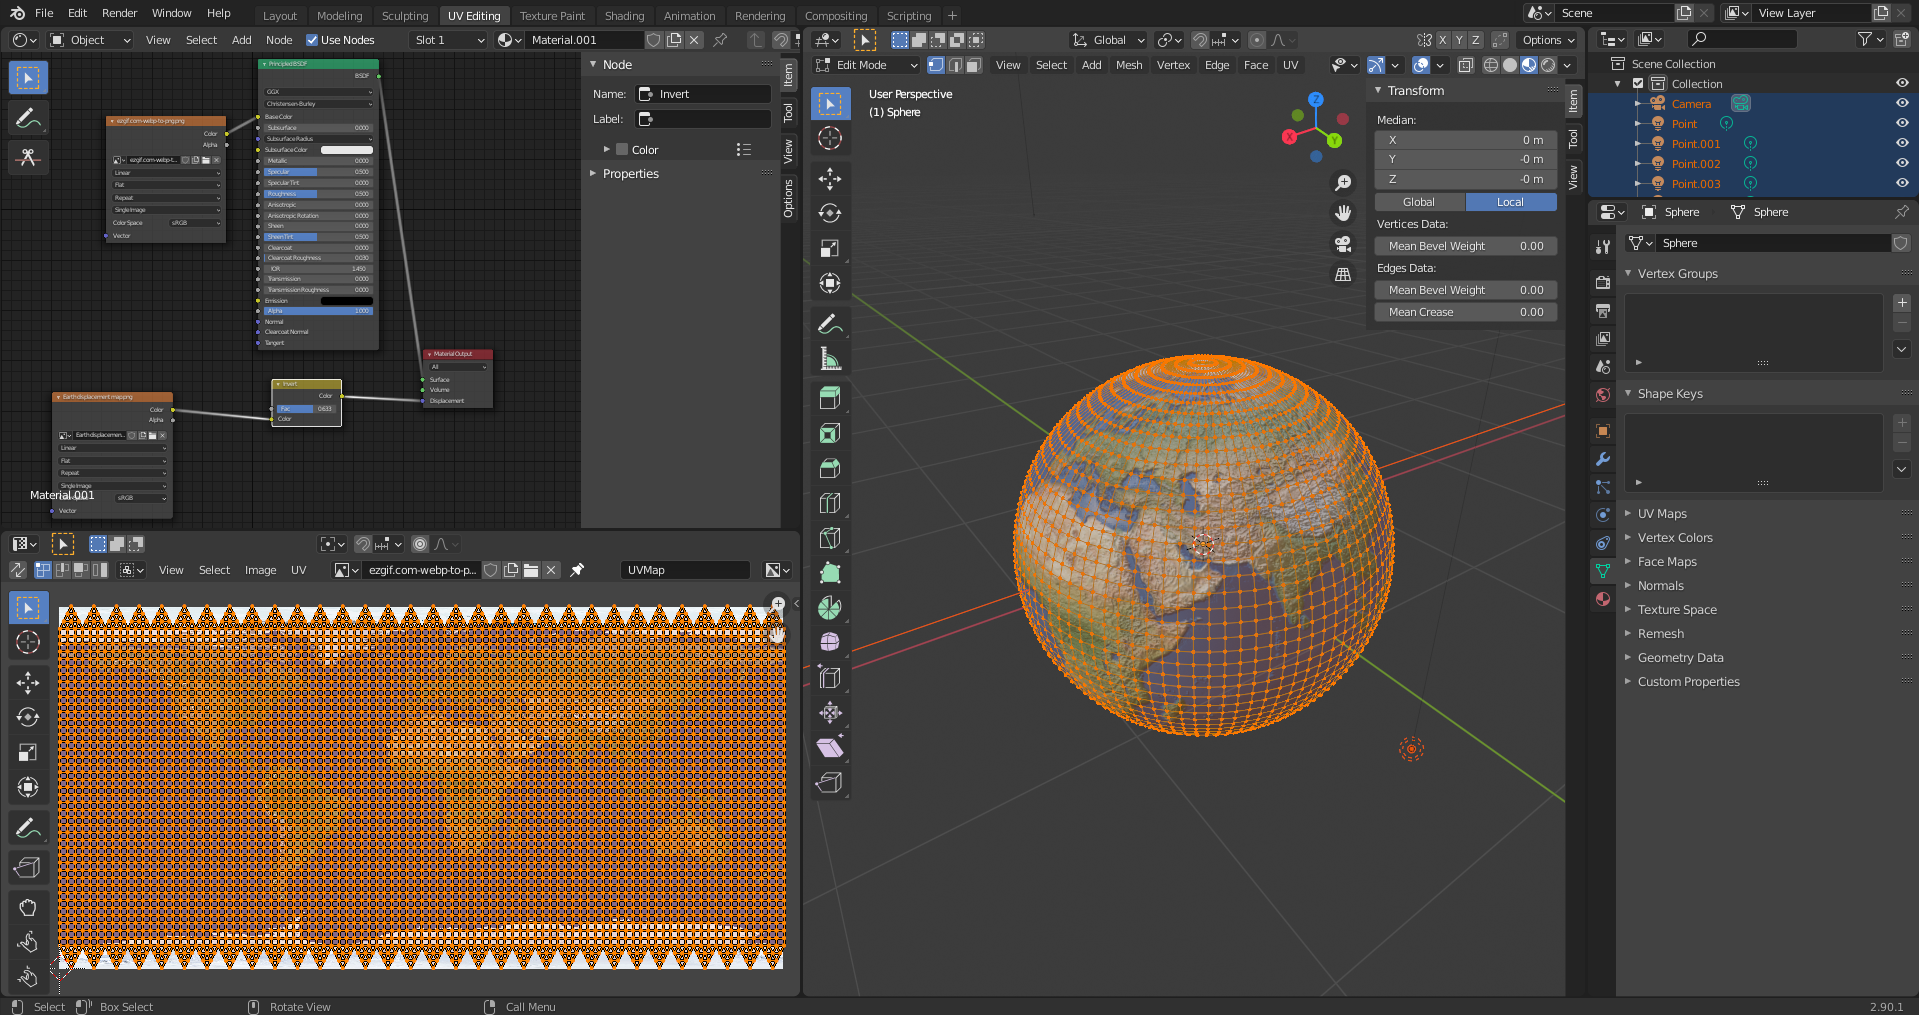
A UV map in the bottom left with all the polygons of the shape unravelled over the top, to map the image.
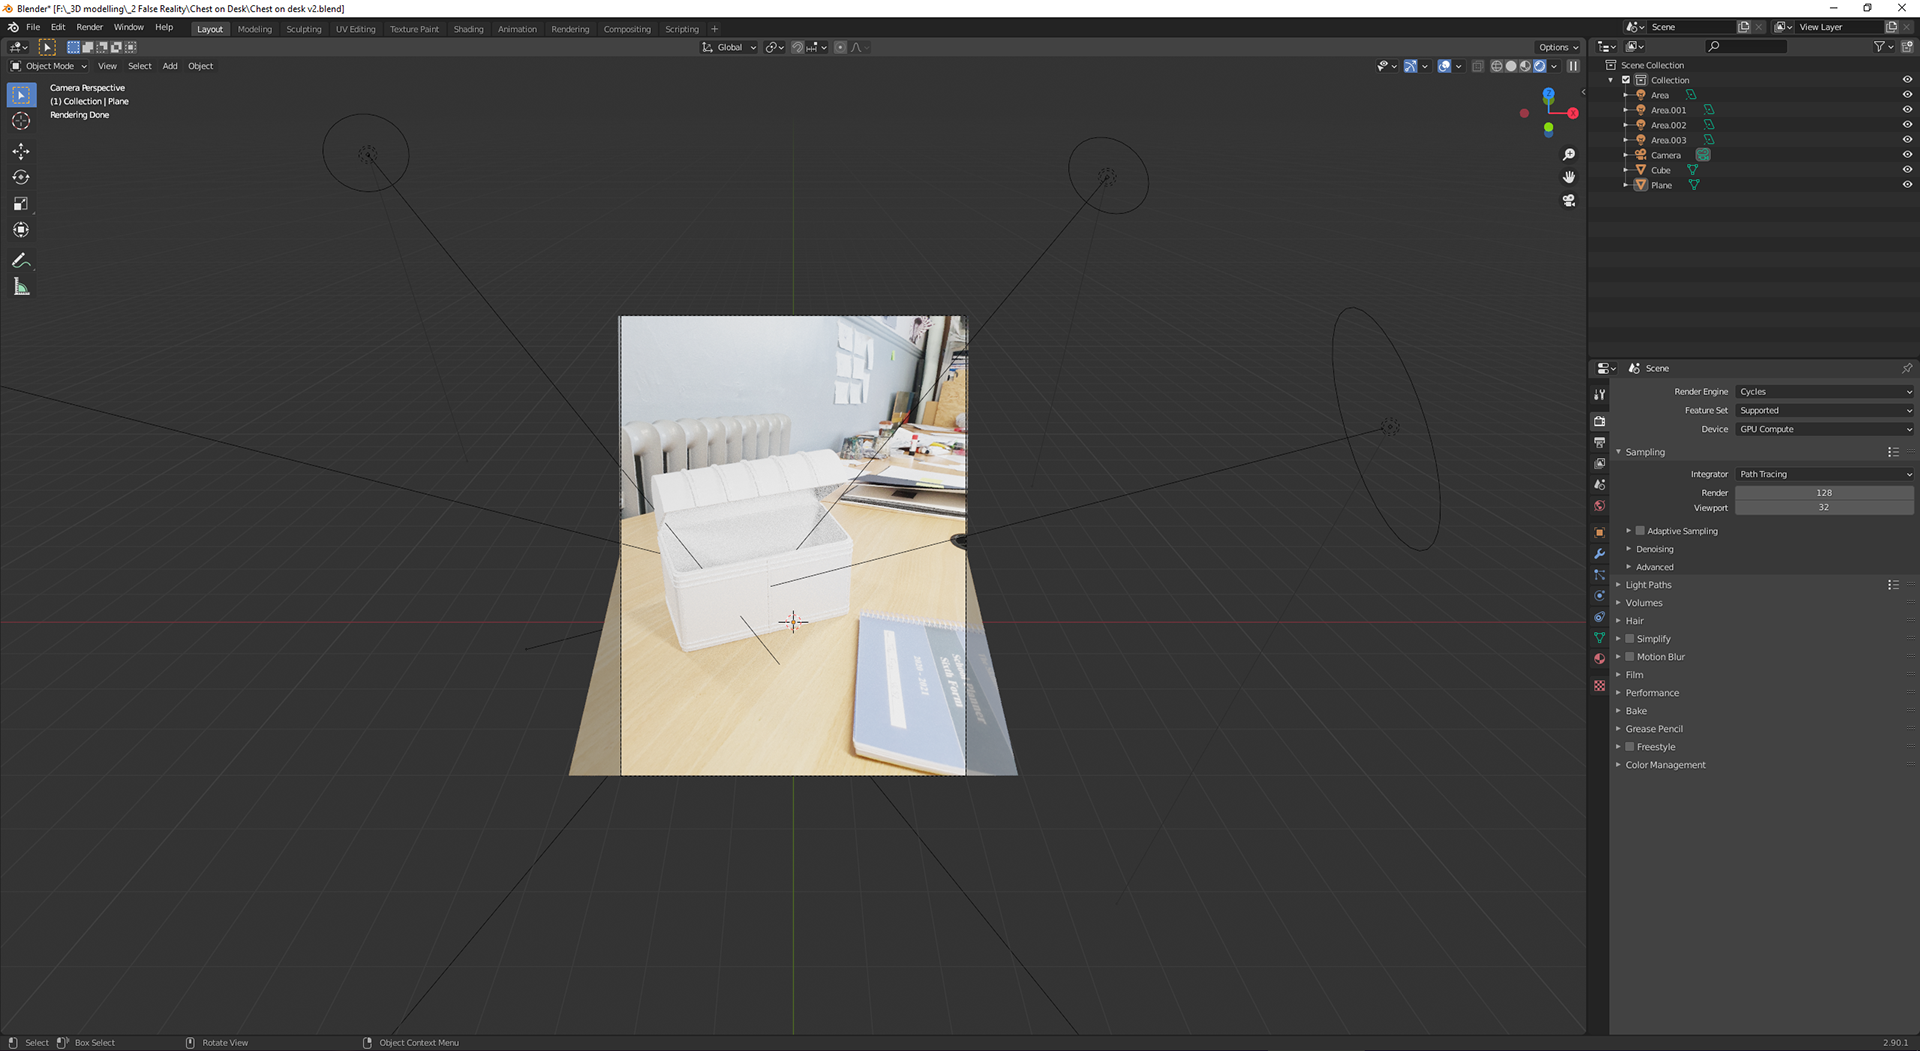
My final render, with the best perspective
My first render, before I had curved the bend in the plane
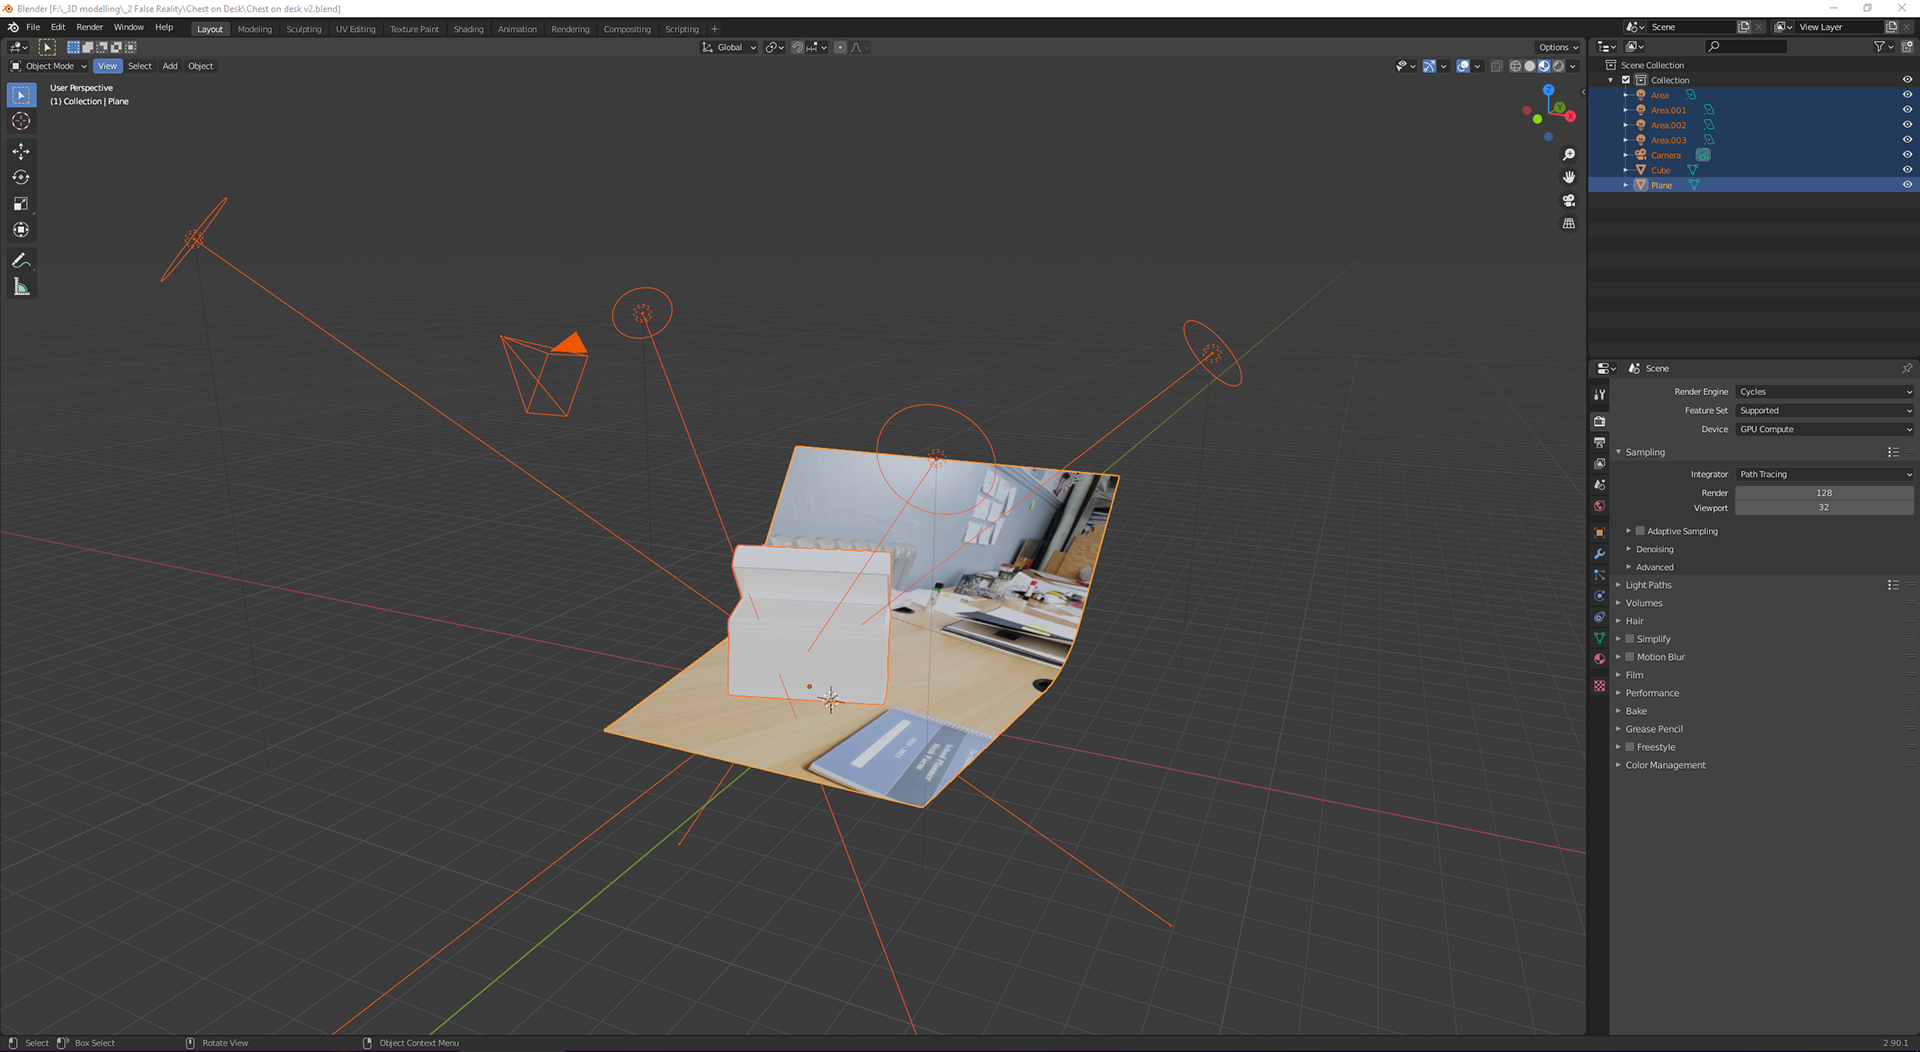
Above are the renders of this piece that I have created. after researching different styles and working out what I wanted to do I tried experimenting with a style I am calling false-realism, with this I plan to mix what is real and what is fake, blurring the line of what is truth. to experiment with this I created the piece above, this piece was a quick shot I took from my phone of my desk which i then tried to map this image onto a plane in a 3D modelling software. with this plane I flattened the bottom so that I could lay an object on top of it and allow it to create shadows, without the perspective being broken (at least too much). Being new to blender it was hard to workout mixing reality and 3D modelling, and there were also very limited pieces online I could look to for inspiration and help, so it was mainly done through my own self teaching.
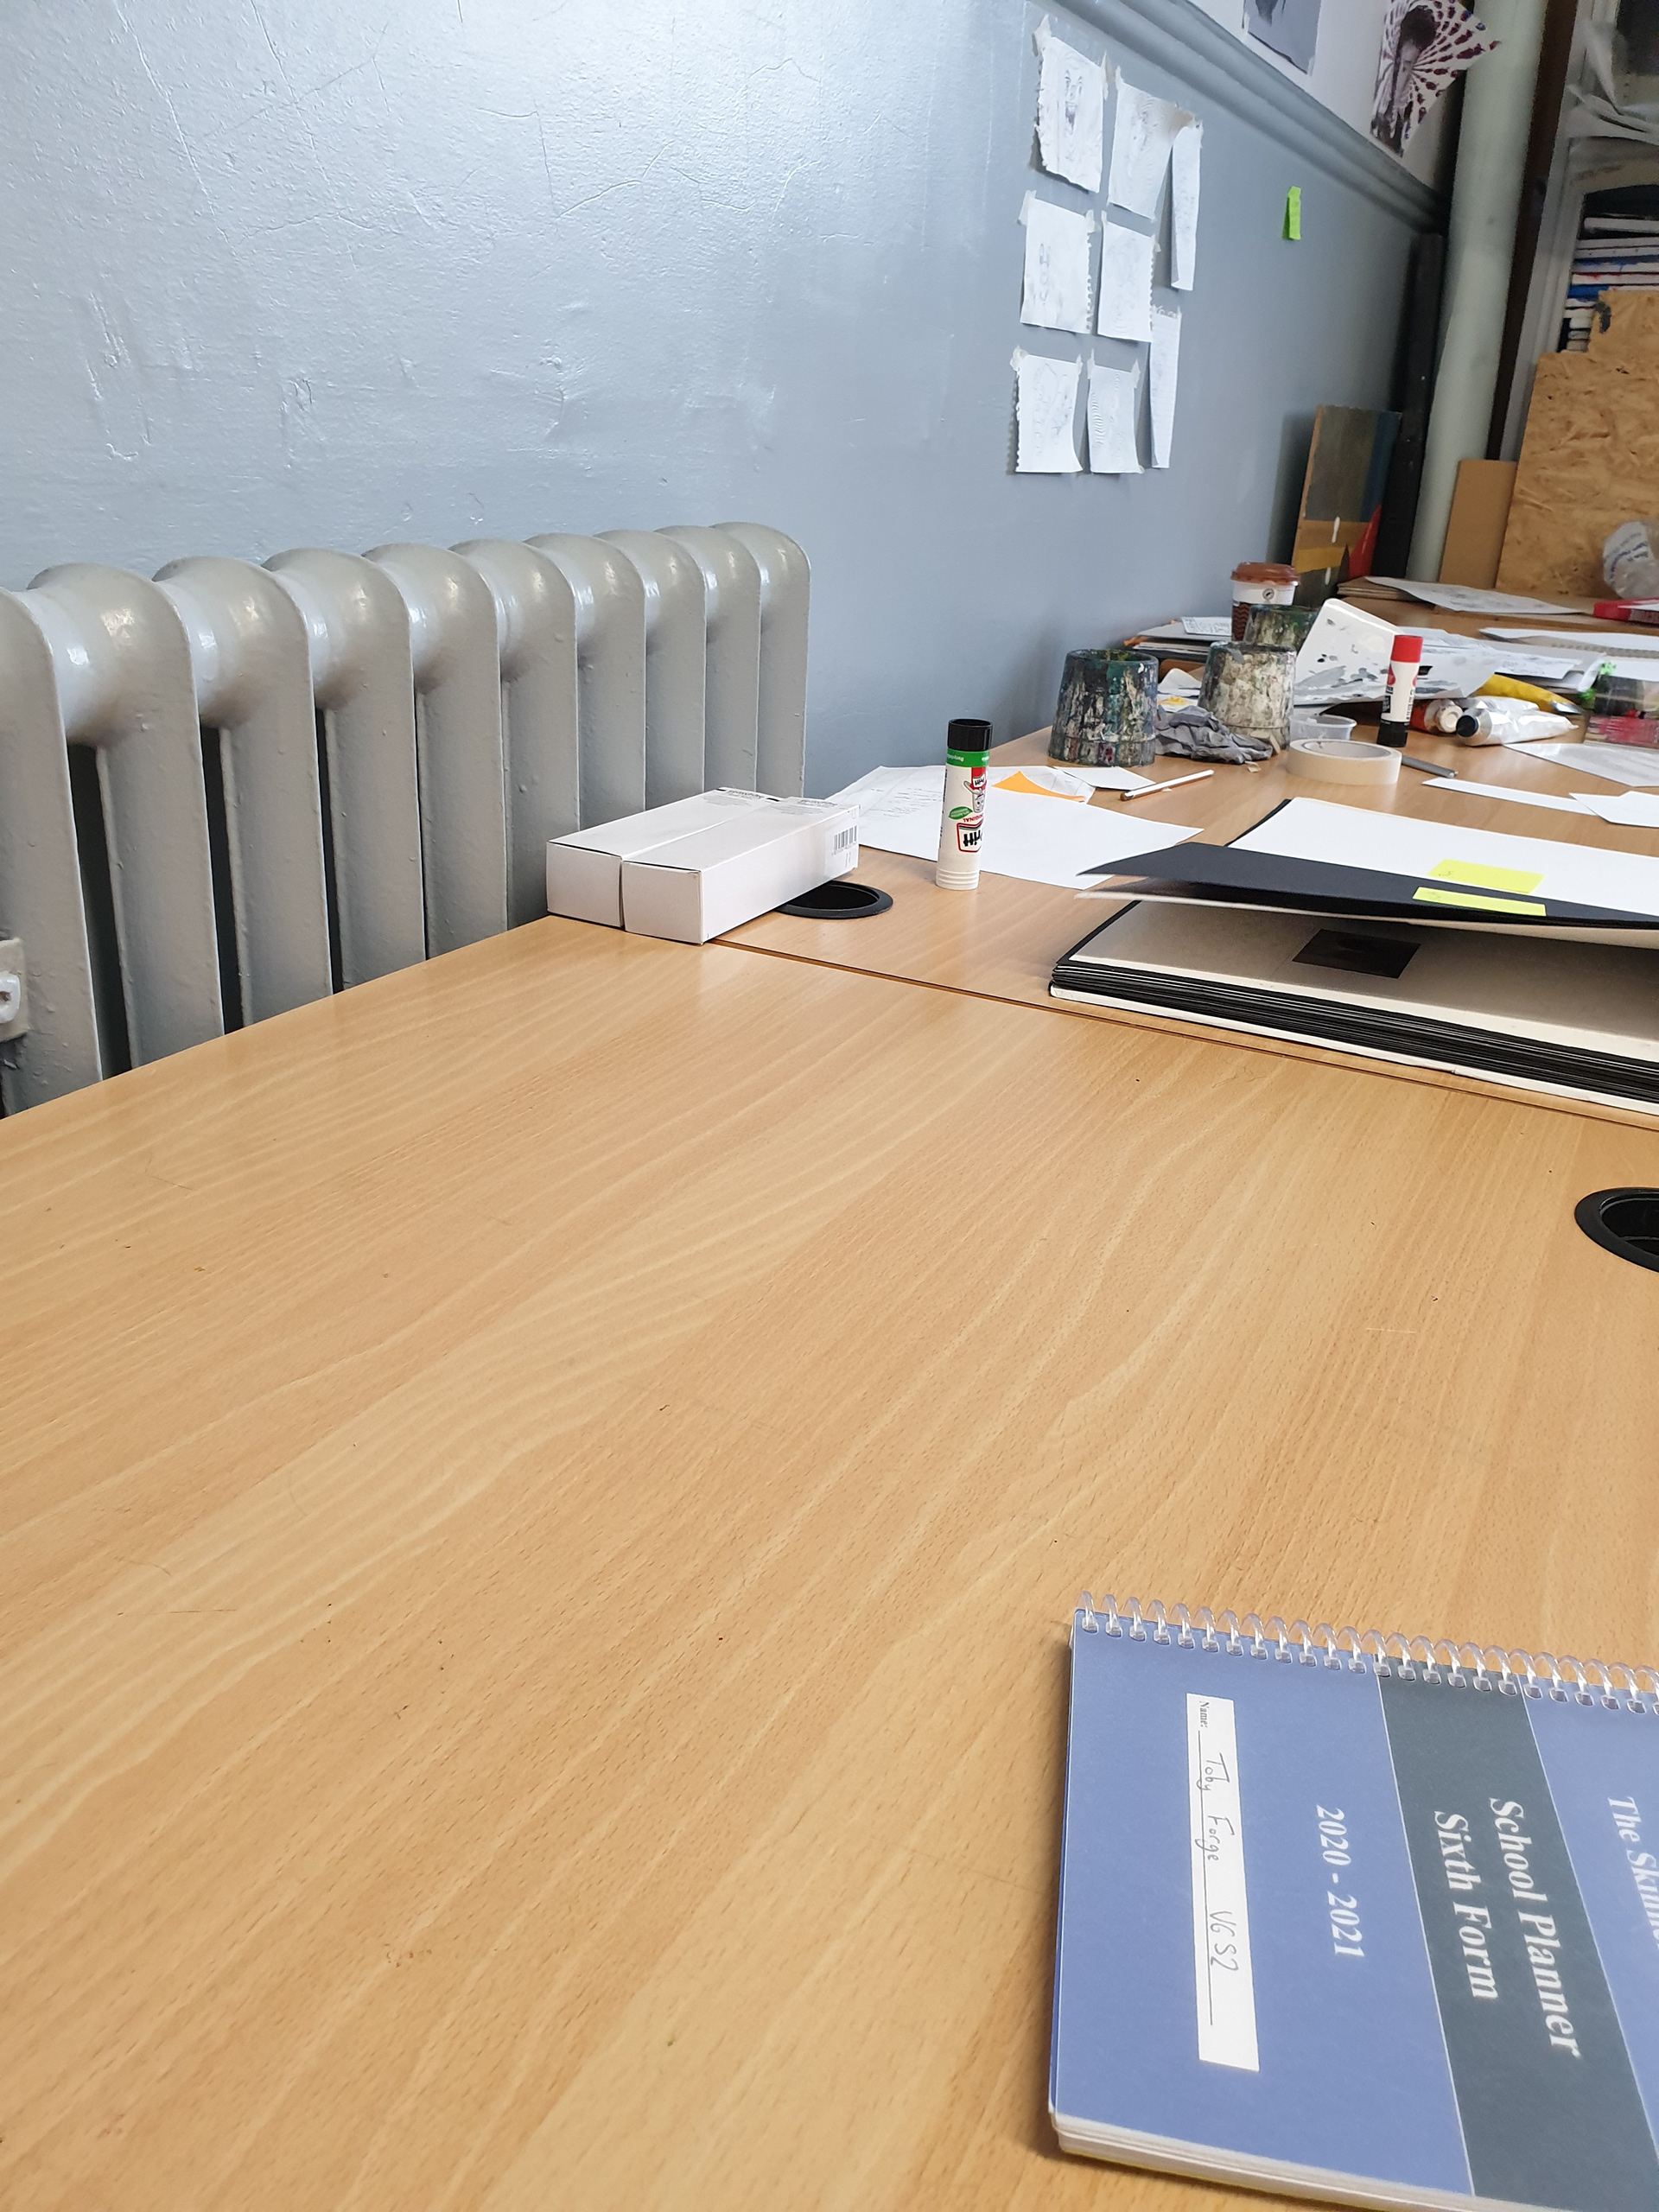
On the right is that image I took of my desk that I used for this piece.
Below is the view I see from the software as I create the piece. the shape of the plane is very distorted, the basic shape is a rectangle with the further edge stretched wider and lifted up to fit to the camera's width, to lift it up with the base plane staying flat I also had to add a cut across to pivot about, this is visible in the right most render at the top. To fix this problem which was mainly a shading problem causing the line to be visible I used the bevel tool to add more cuts that can then be curved out creating a smooth curve into the backing so the cut between horizontal and vertical is not as visible.
with the camera view I also matched it to the resolution and aspect ratio of my phone to make it easier to match the perspective.
An overview of the scene with all the objects, lights and the camera
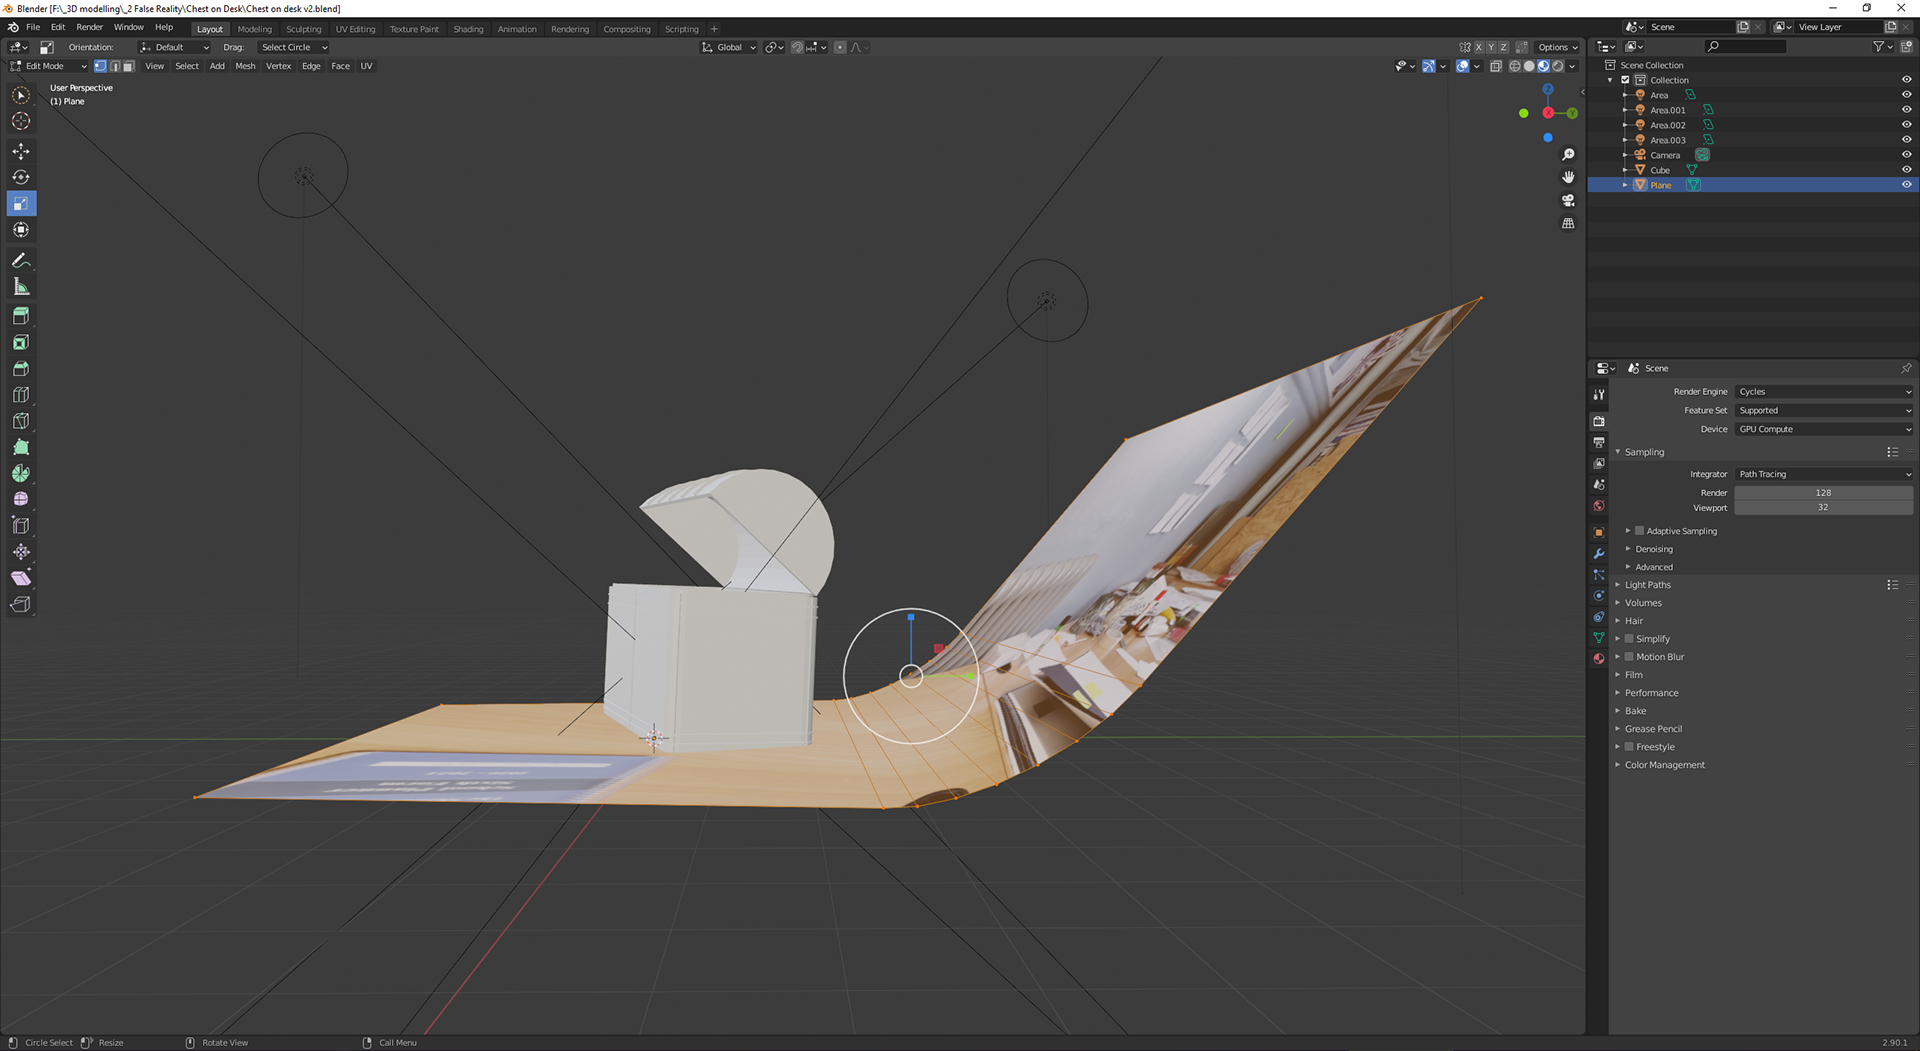
A side view showing the bent shaped required to match the prespective
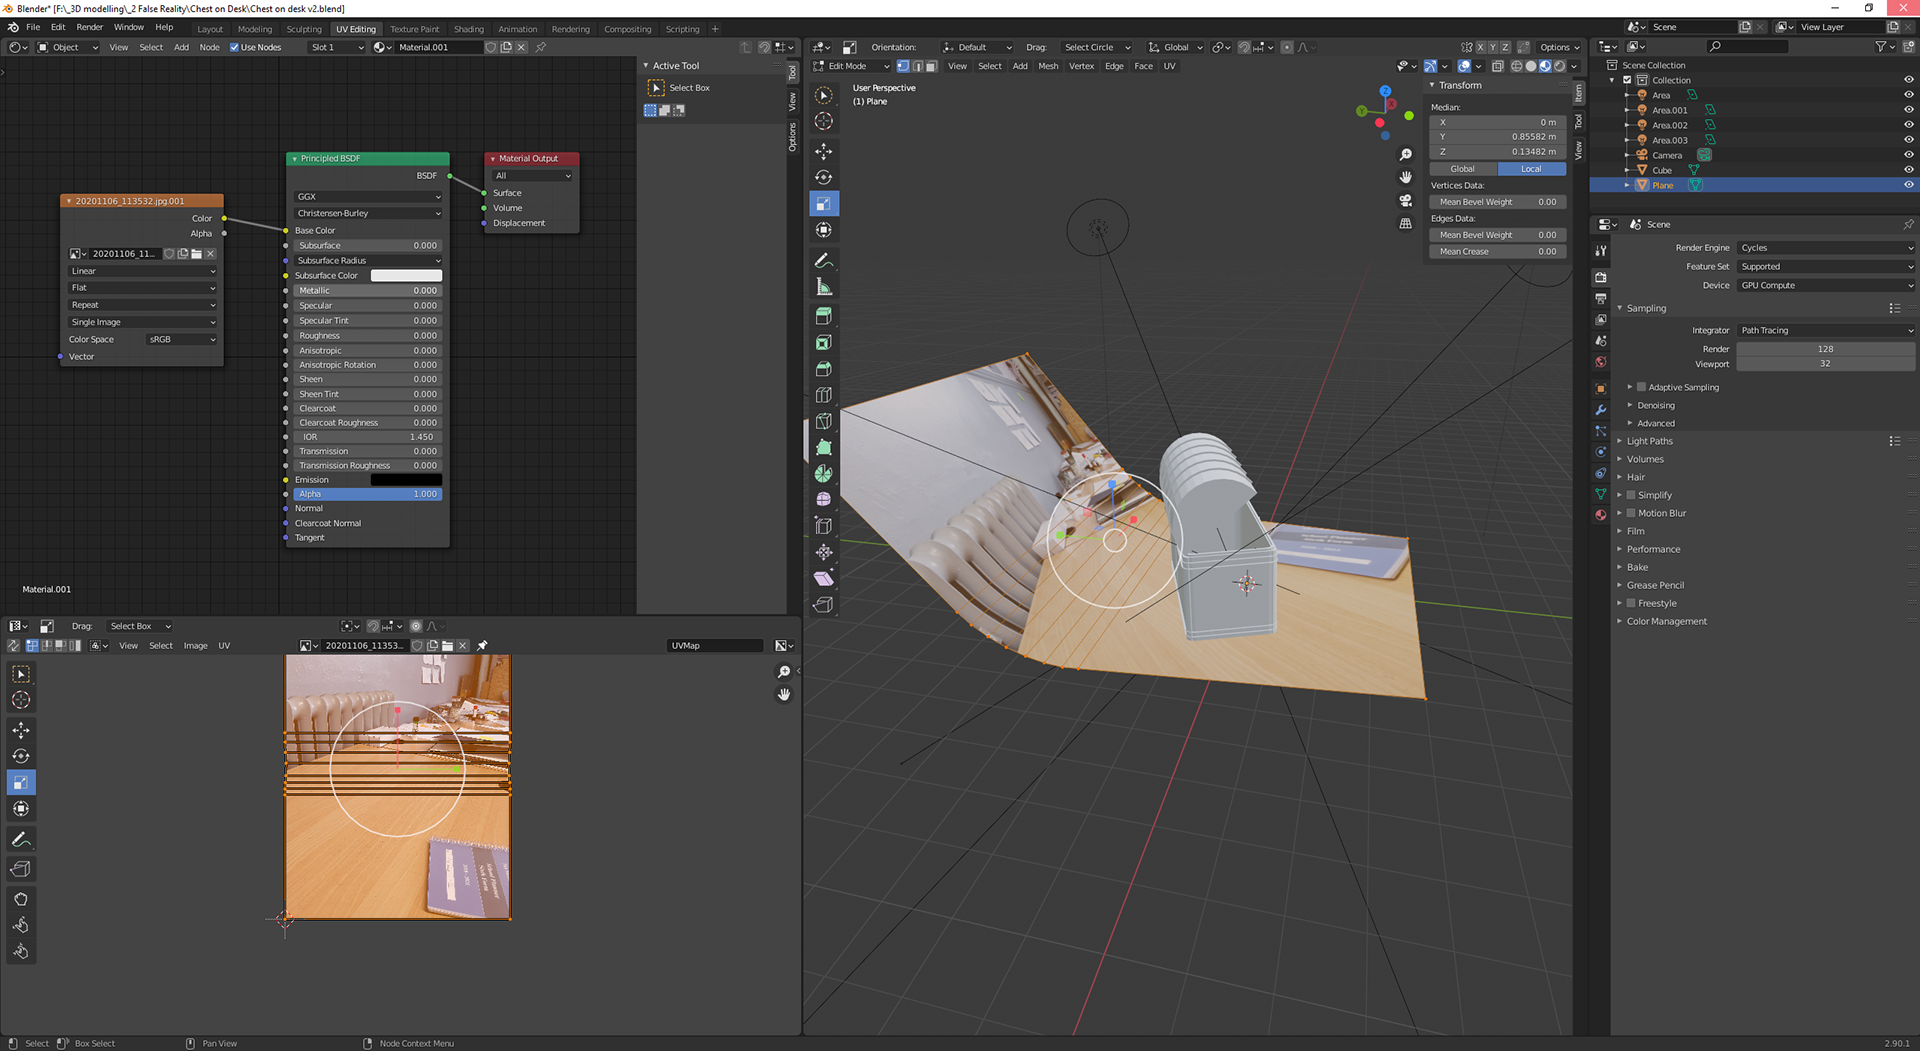
A view of the UV map screen showing how I map the image onto the plane
The view the camera sees (the square in the centre) zoomed out to see all the lights
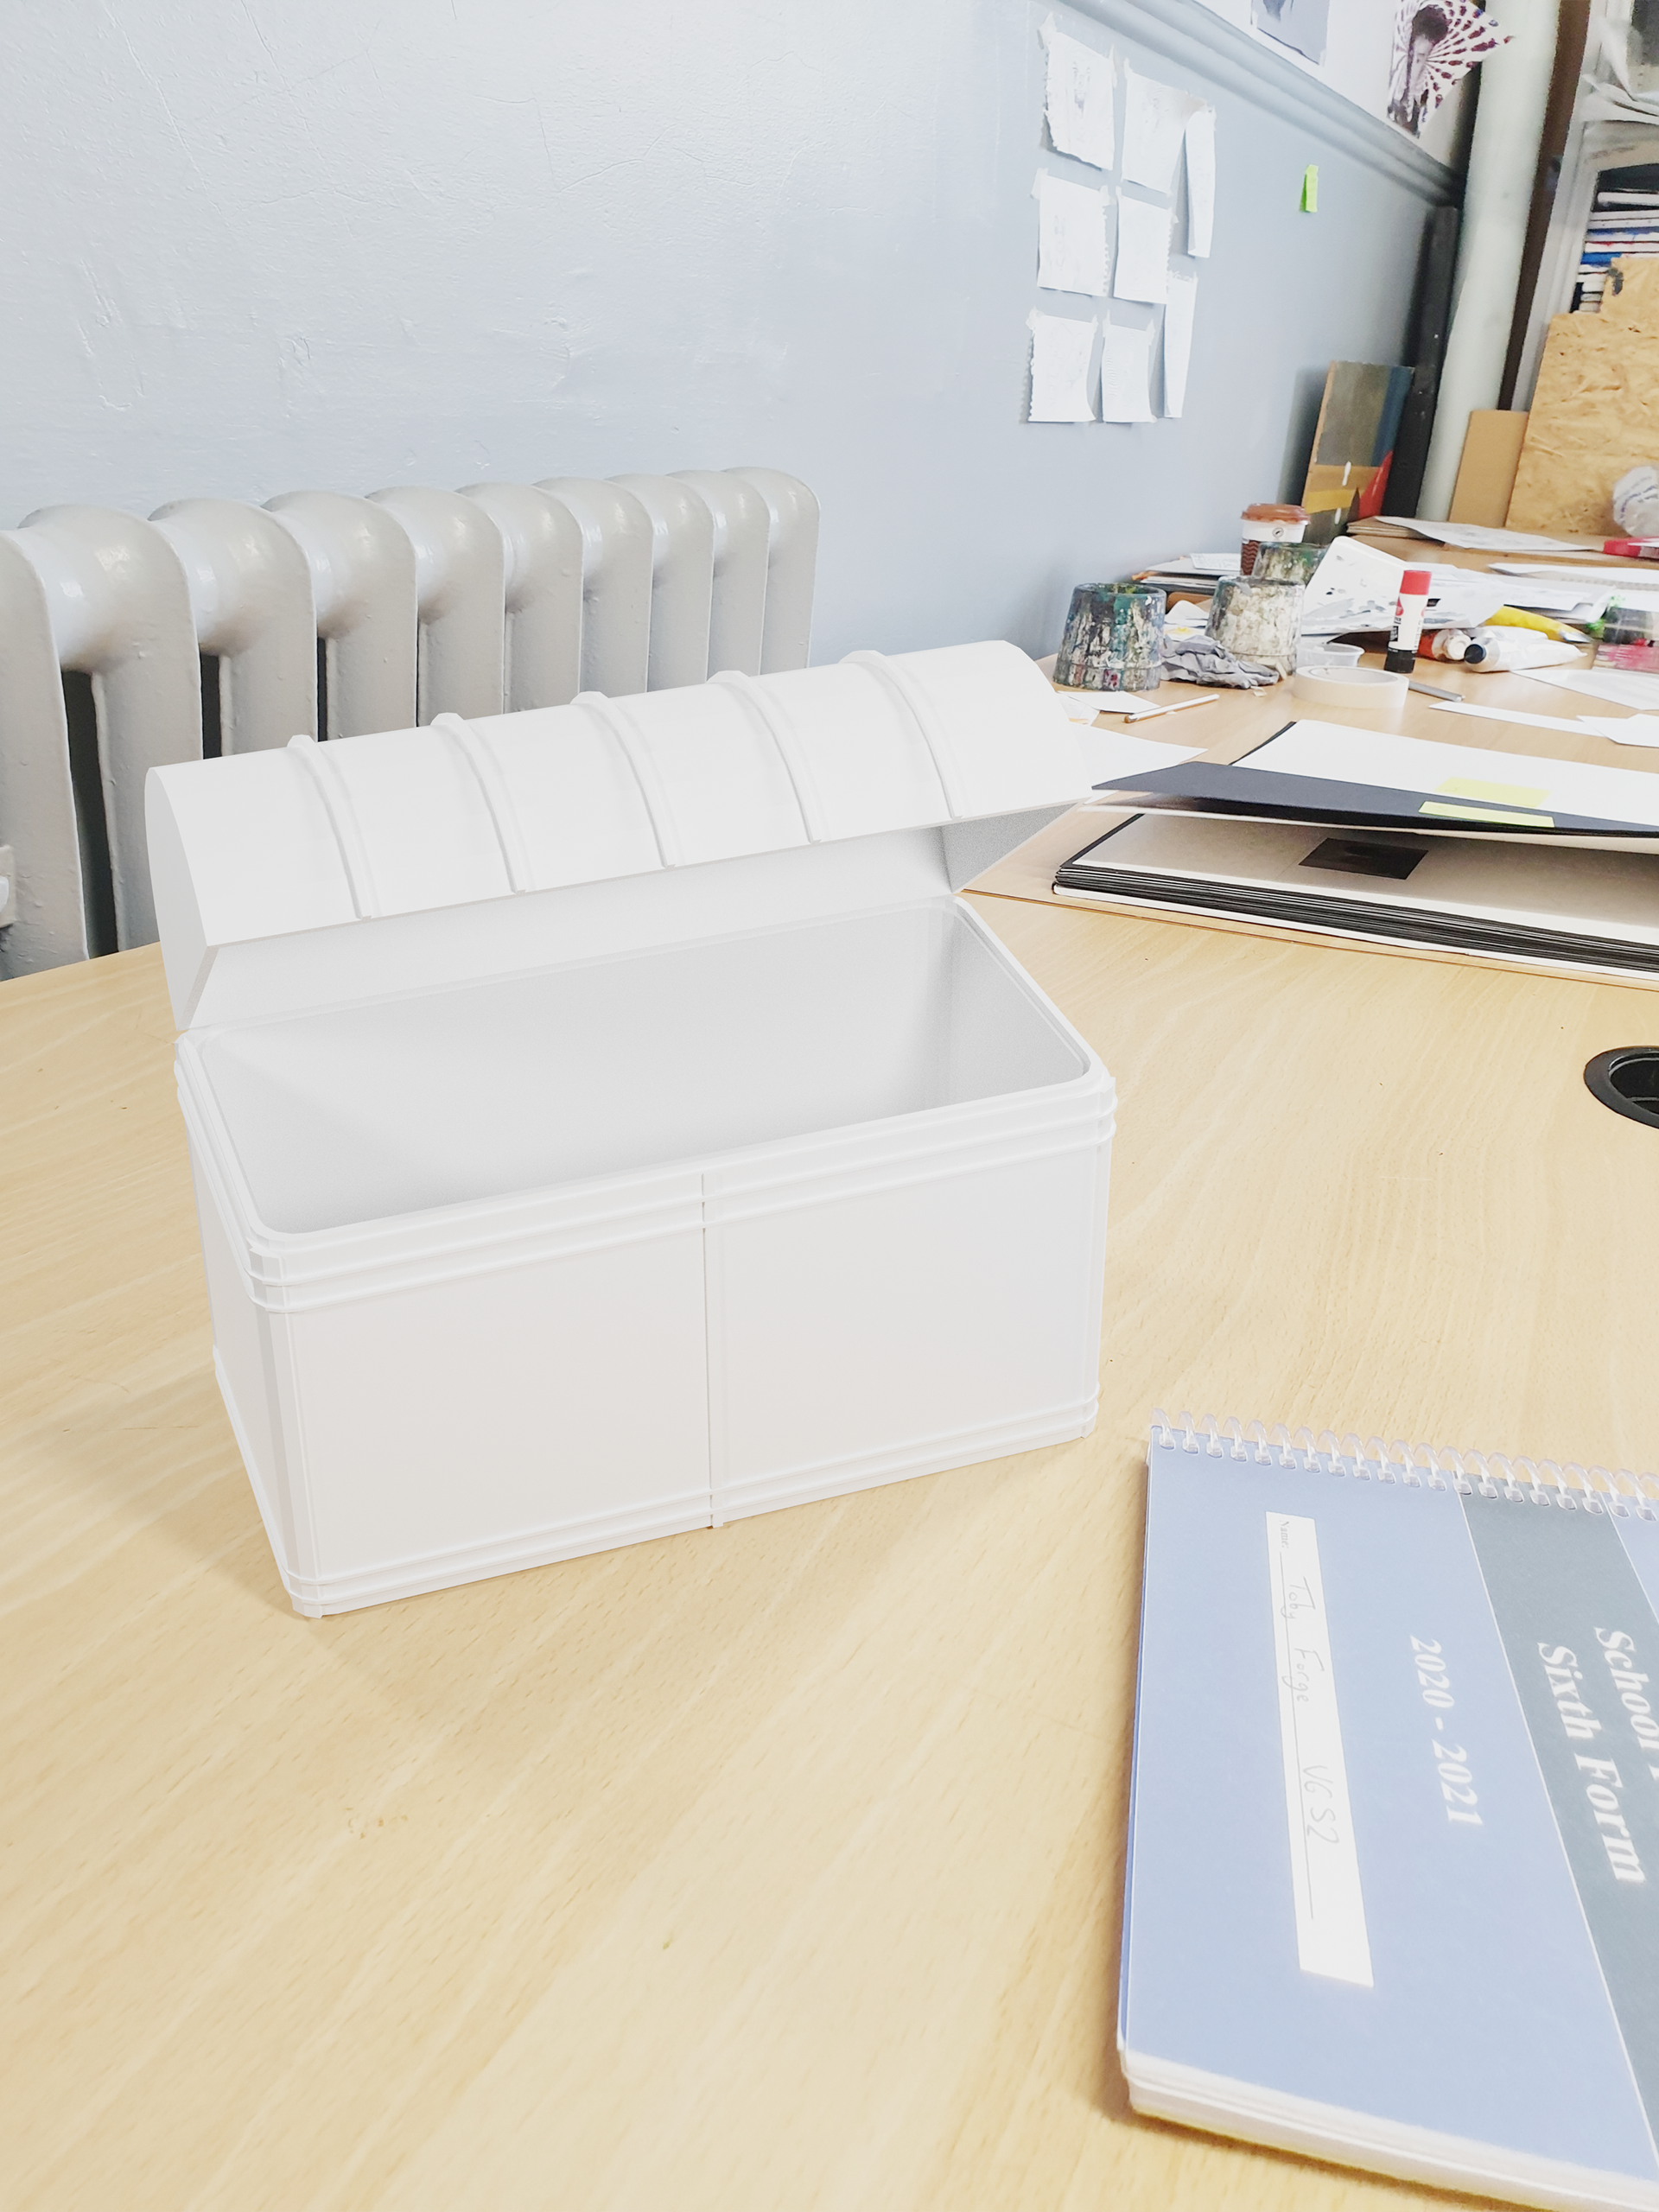
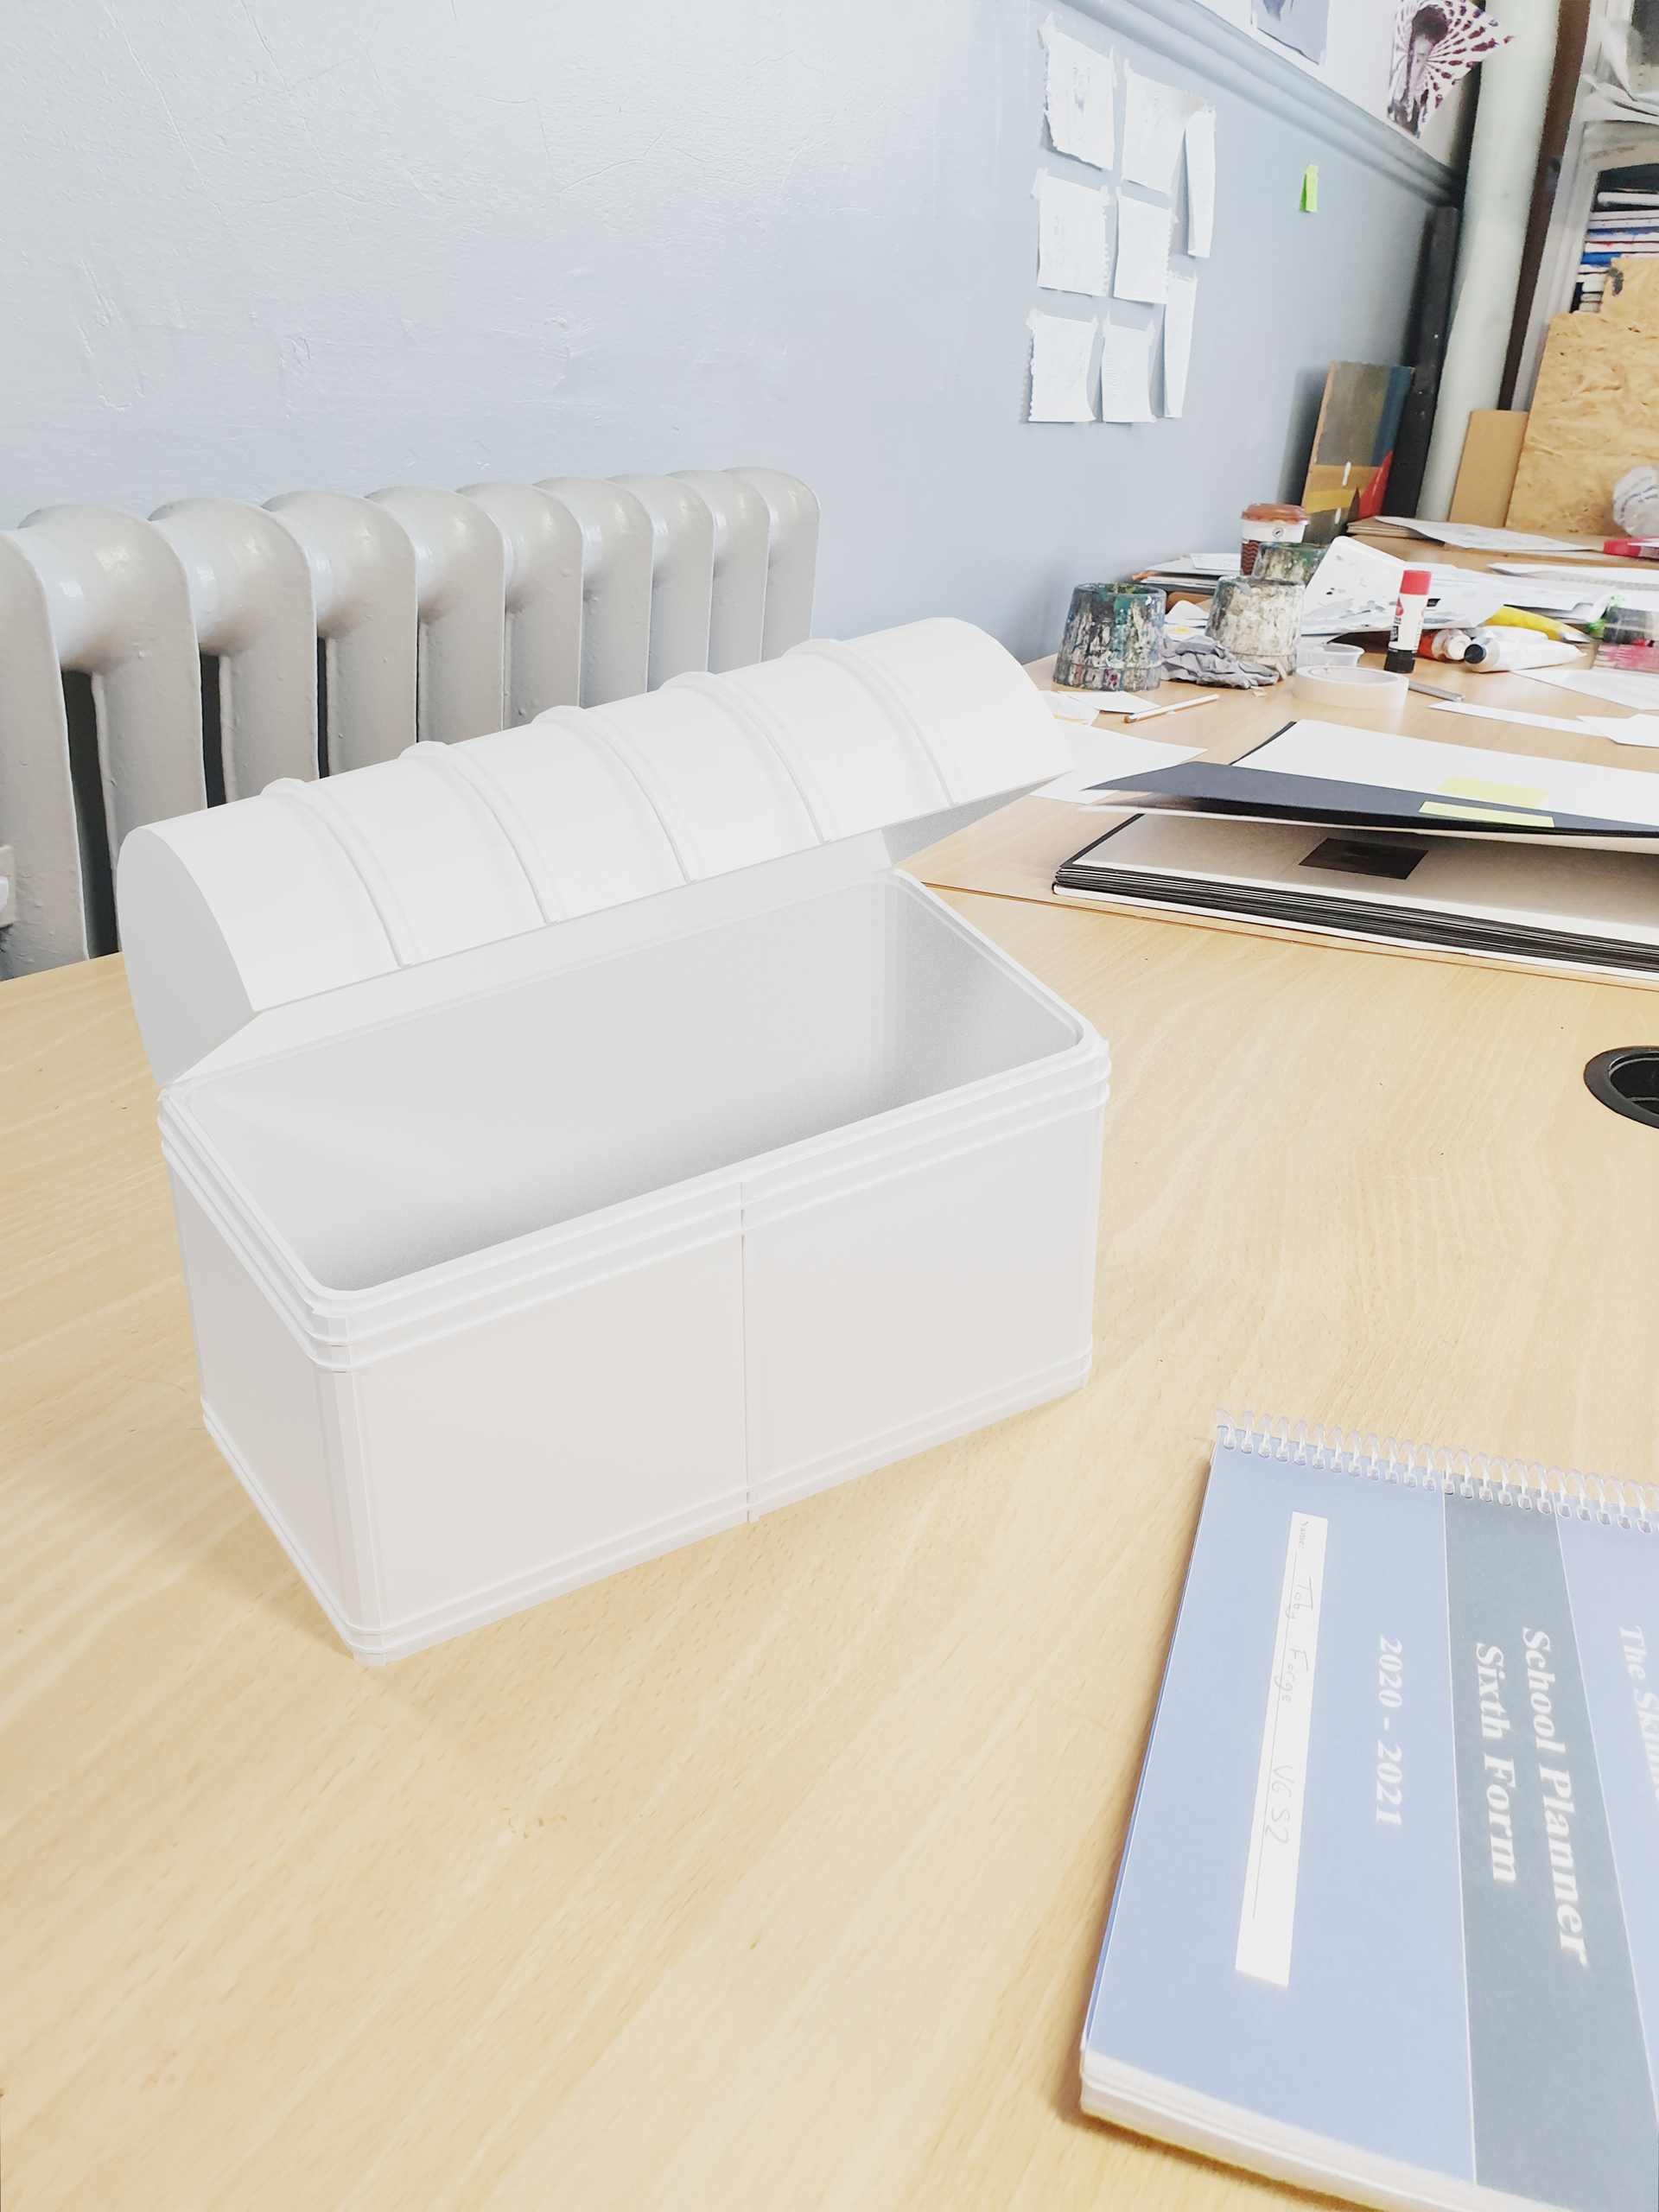
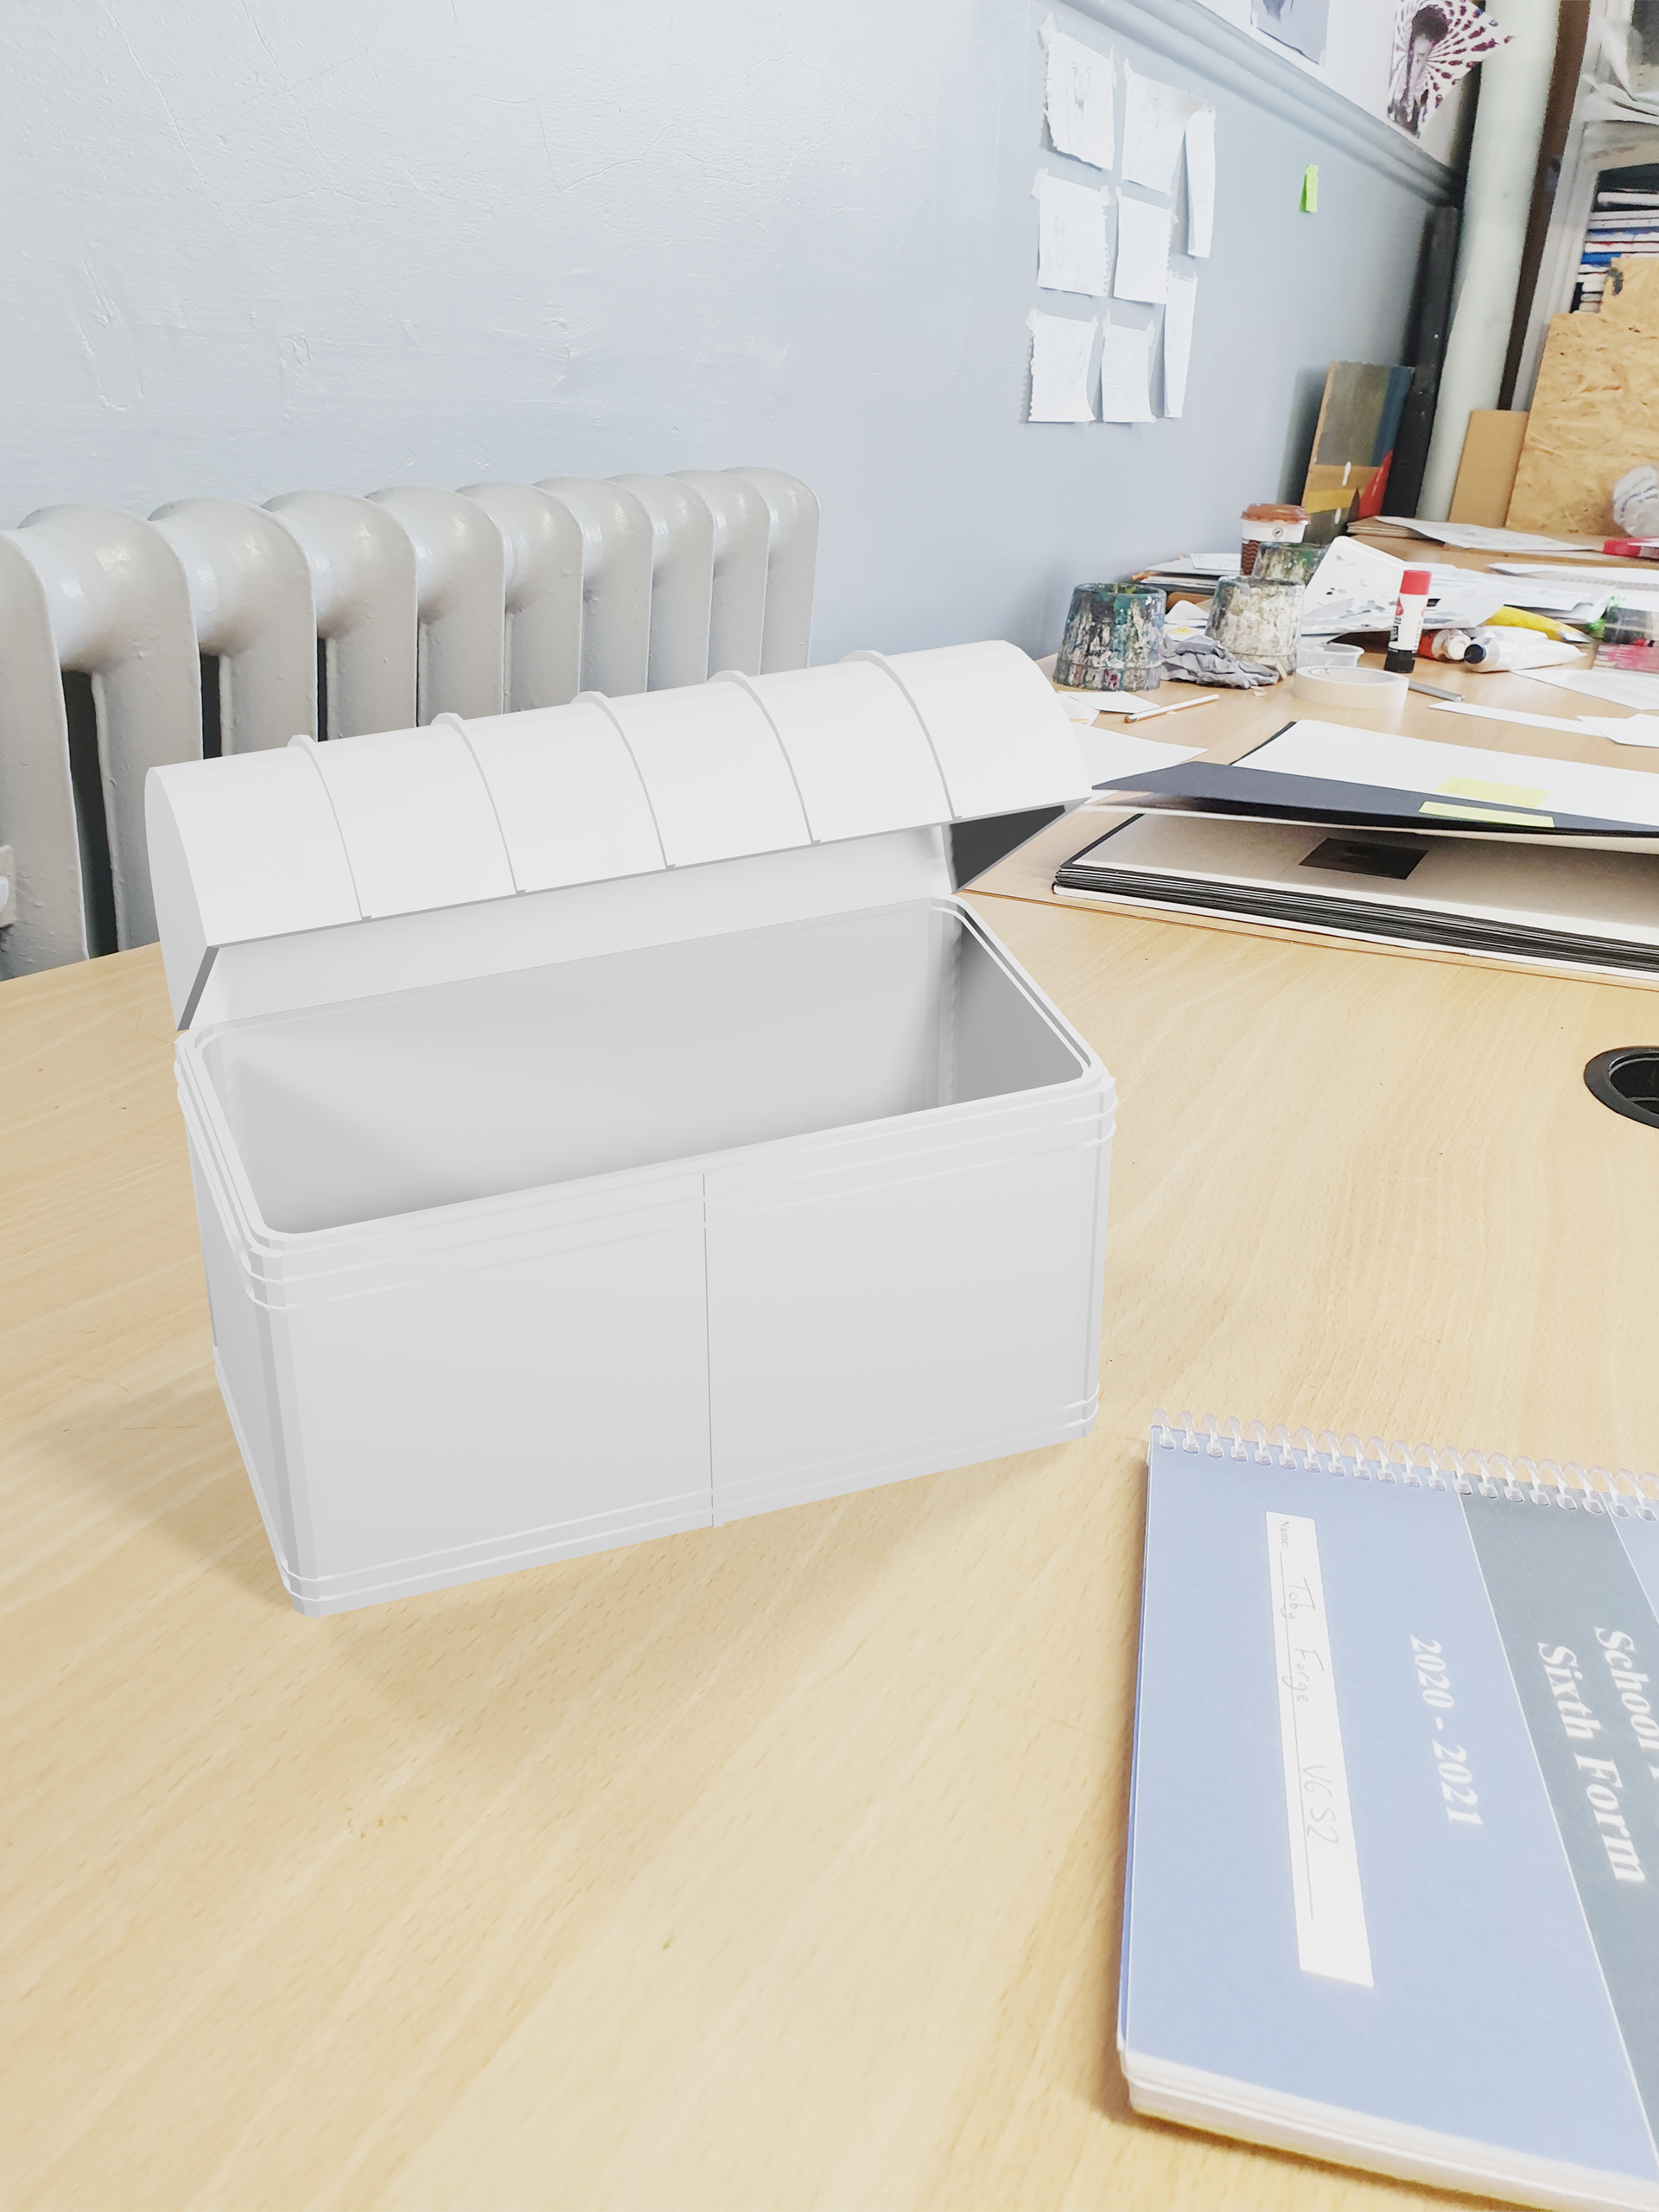
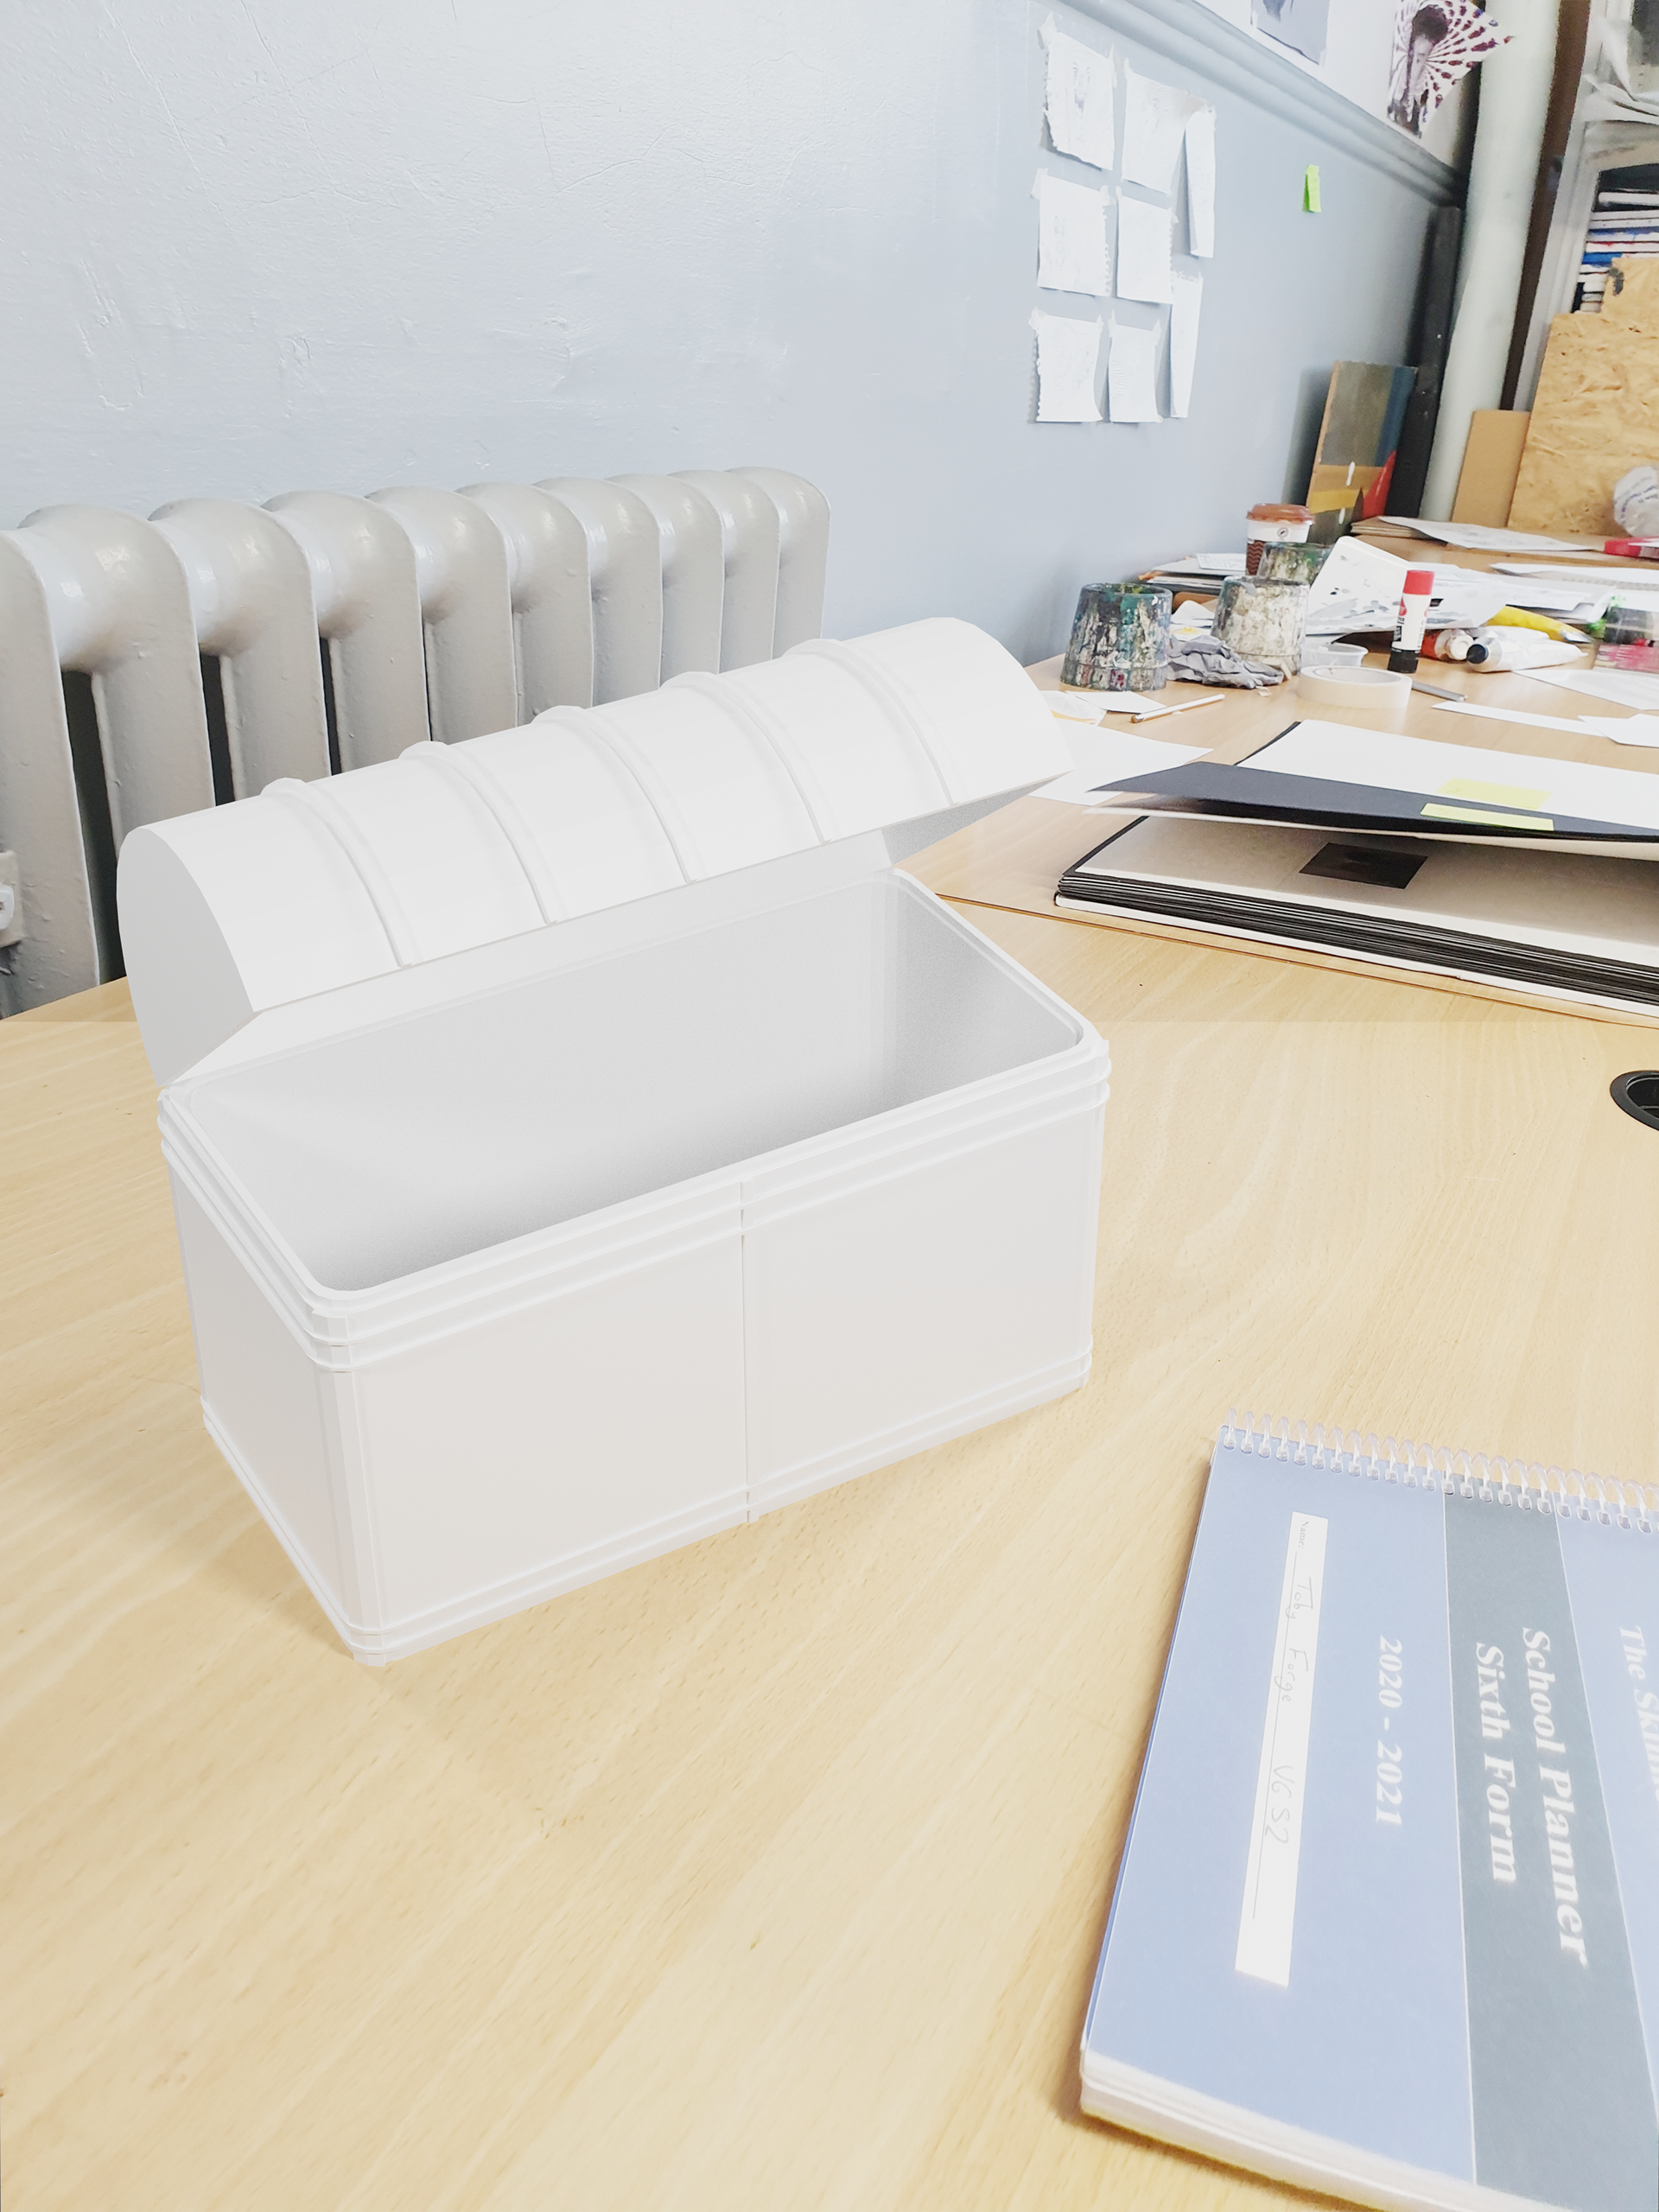
this Treasure chest that I used in this piece is one of my practice pieces which I created following this tutorial on the right, it was my first piece that I actually created using the best tools and an actual object. the objects I had created before this were just experiments using my own limited knowledge of blender and just trying to find my way through, as I can be quite stubborn with trying to do it myself. However, this tutorial was incredibly helpful with teaching me the basics of blender and what the most common tools can do that are given to you.
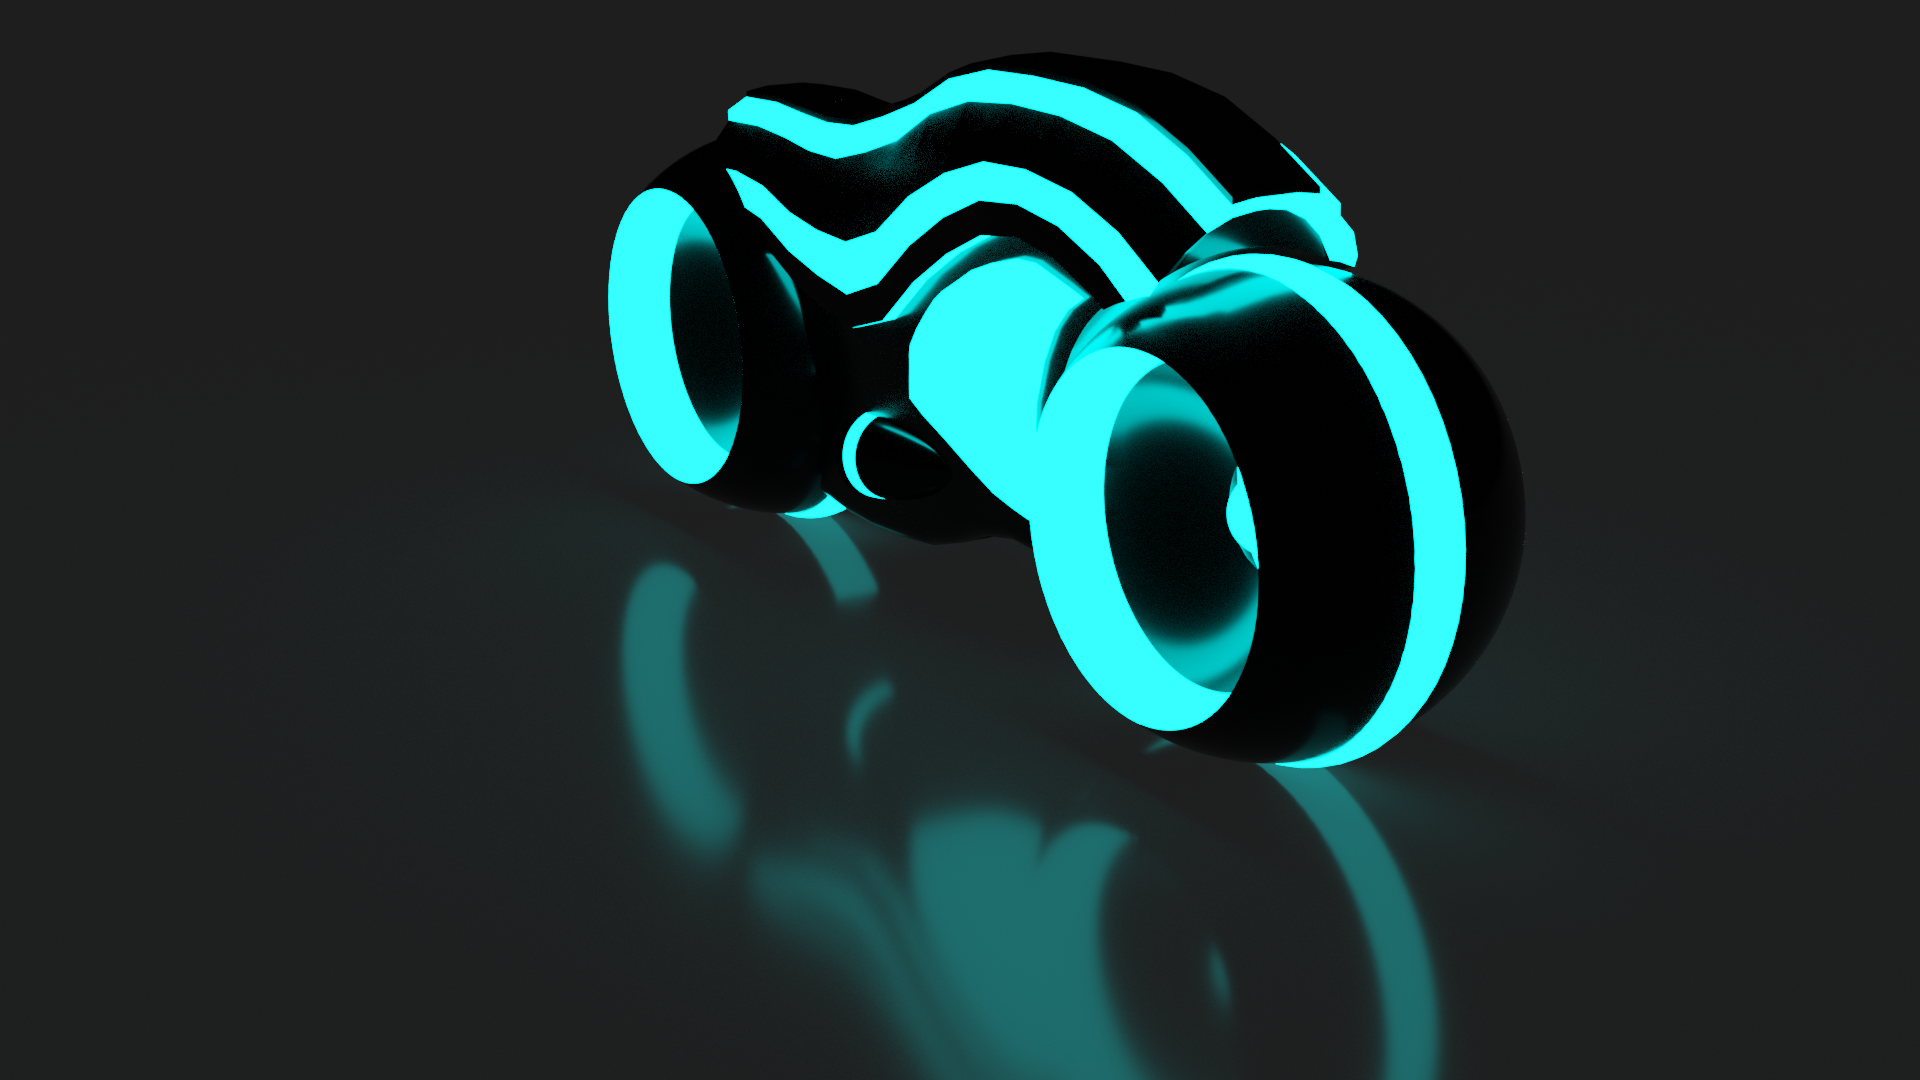
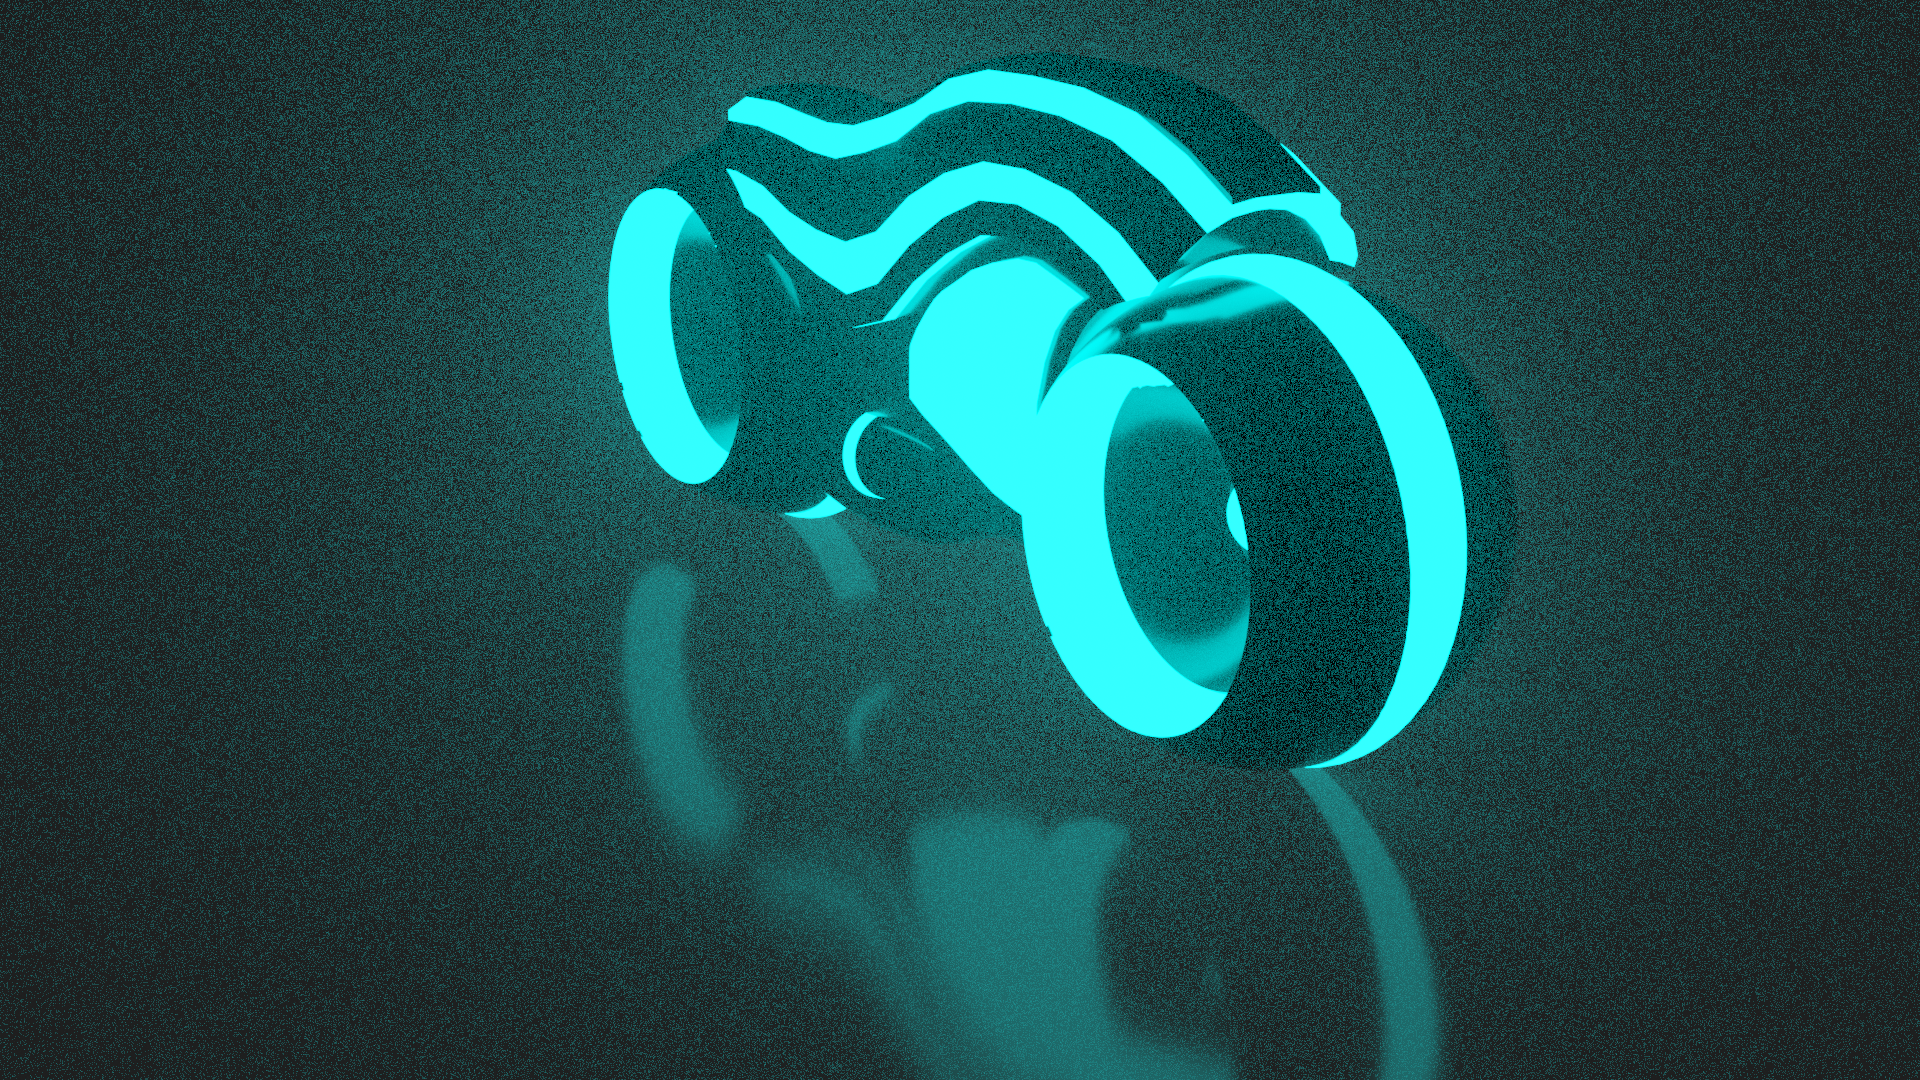
My final model with the correct lighting on the bike itself
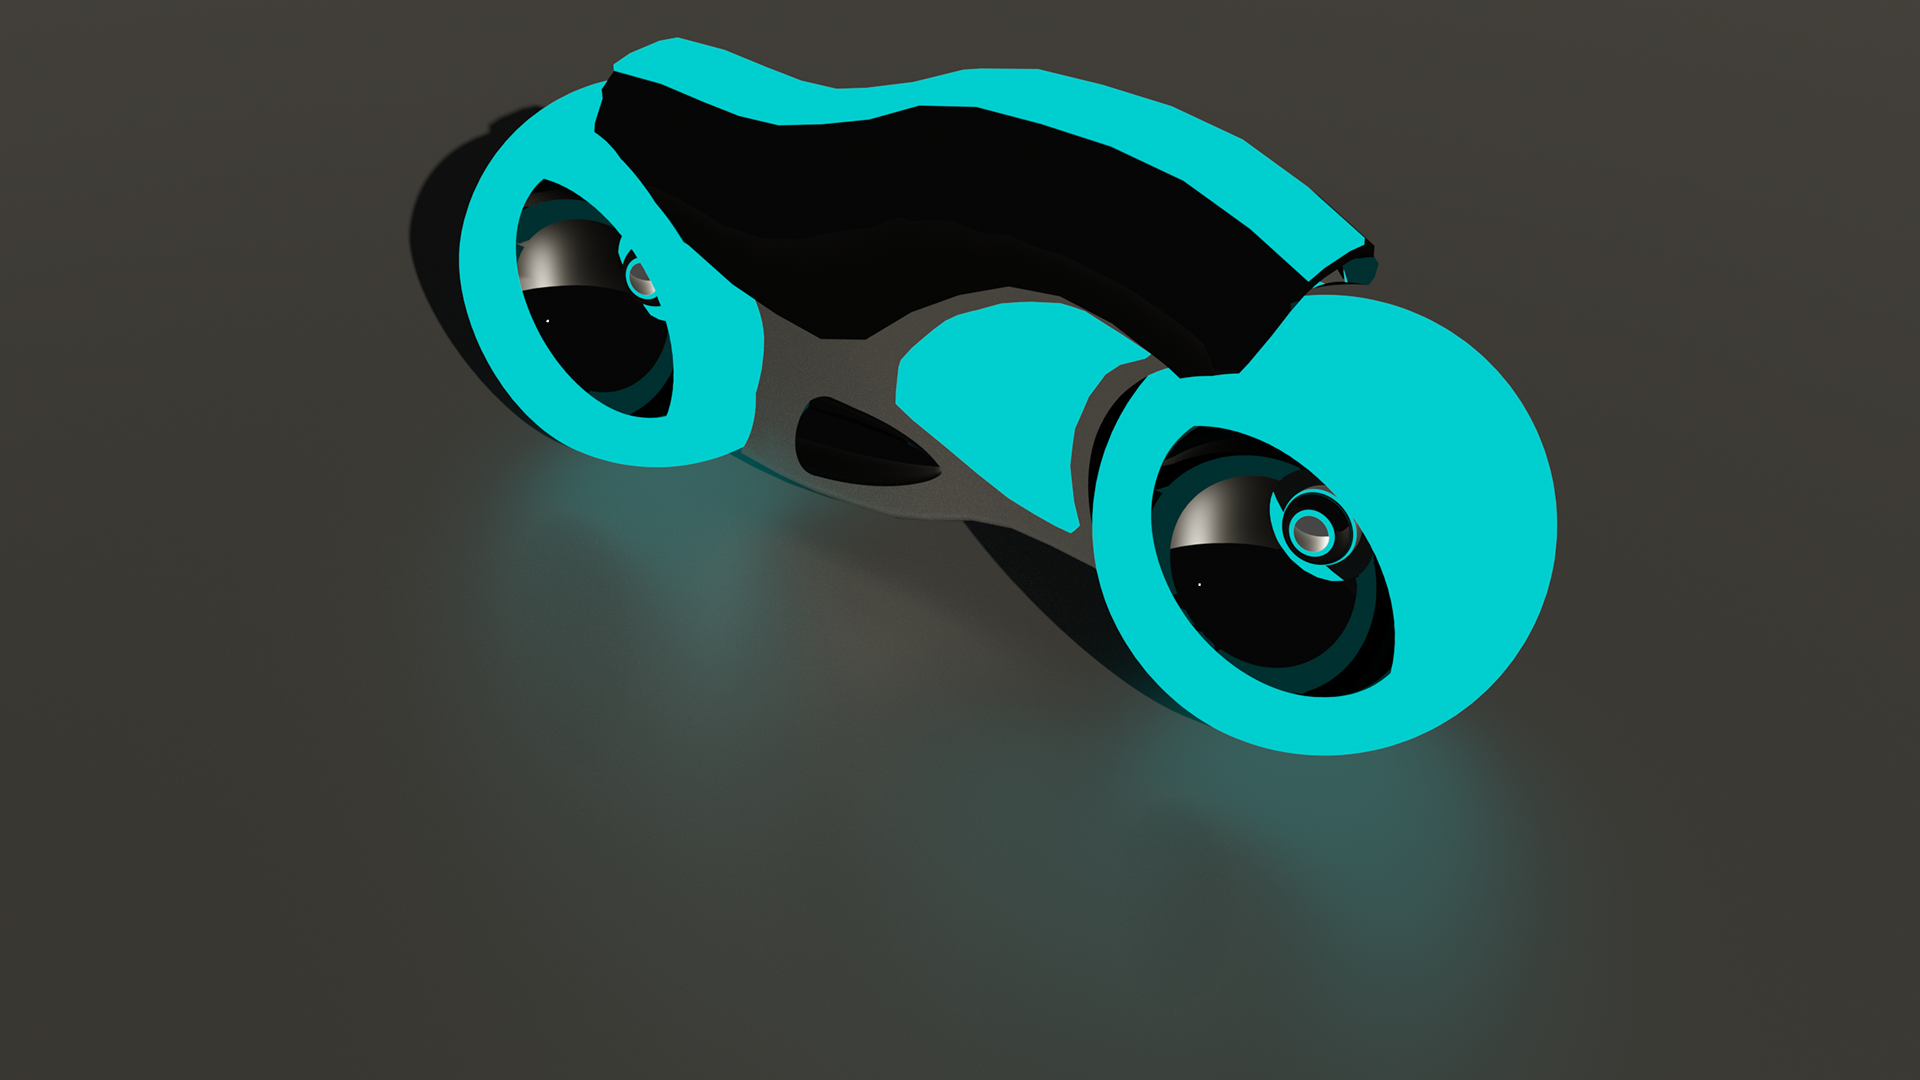
One of the versions I started with, made with a different layout of materials and different rendering engine
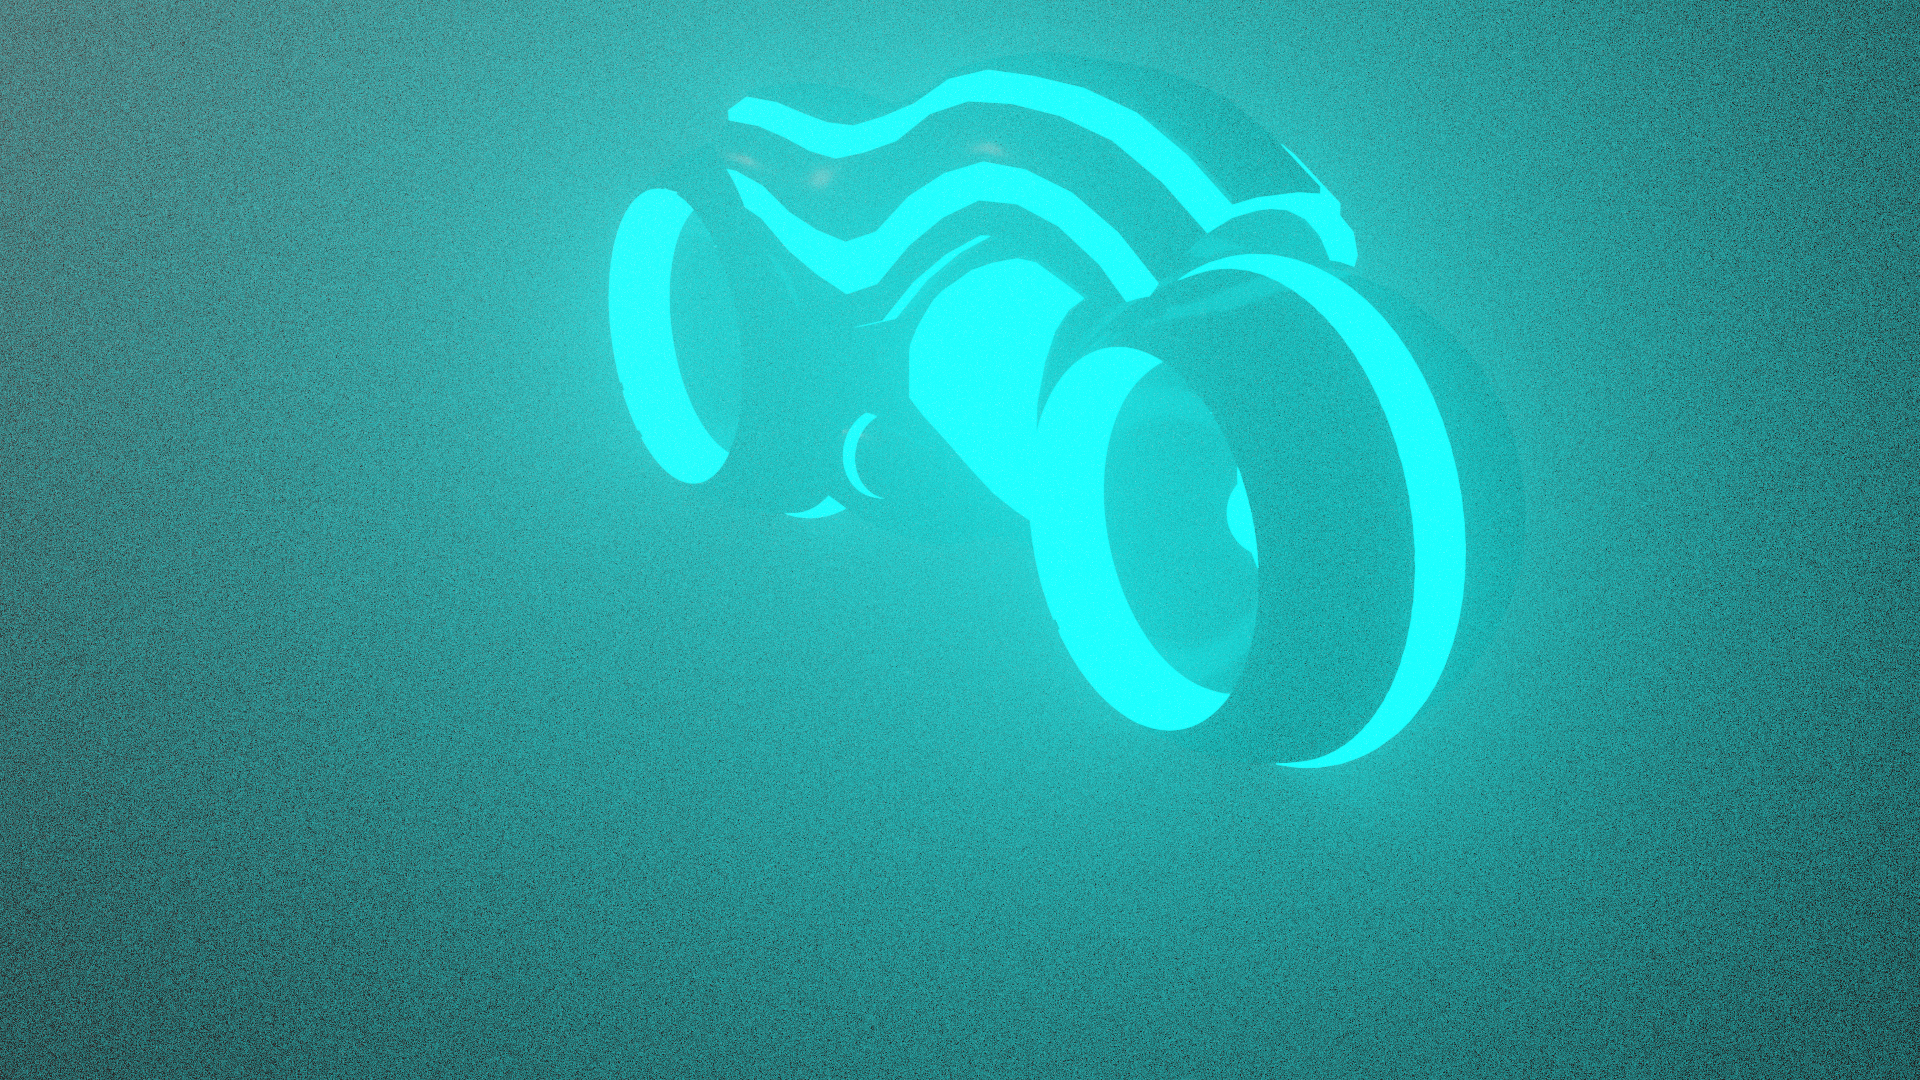
The volumetric lighting does not work with this model as the light is not direct enough and spreads in all directions
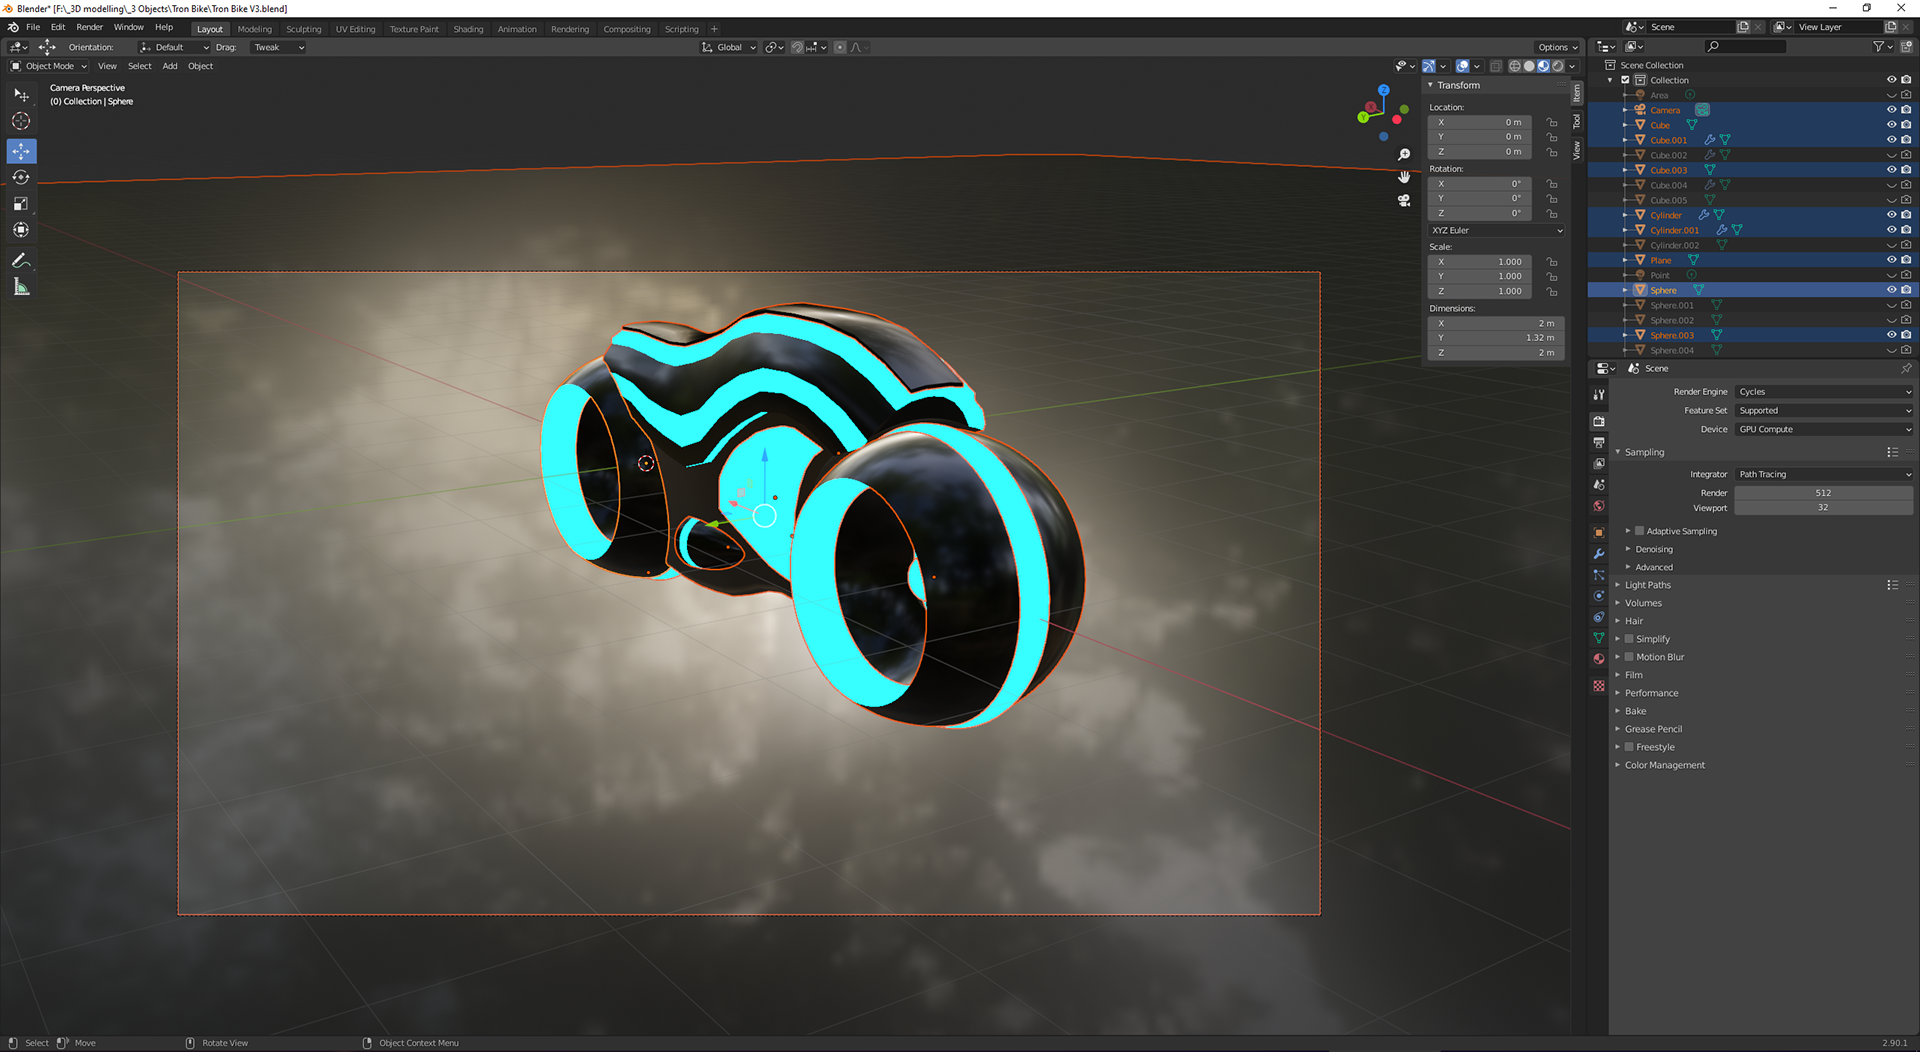
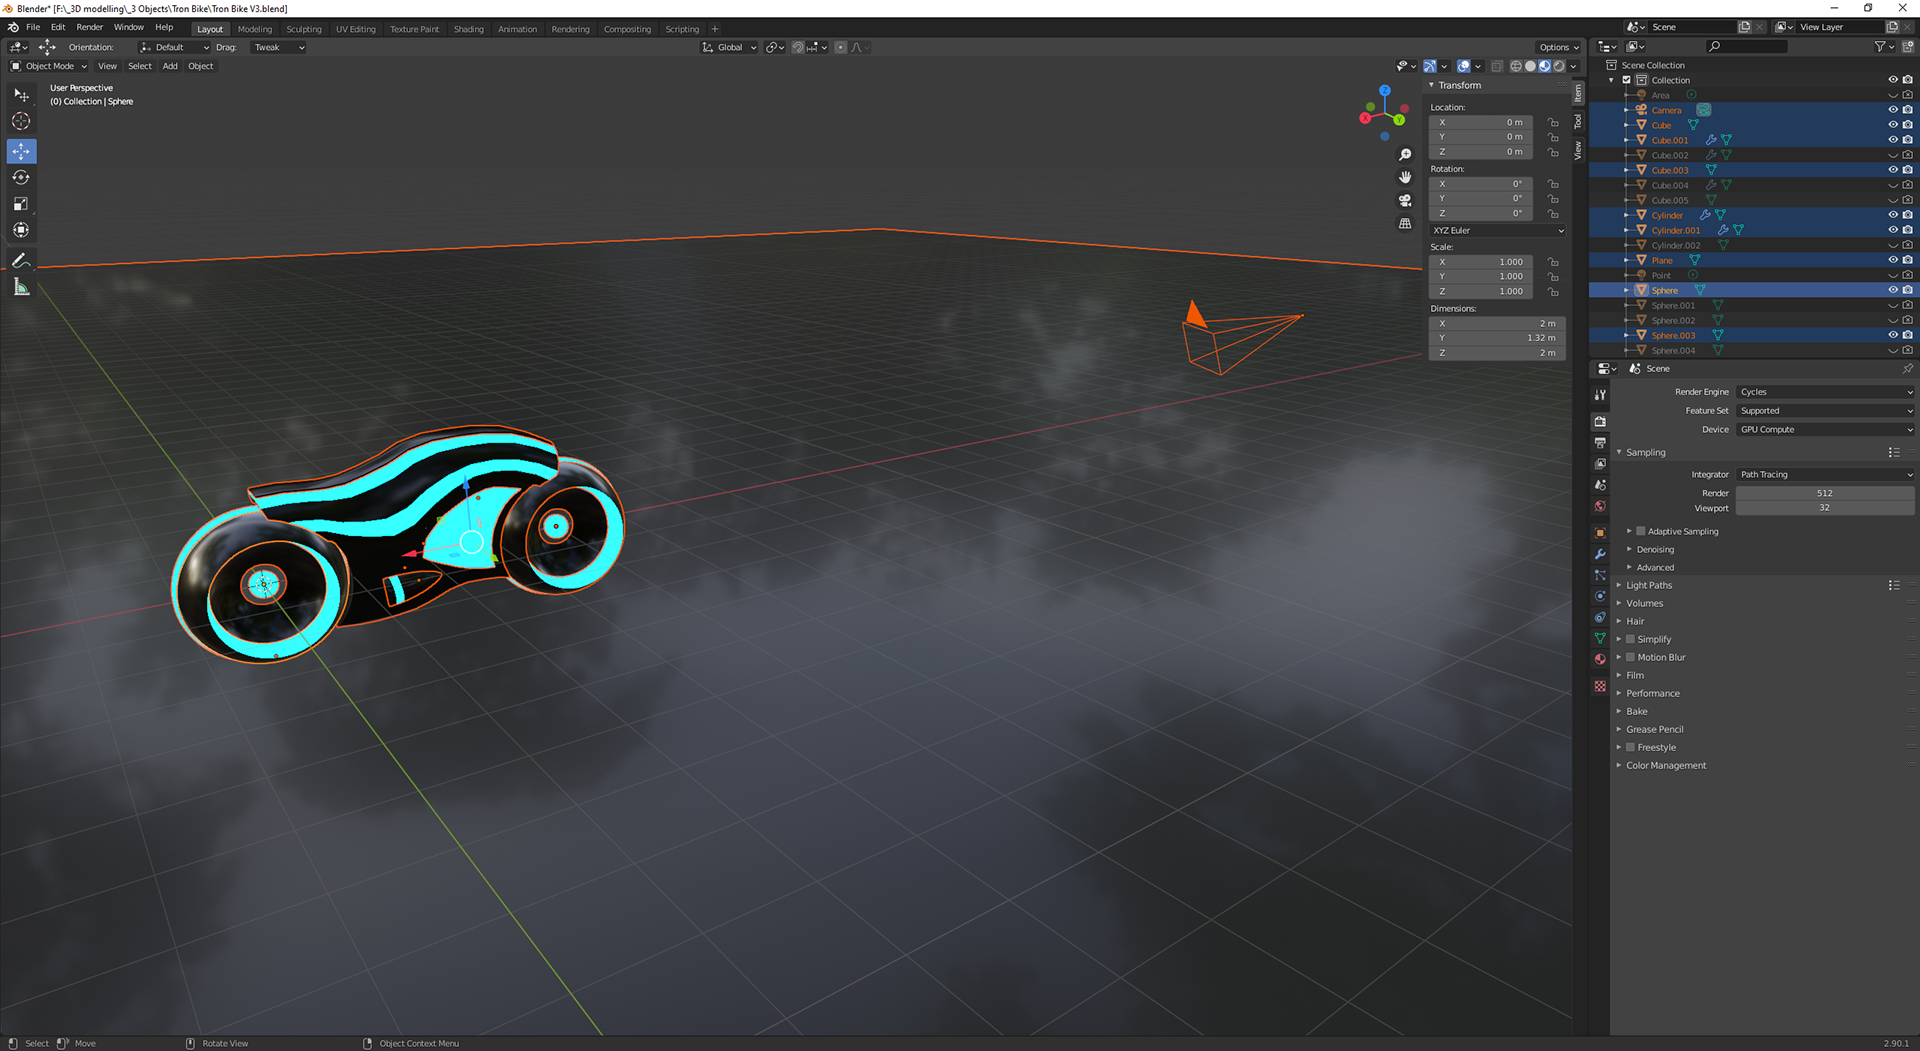

These are screenshots of blender, the same software used above with the bullet.
the top left is the view of the bike from the camera's perspective, the same in the renders above, but it is viewed in a material preview mode, so it will only give show how the material would reflect, and its roughness, not how light interacts with it.
In the top right it shows the bike with the camera floating on the side (the rectangle with the corners going to a point), that is what i position to get the angle of the bike in the renders.
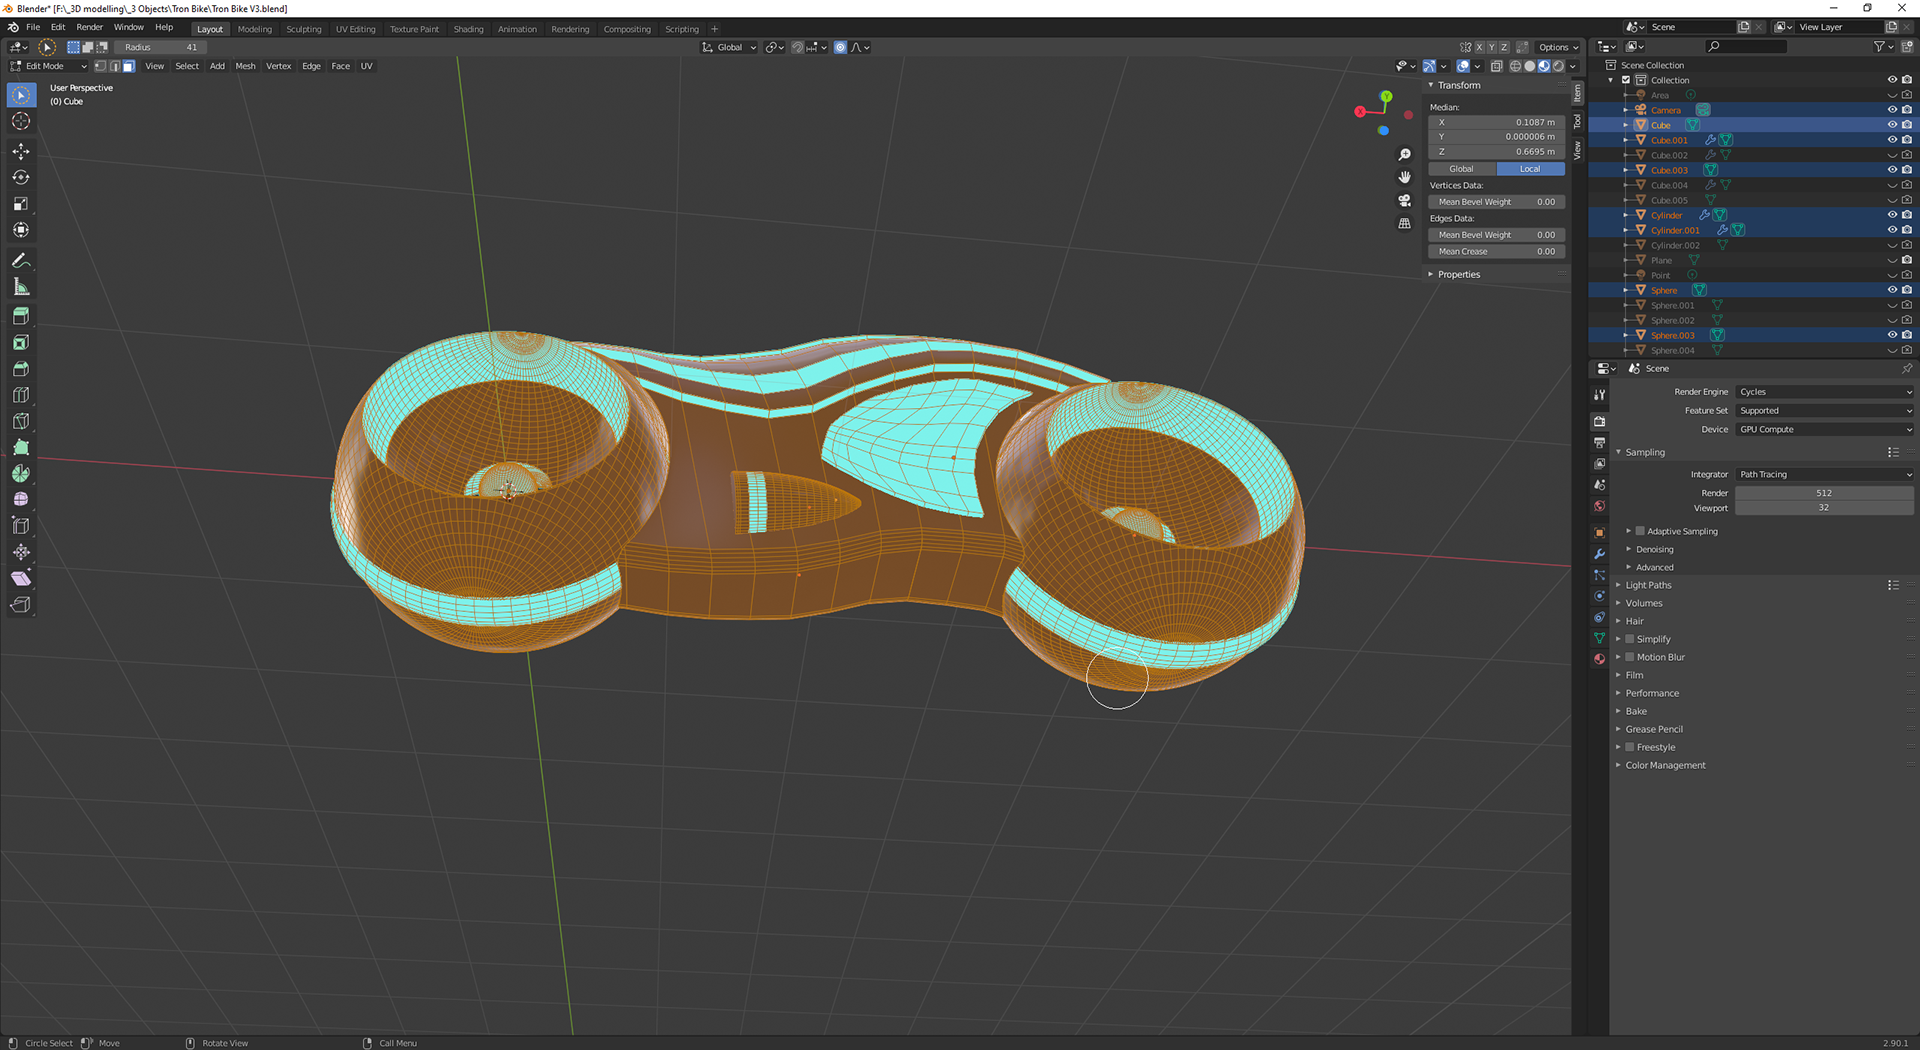
the other two renders are different angles of the edit mode, which shows all of the polygons and faces that make up all of the pieces to the object.
the wheels are made up of spheres that I have then applied a boolean operator to carve a sphere out of each side to produce what it is there, with a small sphere in the centre. The glowing section in the centre of the body is a cube that i have stretched and moved all the edges to wrap around the wheel and the top of the body; if I were to do it again I would start with a higher subdivided object (more separate polygons and independent edges) so it has a smoother edge, the same with the body so it is smoother and gets rid of that sharp edge in the material and when viewed from certain angles. the body its self is also a cube that has been subdivided multiple times and then morphed into its current shape, to add to it I also did another boolean modifier of a larger sphere than the wheel to have it curve around the wheel properly, the top of the bike that extends out a bit is also done by using an extrusion tool to pull out the faces further creating a lip and adding the affect of a top to the bike. The only other thing that makes up the bike is the "exhaust" in the middle bottom, I created this by using a cylinder that I have then added a beveled edge to curve it round created the tapered bullet nose shape.
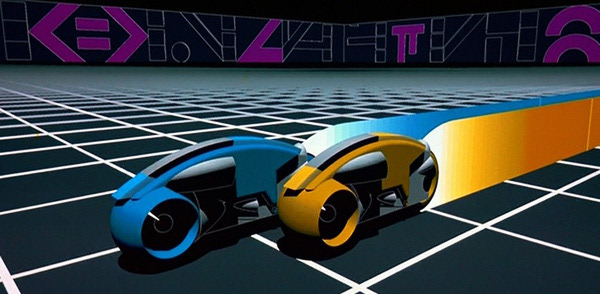
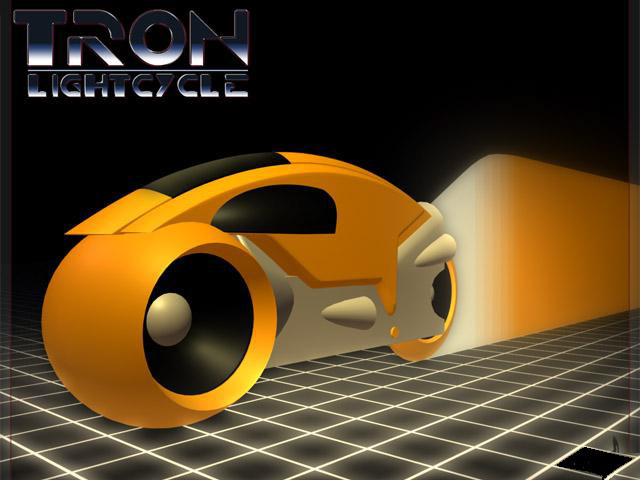
Producing this object was an entirely new skill to me with the little practice I'd had from the few other projects I did before, however one reason I had chosen this light cycle was inspiration from a YouTube video I'd watched about the original "Tron" film from 1982, which was a time where there was no CGI and all of the "cgi" in the film was done through using primitives (the basic shapes for 3D modelling, e.g. cube, cone, Taurus, sphere, etc.), mapping all of there locations and movements with mathematical notation and coordinates; this inspired me as it showed that they were really made up of the simplest shapes and I thought it was a good place to start. by the end it definitely wasn't made up of primitives anymore, many more shapes had been added through beveling, extruding and use of boolean modifiers, however it created a light cycle that I was proud of and my own creation, not a perfect replica from the film.