This is a follow on and expansion from the previous page (Realigning focus) where at the end I briefly mentioned Andrew Price and the tutorial and piece I plan to expand on. In this page I will expand further on that piece and some of his other pieces.
Andrew Price, also known as Blender Guru is a 3D Modelling artist who specialises in Blender (the tool I use for 3D modelling). He publishes a lot of his work on his YouTube channel where he posts tutorial form videos instructing people how to create beautiful digital pieces. AS he is a tutorial style channel he creates a huge range of pieces that all vary drastically in style and theme. However he has created some pieces which I think relate well to my theme but also incredibly helpful for direct input on techniques that I can use in all of my pieces as he is using the same software.
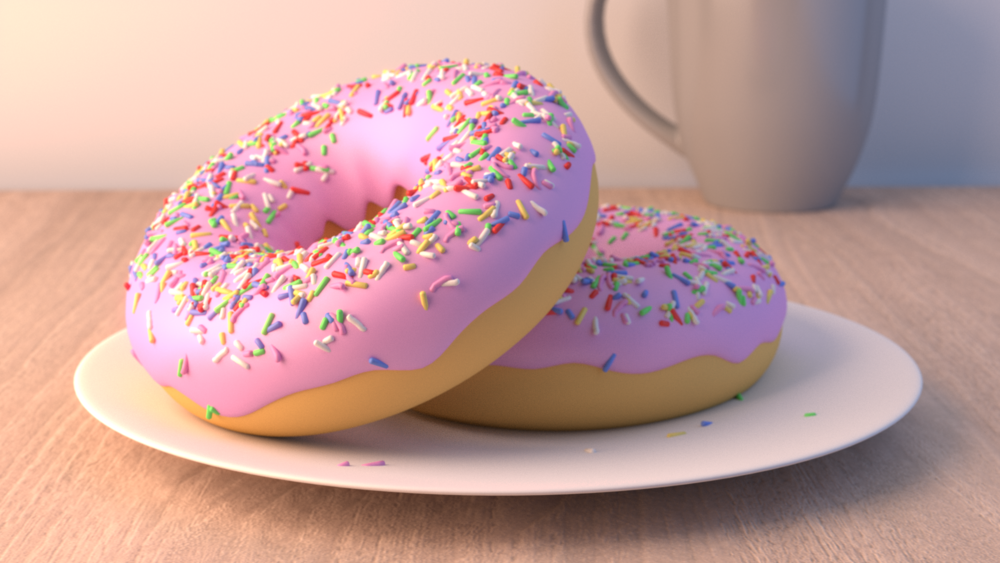
This is an image of one of Price's most popular tutorials, this is a many part series with different levels of difficulty that is incredibly well known in the Modelling community. It is known as one of the best videos to start getting into 3D modelling, it goes over all the different steps of producing a final rendered scene, Model shape, materials, lighting, camera, background and many other in between steps. there are 24 videos in total to do with every step, in depth of making a doughnut. It isn't particularly related to my theme and subject matter, however, it is probably one the best places to visit in getting started in 3D modelling.
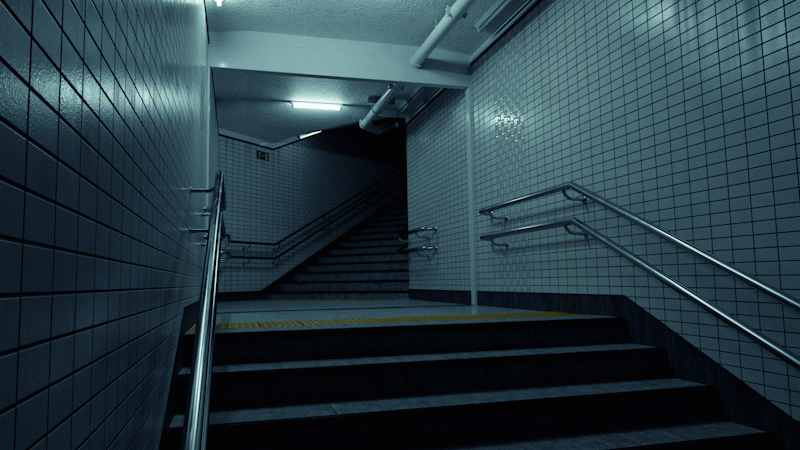

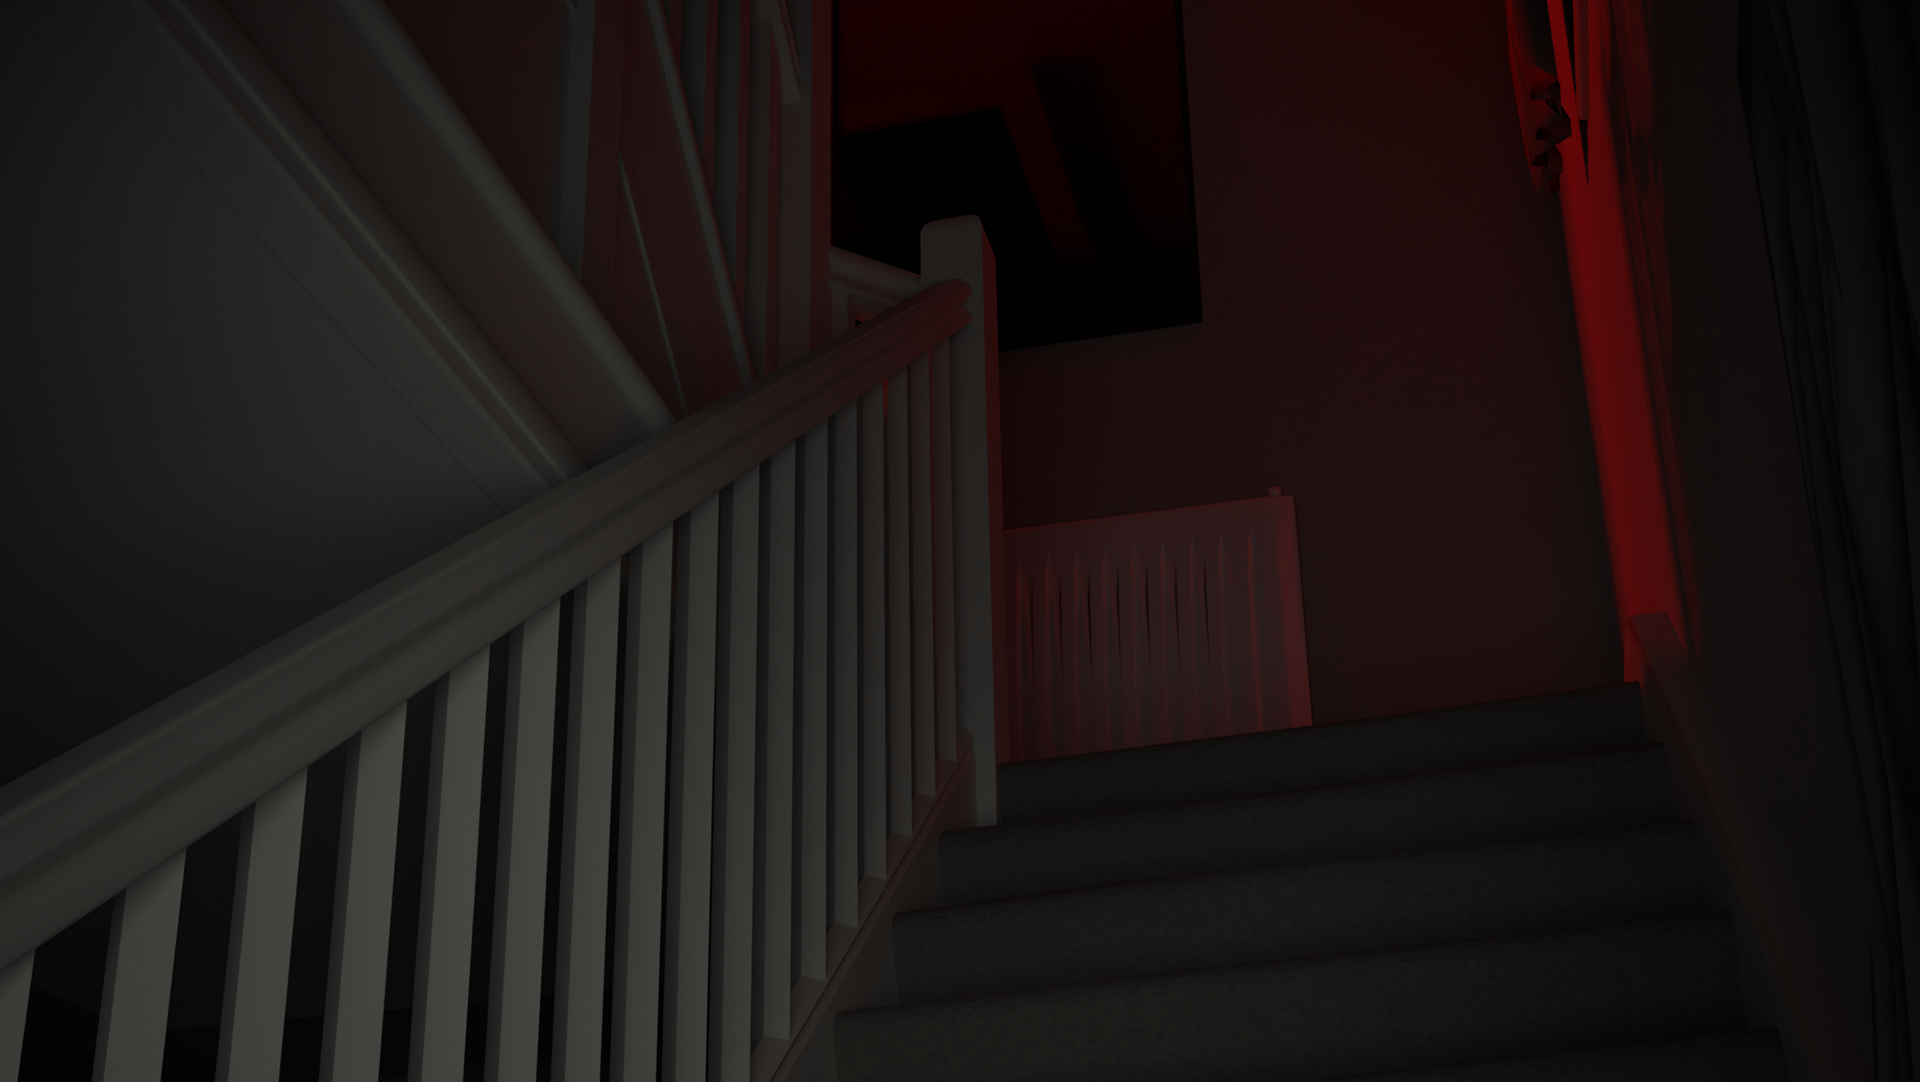
This is the piece mentioned on the previous page that I plan to use as a strong base and guide for my next piece, I will not use the same picture as him however I plan to find a photo that fits my theme very well.
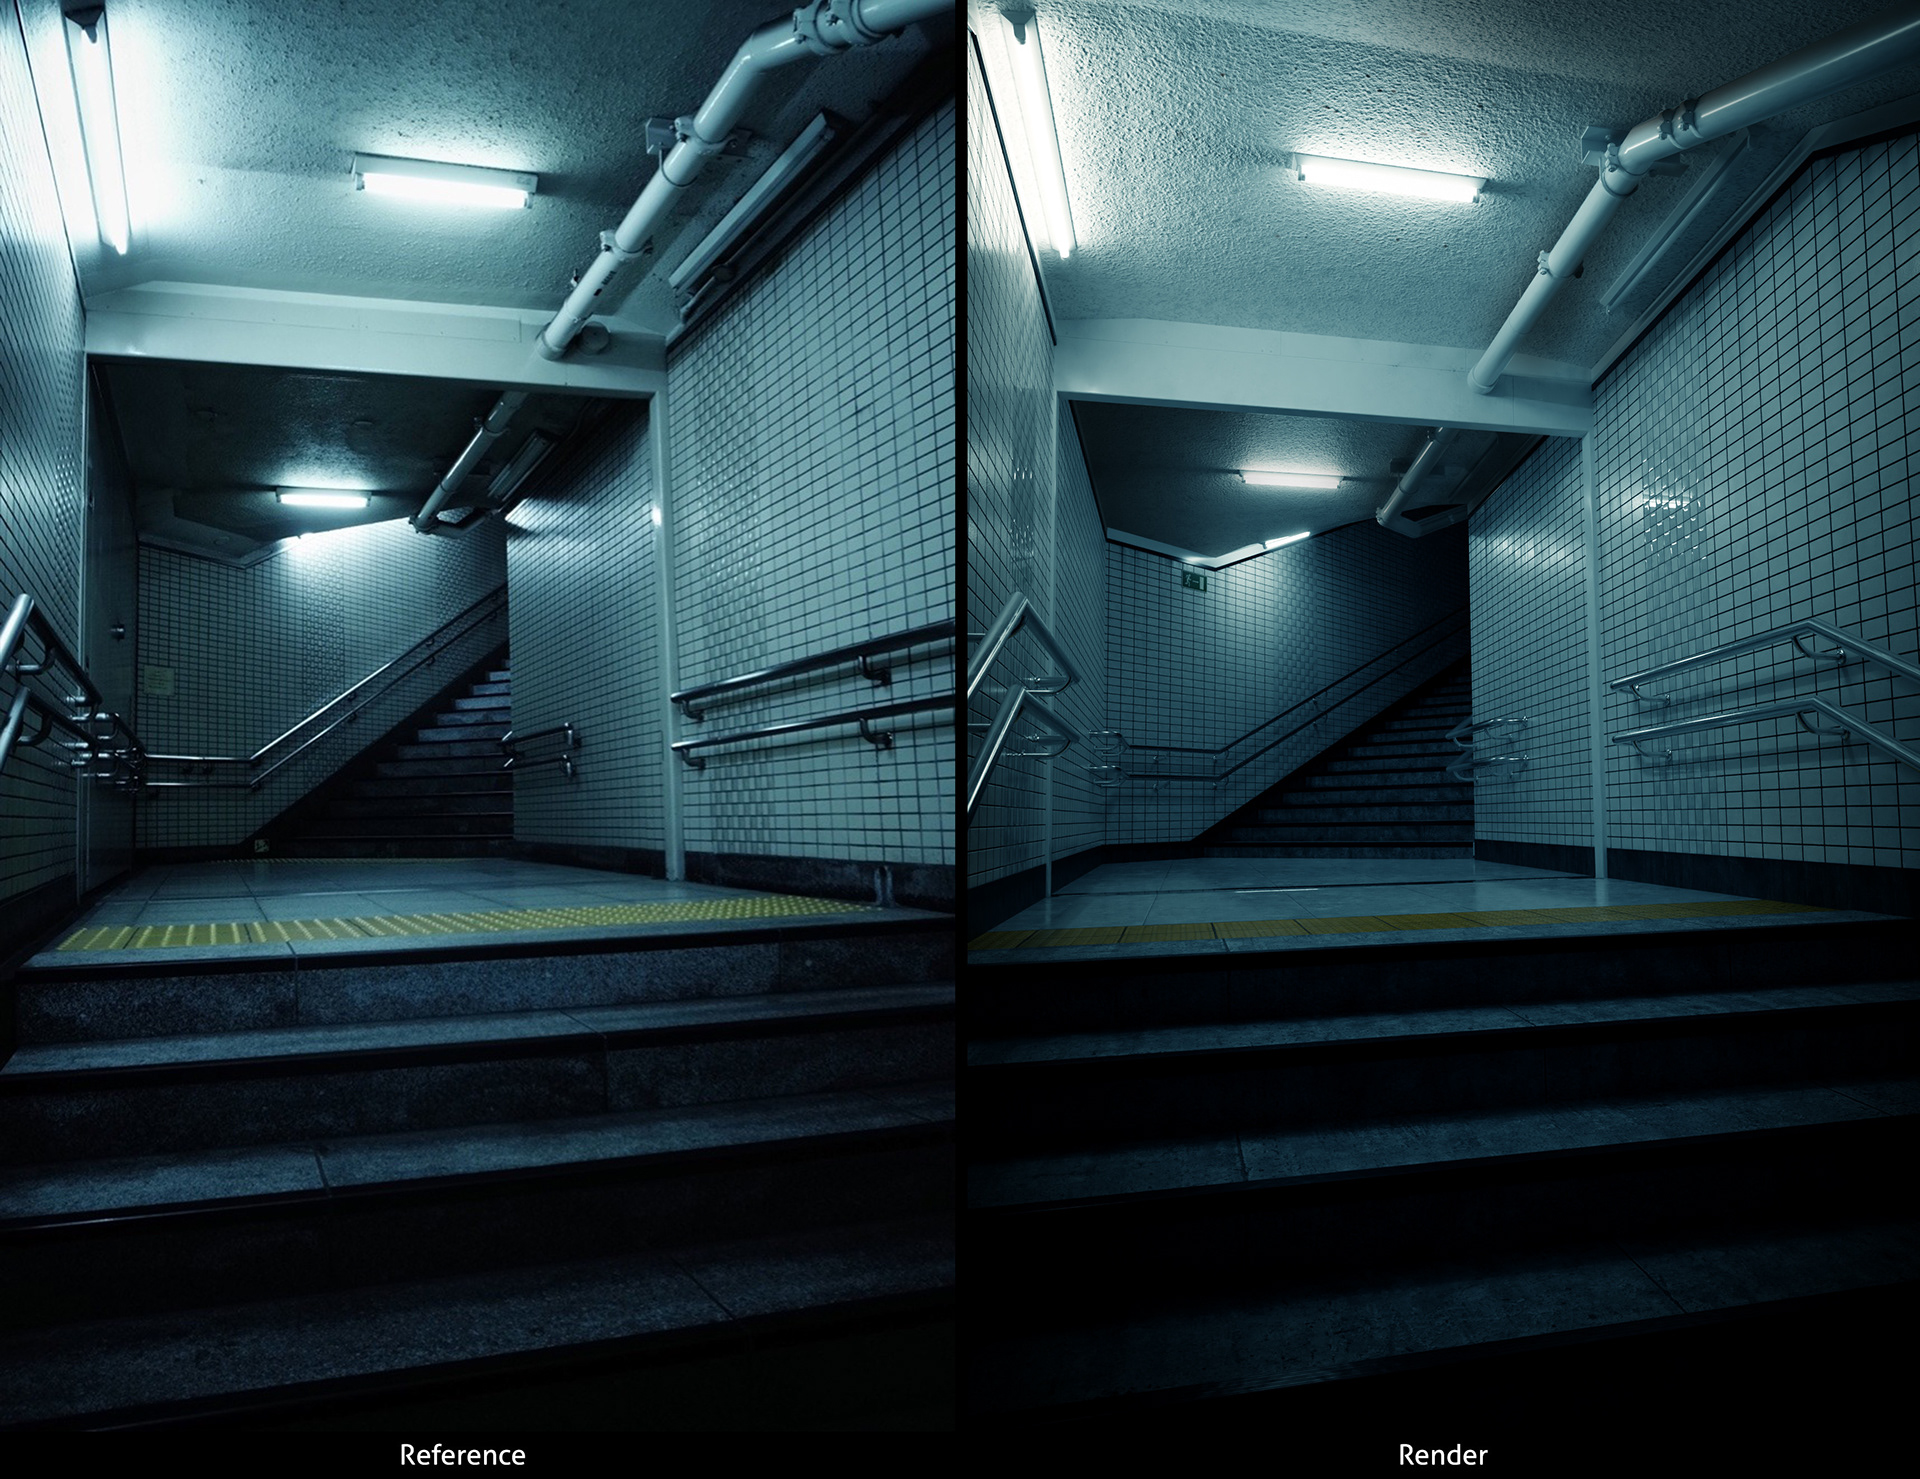
On the left you can see the final render and the simple model as seen from the viewport in the software, lighting and materials are not rendered. above is a comparison to the original image that it is based off of next to the final render, This shows the incredible skill he has to recreate the scene so accurately.
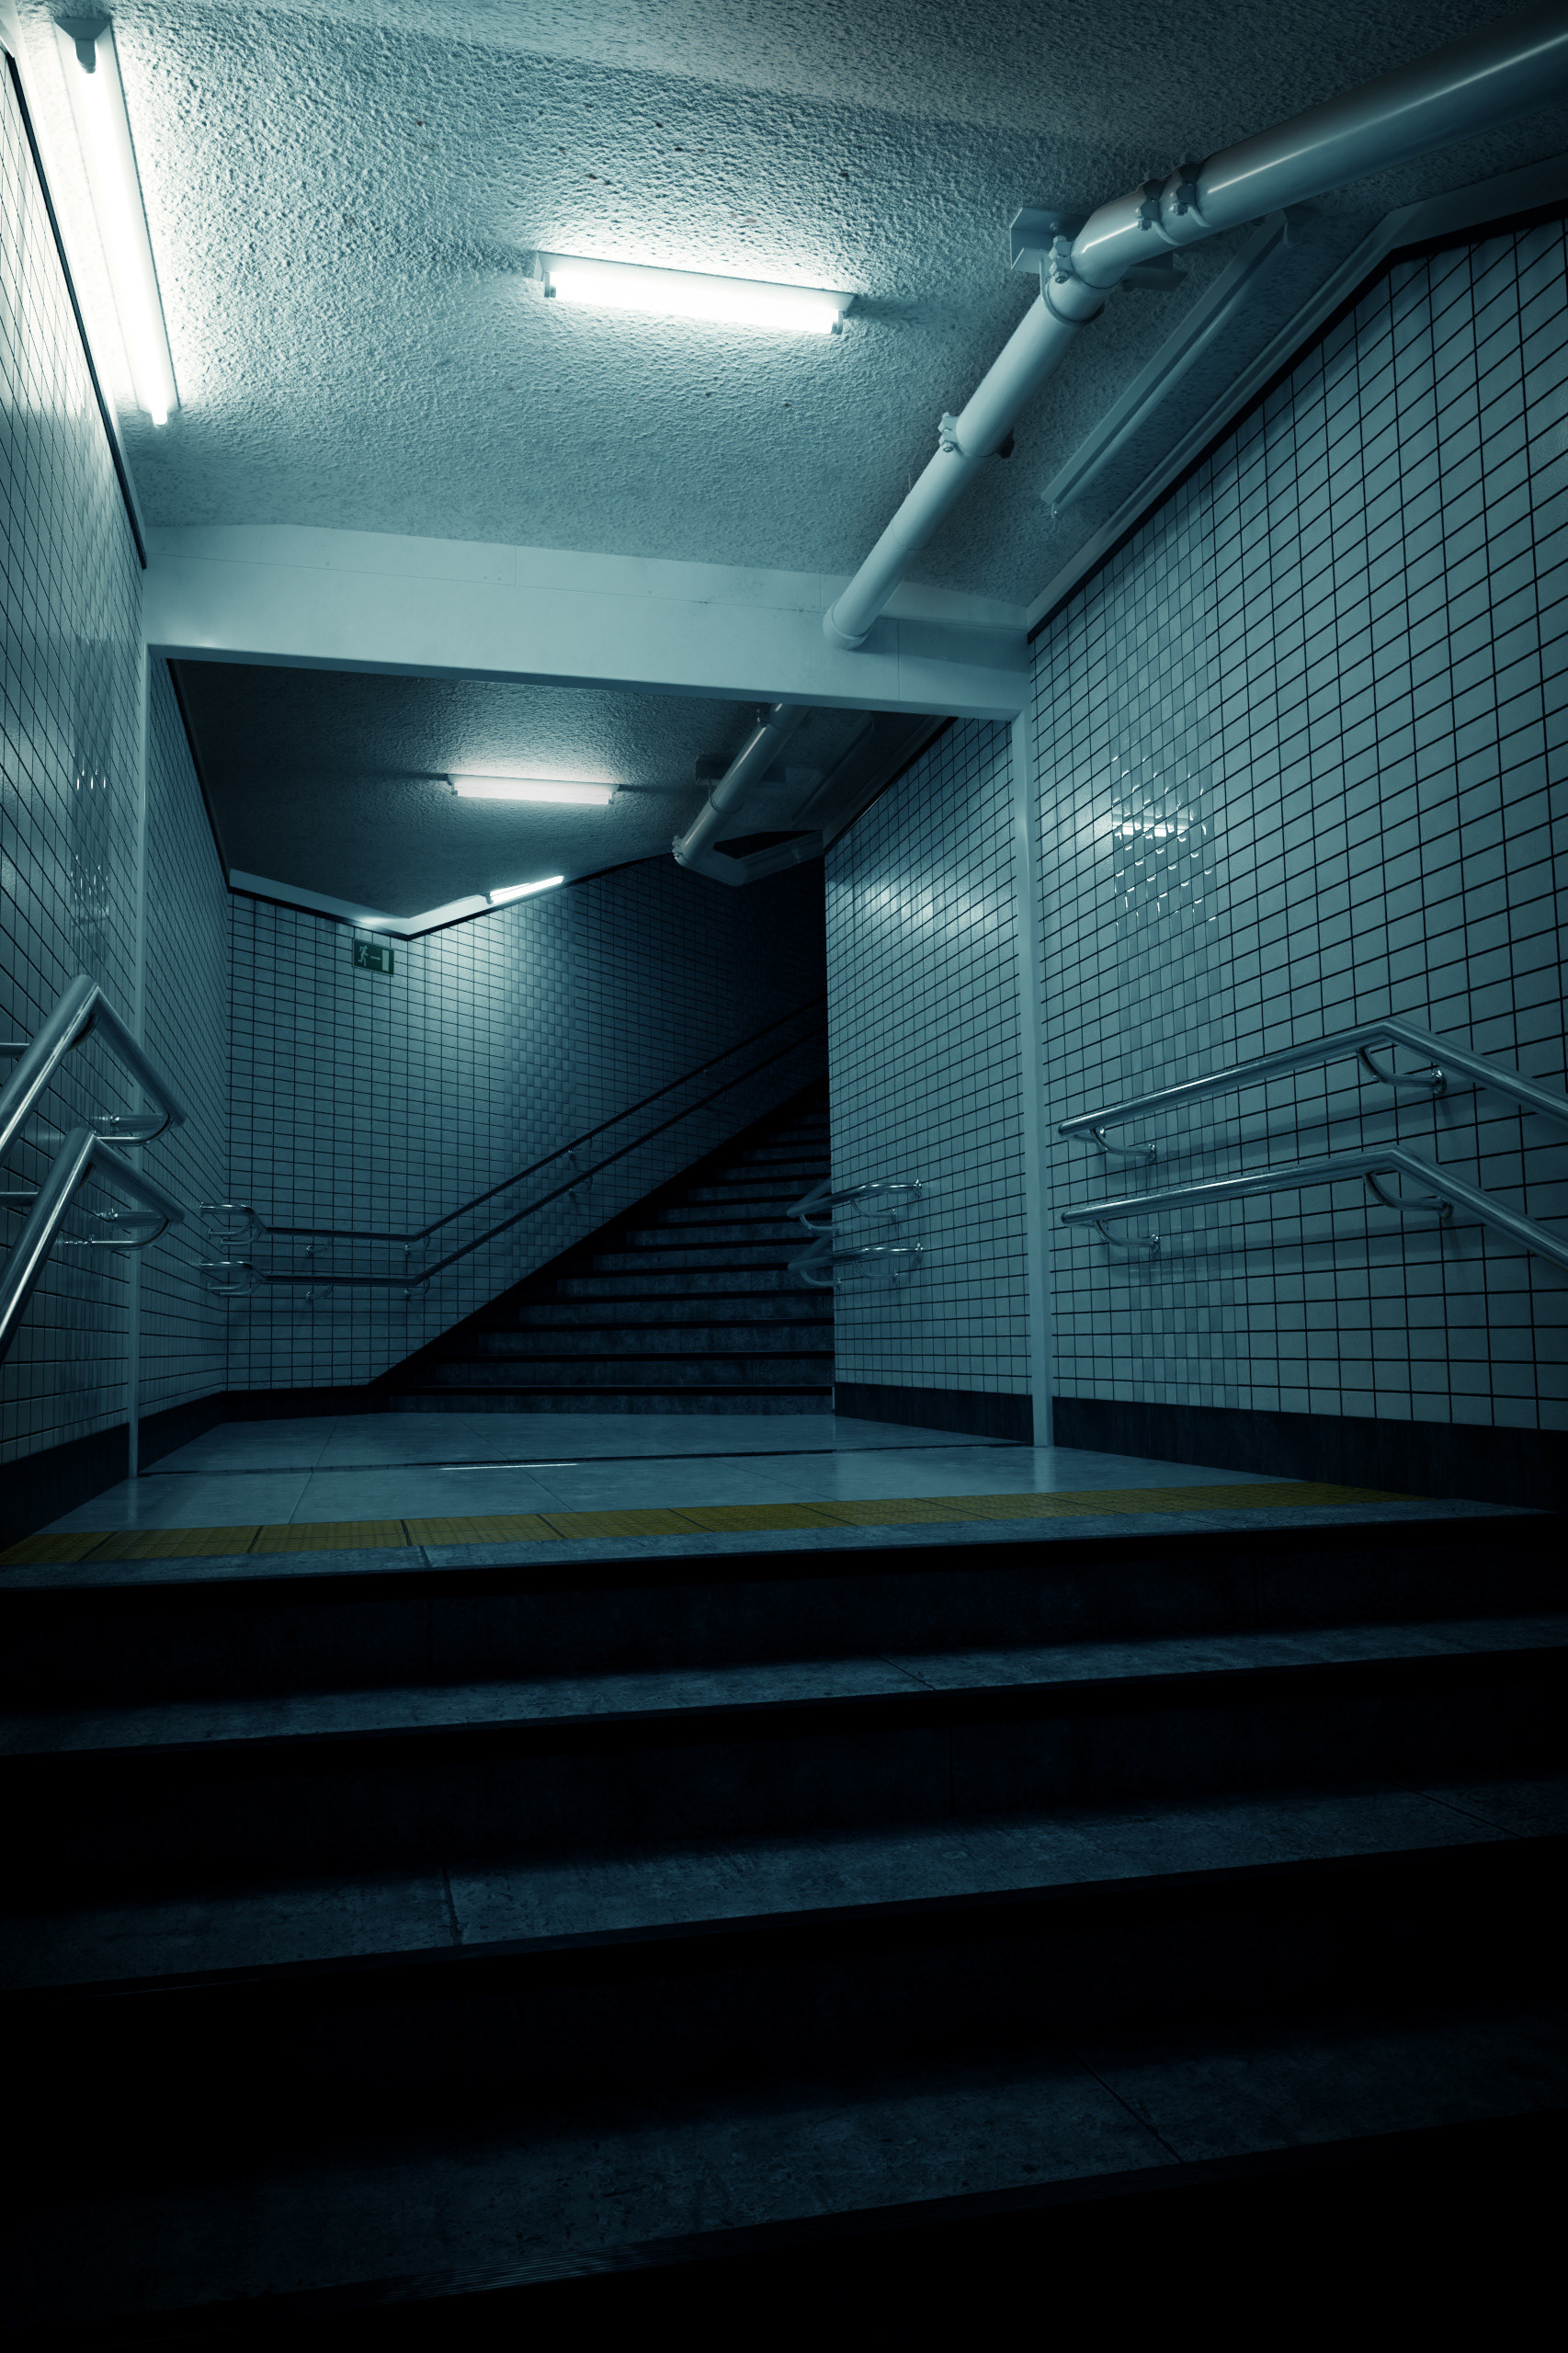
One of the main factors of this piece that I think is incredibly important and boosts the atmosphere is the anticipation and tension building of slowly getting closer to the dark hallway leading somewhere unknown. Along with the constant flashing light, the already strong sense of fear is emphasised.
One benefit of using the image he did is that it is quite a square hallway, and while the quality is astounding it is helpful to have an easy shape to base everything on. But the modelling itself is not what is incredibly strong in this piece, the strongest feature I'd say in his piece and all his others as well, is the materials and the small additions he puts in to them. A few of the materials he uses in this scene are from Poliigon which I have explained talking about the piece below, which in short means they will be easy to use high quality materials. Some of the others are done in a specialised, however, After the launderette piece I have gained access to but it is a learning process that I have not started yet.
Another technique with the materials that he did and something I failed to get working in my launderette scene was texture painting, using a digital paintbrush to airbrush another material on top of the other. Which helps add dirt and grime to corners and edges, which push that realism a step further.
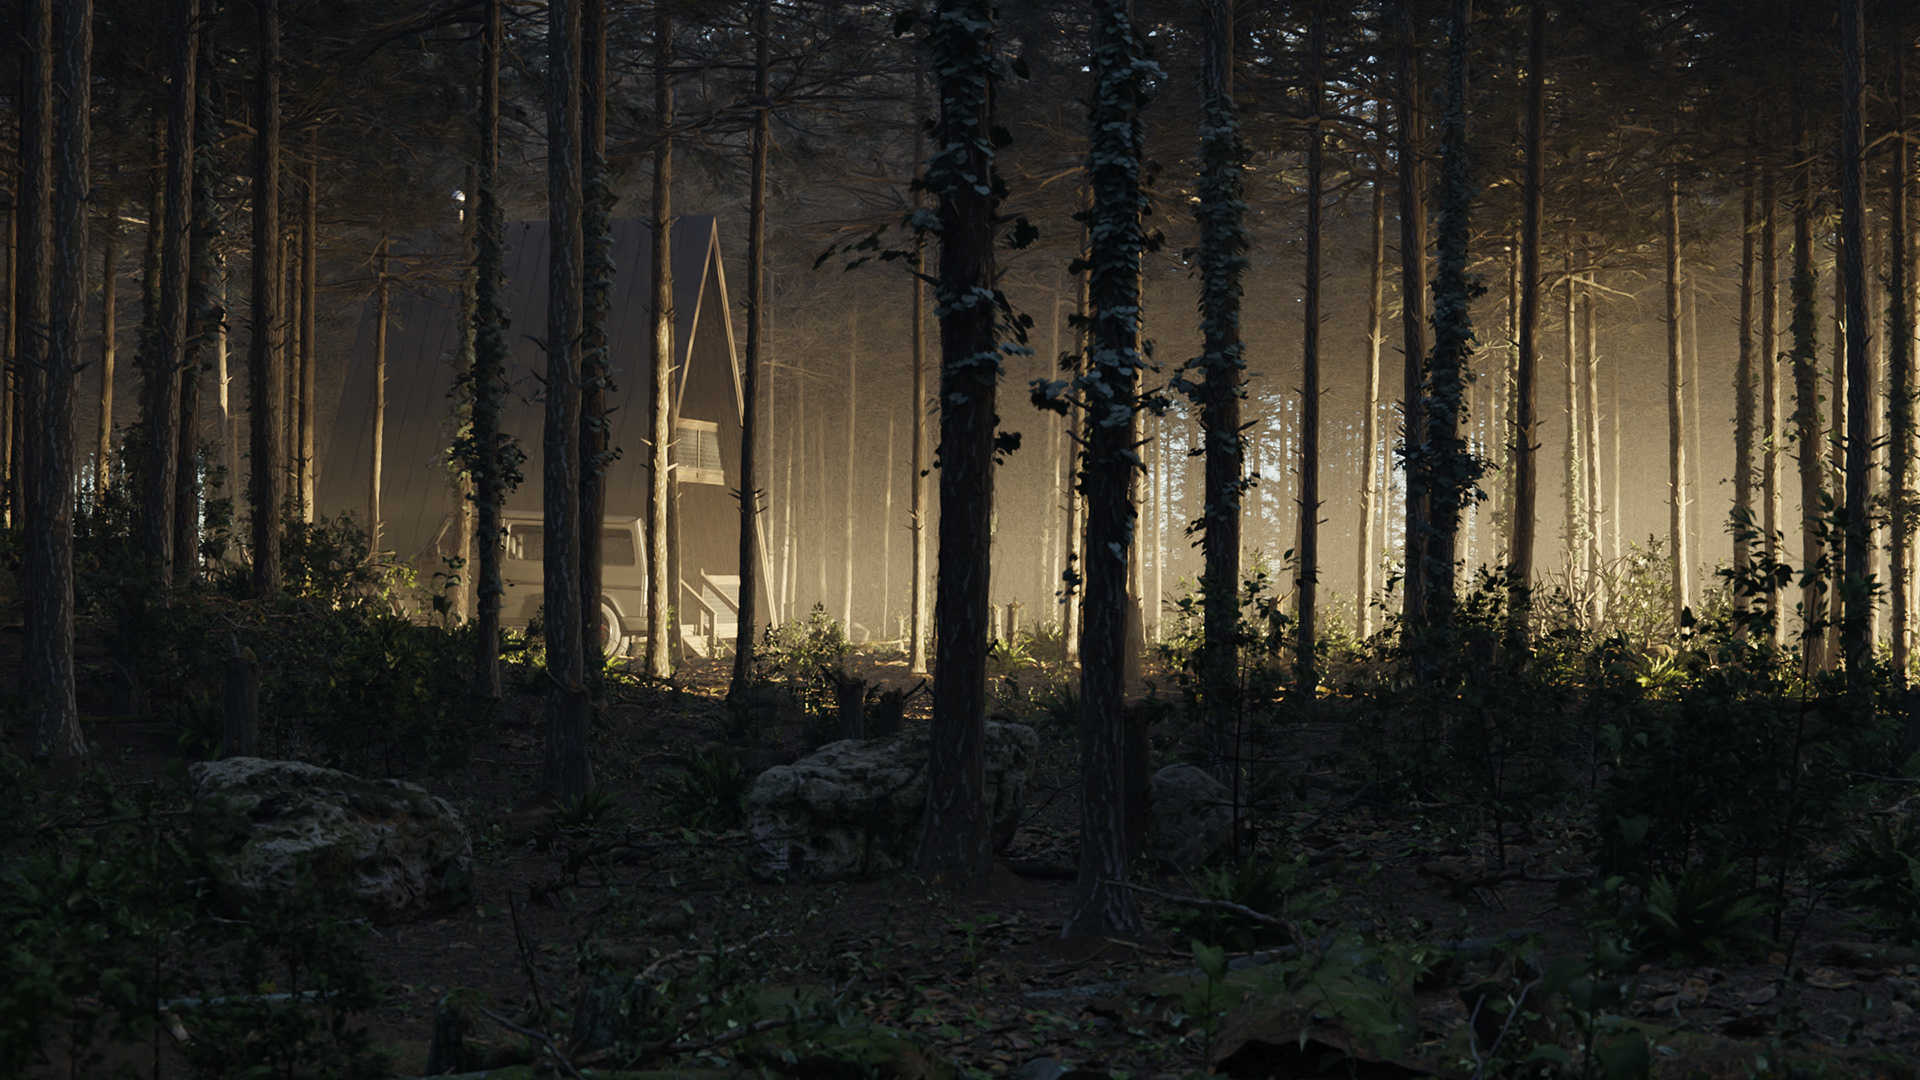
This piece is his most recent tutorial video as of writing. as you can see from the images and video above, this piece is incredibly detailed and overall an amazing piece, this tutorial had not come out as of making the launderette scene however I would like to talk about it as the quality is amazing.
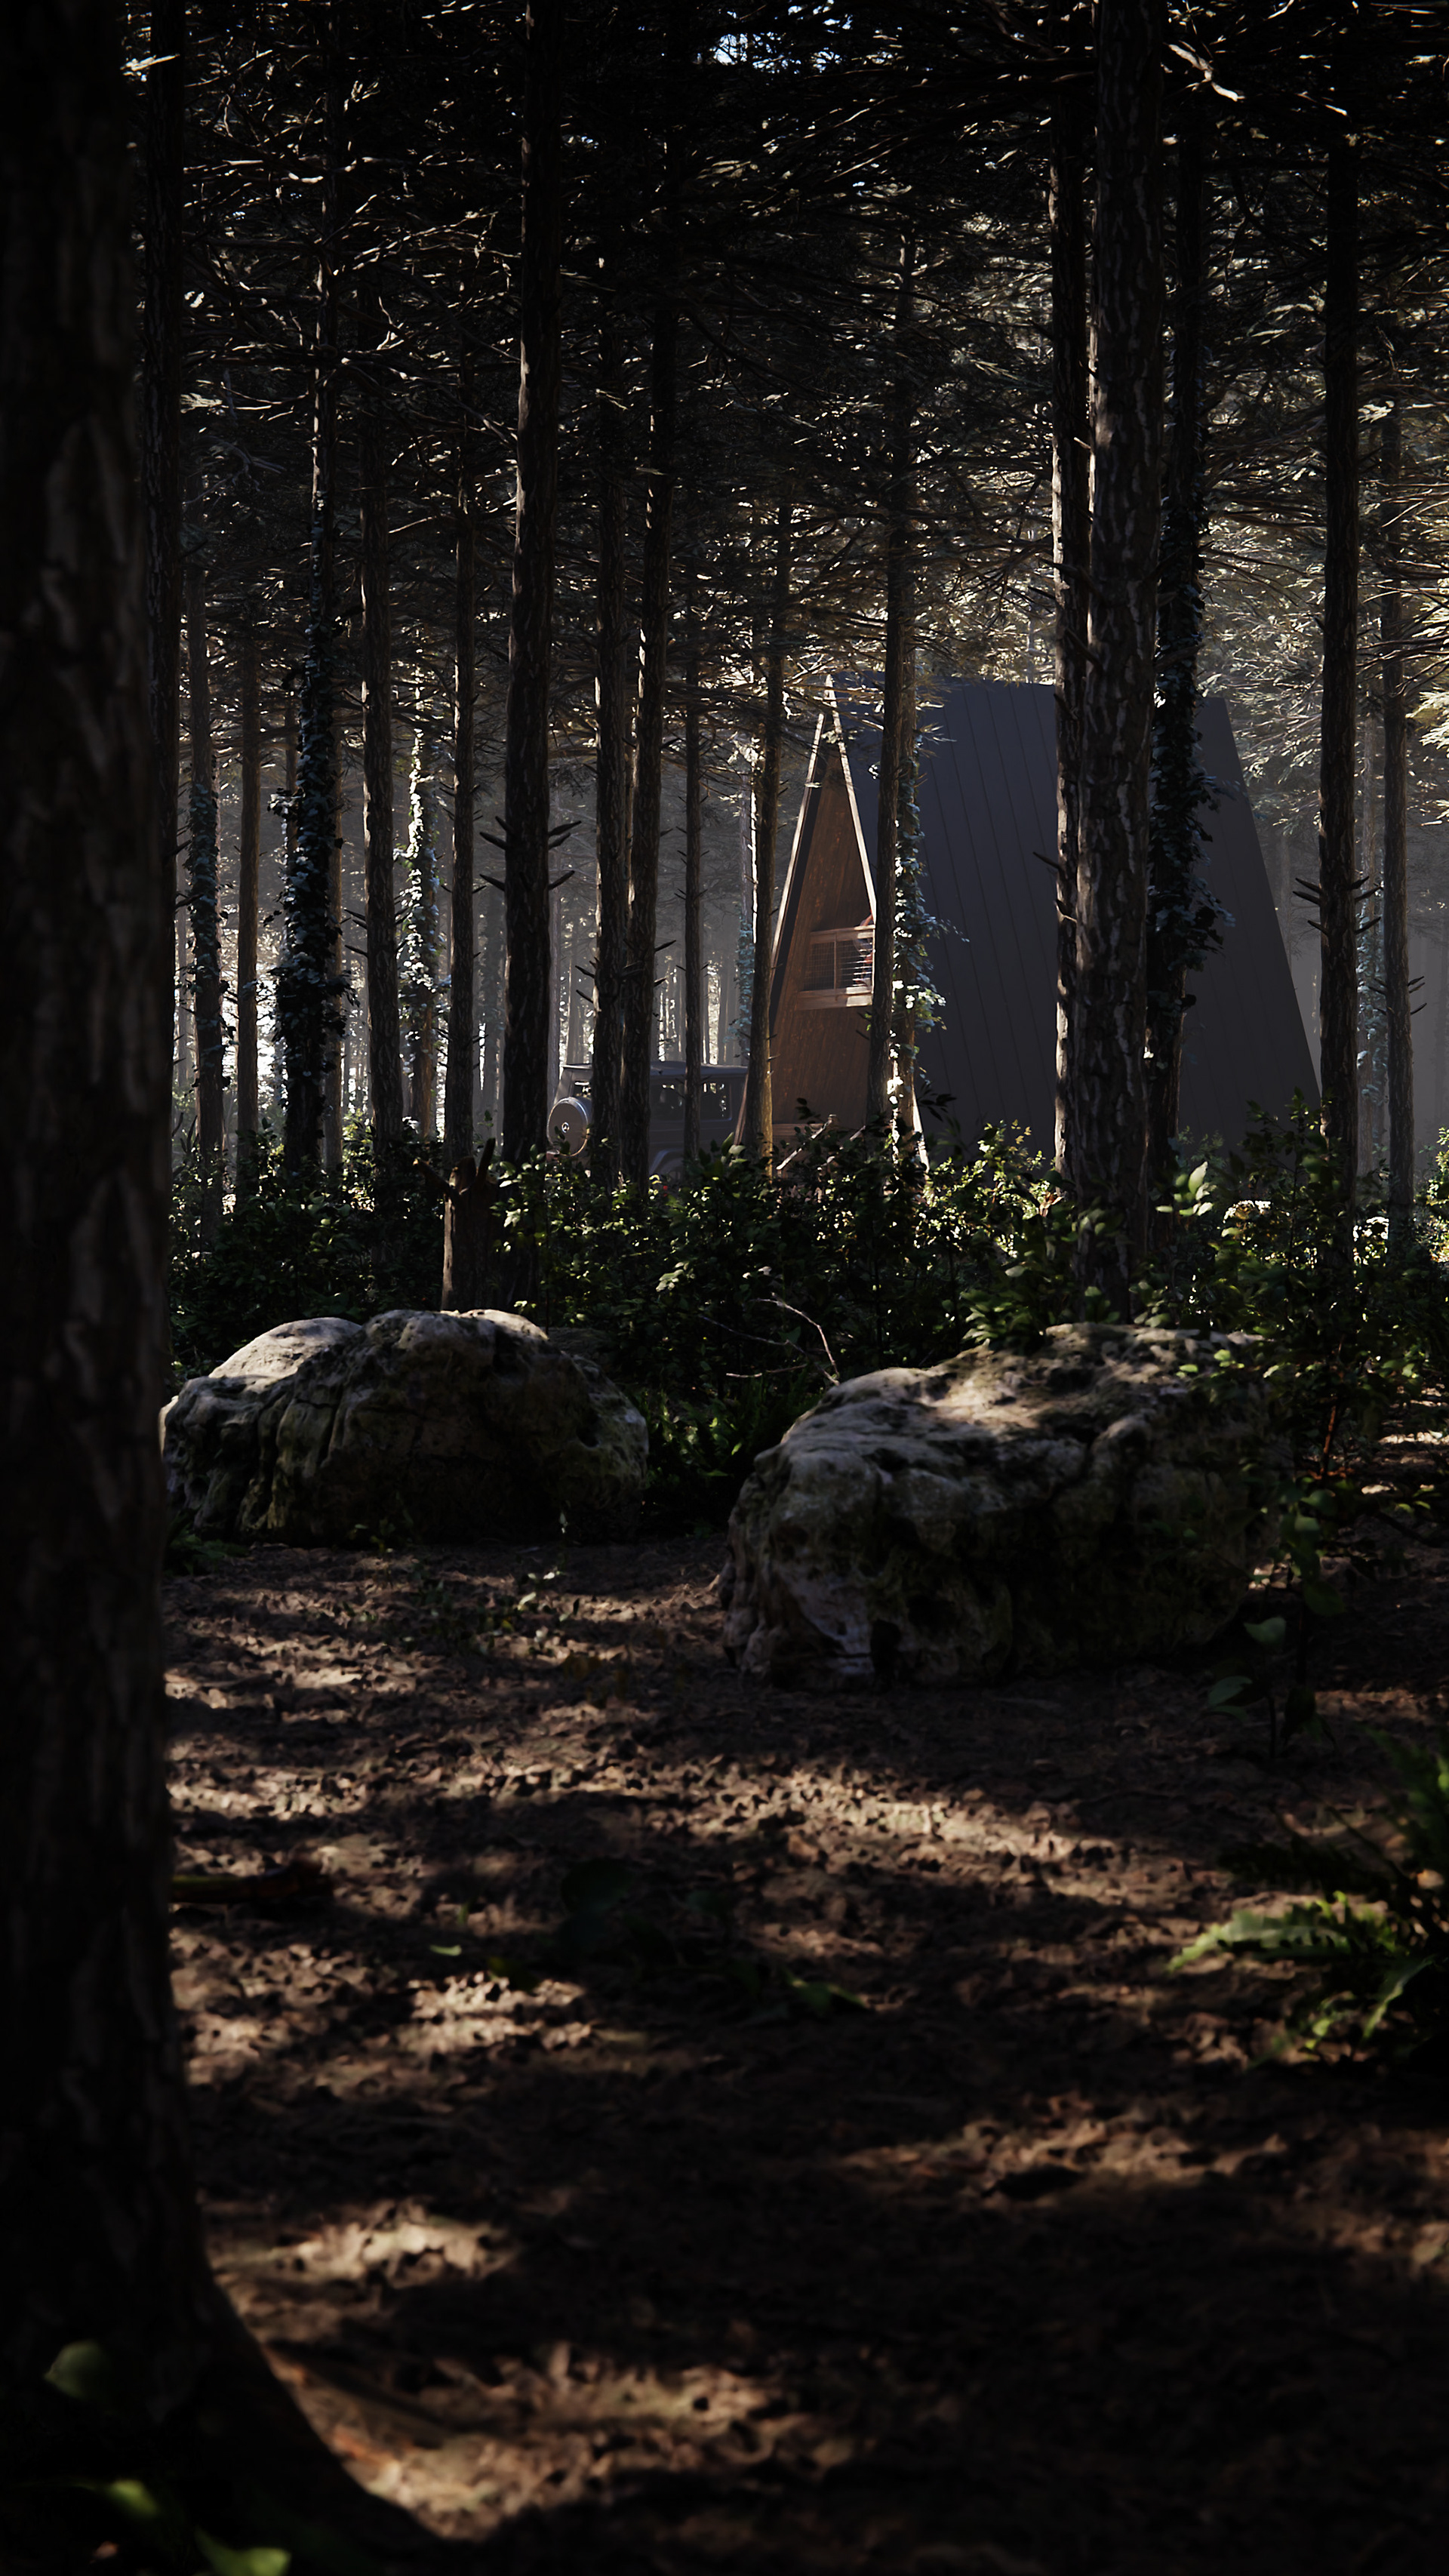
This does not necessarily have a sense of fear however its realism and location are incredibly inspirational to something that I could create, transforming it into a scary scene through the use of an incredibly realistic model.
This quality is something I strive for, however one thing I believe should be mentioned is something called Poliigon. Poliigon is a 3D model materials website that has hundreds if not thousands of materials of very high quality (much better than Blender kit that I mention on the launderette page) it is something that I would love to have access to however, It is quite expensive and not something that I believe is worth the cost for the few projects I am doing. Poliigon was set up by Andrew Price and so he often uses it for all of his projects. He has increased the popularity of 3D modelling and ease of access for those that just want to try it as a hobby and it has allowed him to set up this huge library of materials.
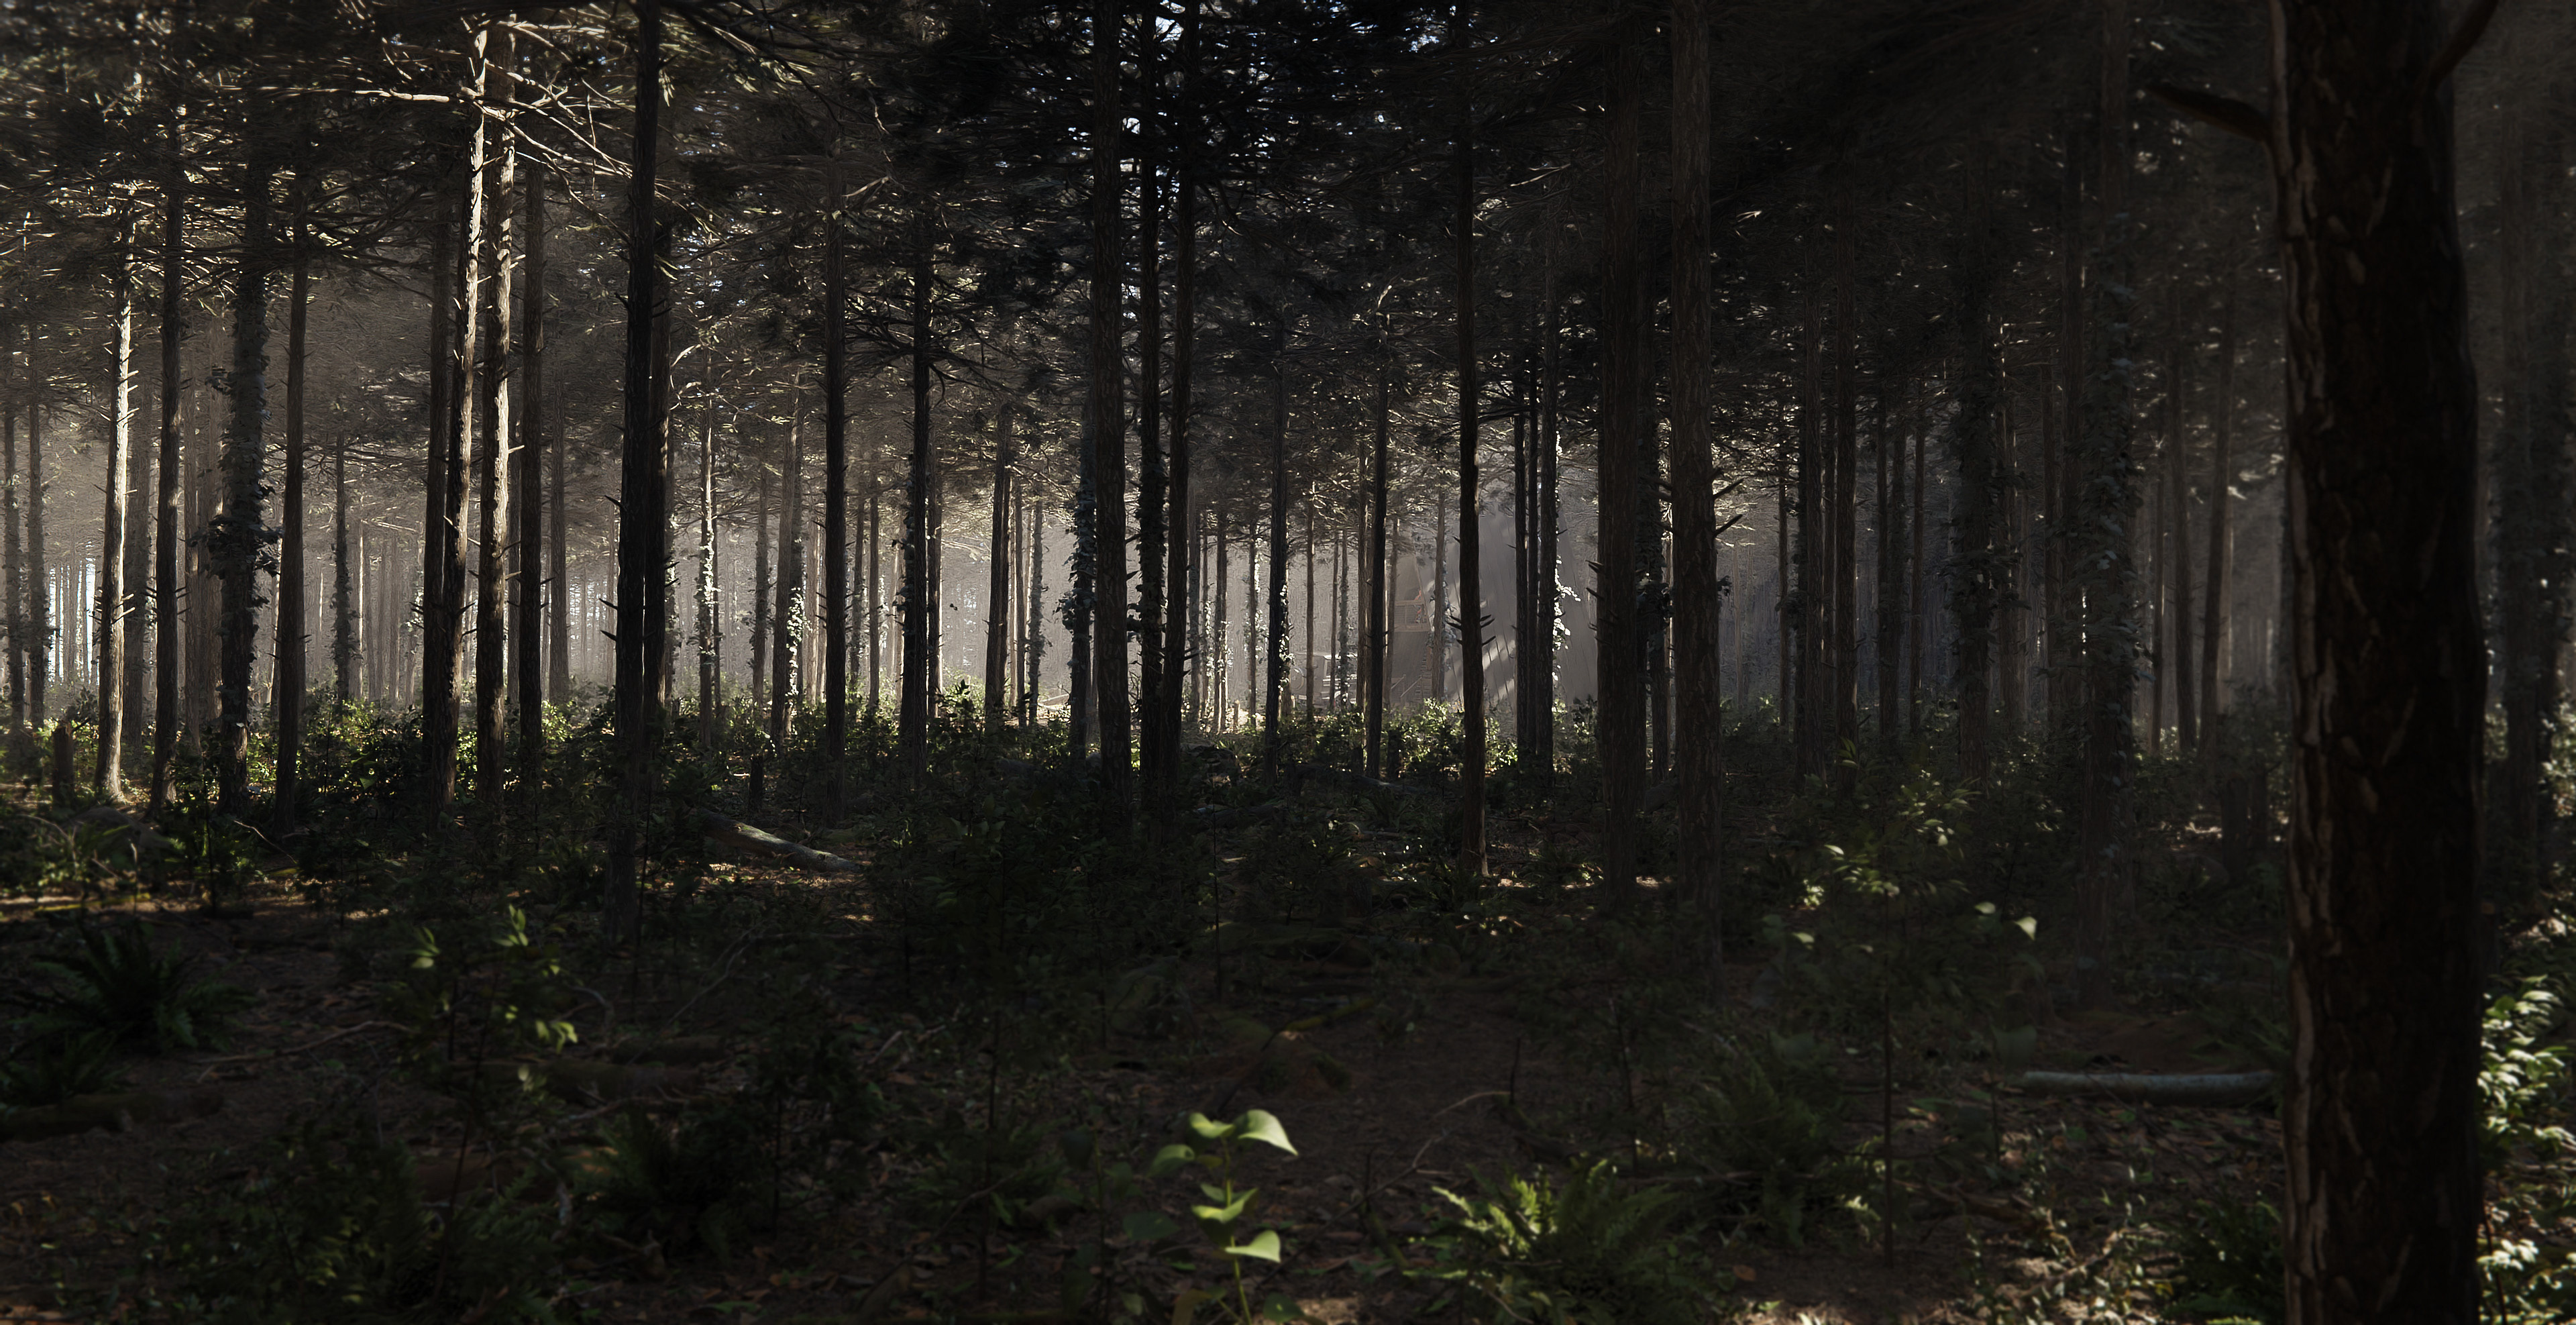
In this piece he created a large scene on a plane, adding all the trees and rocks with particle systems (using one model and placing multiple times at points on the plane). He then set up many different cameras, as can be seen in the images.
As said on his Art station page where he talks about this he says that this piece took 2-3 weeks full time work along with the tutorial taking 30 hours to record and edit, showing that these pieces take incredibly long amount of times to create something this high quality.
The button below will take you to his artstation page where you can view some of his works and tutorials, quite a few are many years old now though.